Photography: My Shot – Reflections on Dinner

I have always been interested in lighting, shadows and reflections. Most of us have probably looked at reflections of ourselves in a glass ball, a jar or perhaps a glass doorknob and became interested, if not fascinated, about the distorted representation of ourselves.

I recently returned to a restaurant we like which has a great view of the Phoenix, AZ valley. As a matter of fact, the restaurant is called Different Pointe of View. It is part of the Pointe Hilton Tapatio Cliffs complex in the Moon Valley section of Phoenix. The hotel and restaurant sit on a mountain top.

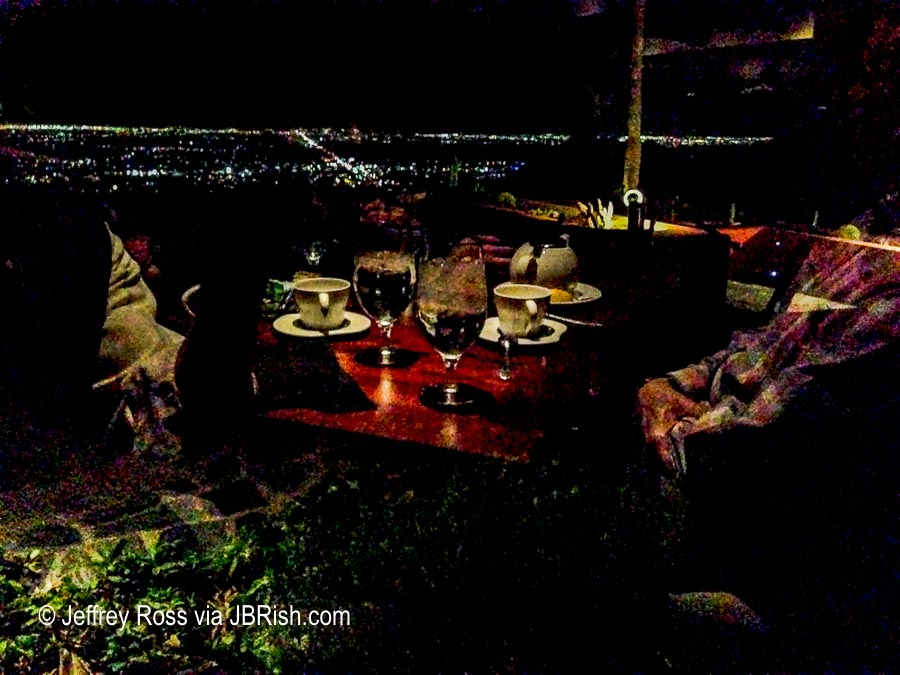
While we were dinning, the sun set and as I looked at the view of the valley in the large glass windows, not only could I see the city lights, I could see the reflection of our dinner table and it was mesmerizing.


Reflections of Dinner at a Different Point of View
“Reflections of Dinner at a Different Point of View”

The coffee cups and teapot are very discernable as are the two frontmost glases of water. What makes the photo most interesting to me is the reflection of the two people in the foreground combined with a view of the distant city lights. When I consider this was taken with my iPhone, I am pleased with the abstract result.


**********

Metadata

File Name: reflections_on_dinner_1431.JPG
Capture time: 8:38:34 PM
Capture date: march 17, 2018
Exposure: 1/15 sec @ f/2.4
Focal Length: 4.12mm
ISO: 3200
Camera: iPhone 5
Lens: 4.12mm f/2.4

Edited in Lightroom

**********

Read more photography posts HERE


**********


All original content on this blog is copyrighted by Jeffrey B. Ross with ALL Rights Reserved. While reference links back to JBRish.com are appreciated and encouraged, please acquire approval for any reproduction of original content from this website.

©Jeffrey B. Ross – 2018 – JBRish.com


Photography: Videos – Landscape Hints and Ideas

There are many, many videos on the Internet related to almost every aspect of photography ranging from the technical to the artistic and abstract and everything in between. One field of photography in which I have a strong interest is landscape photography and hobbyists can spend days on end watching nothing but videos about landscape photography.

I have seen dozens over the years and I want to highlight the two resources below because I feel they are especially well done and they have worthy ideas that may be new for many.

My TOP 5 best TIPS for composition in Landscape Photography
by Mads Peter Iversen

Mads Peter Iversen offers his most important tips for successful landscape photography. What I liked about this 16:35 video is that Mads not only offers his ideas, but then he demonstrates what he wishes to convey by showing examples. This makes it immensely useful!

Here are his five areas of concentration in the video below:

  • Focal point
  • Leading lines
  • Brightness, contrast and faces
  • Balance
  • Elements within the frame and the need for “breathing room”

Simple IDEAS for CREATIVE outdoor photography
by Nigel Danson

From the YouTube page:

The possibilities in photography are endless. Landscape photography is no different. Whatever the light or location you can get great images. In this video I talk a bit more about getting creative with out of focus elements and intentional camera movement ICM. And preview the ICELAND series coming soon….

See more photography posts HERE and visit Jeff’s Instagram site HERE showcasing a number of landscape photographs.


**********


All original content on this blog is copyrighted by Jeffrey B. Ross with ALL Rights Reserved. While reference links back to JBRish.com are appreciated and encouraged, please acquire approval for any reproduction of original content from this website.

©Jeffrey B. Ross – 2018 – JBRish.com


Photography: Why Use Post Processing Software?

Although I had been interested in photography as far back as my teenage years, after my thirties and a number of life changes, photography took a back seat to my other interests and obligations of life.

I had used professional gear in my twenties and early thirties, but for many years after, I used a point-and-shoot digital camera with between 5 and 8 megapixels. (As a frame of reference, today’s standards would probably call for a minimum of 16 or 24 megapixels for professional use.) My Canon AS590 IS provided a no muss, no fuss regimen for me and I was comfortable just capturing ptographs as a matter of record.

Of course as time passed, post processing software improved and I became interested in revisiting some of my older photographs and trying to “process” them to bring out the colors and beauty that encouraged me to take the photographs in the first place.

When pondering the question, “Why use post processing software,” let me offer the following.

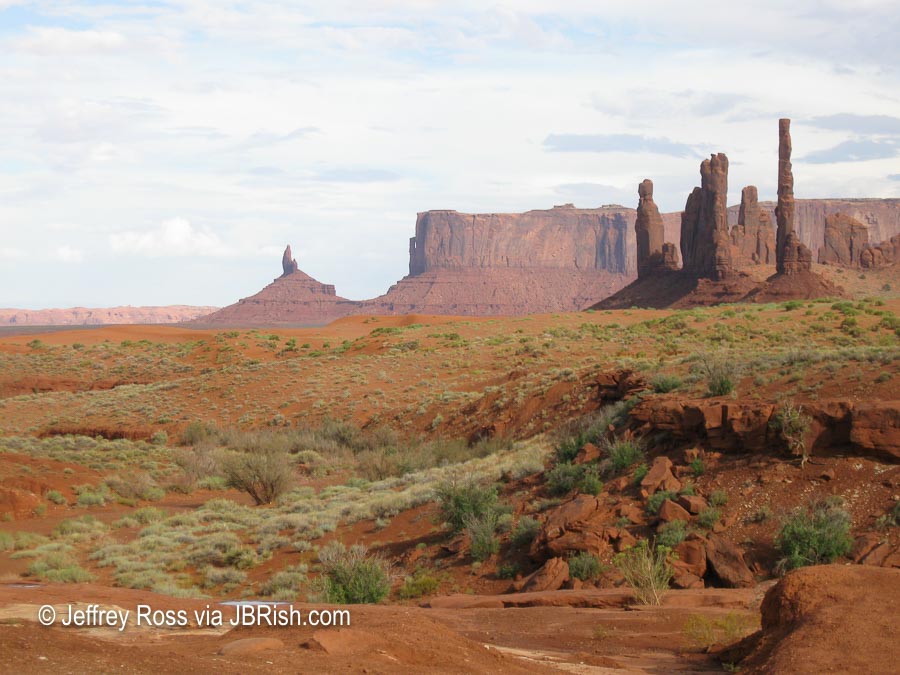
My wife and I enjoy hiking and exploring as readers of JBRish.com know. In 2012, we visited Monument Valley, UT. Sure enough, I had my Canon PowerShot AS590 with 8 megapixels. It took very nice jpeg photographs. Unfortunately, however, the settings and ability of the small sensor was limiting.

Look at this picture for example:


Original picture of the Yei Bi Chei Spires and the Totem Pole

The above is a composition in which I was very interested, but the bright sky and haze did not enable the camera to represent the scene as I envisioned it. The camera did the best it could capturing the scene, but the equipment didn’t render the red rocks and sand as I saw it. The green and yellow grasses played well against the red rocks, but you wouldn’t know it by looking at the photo above.

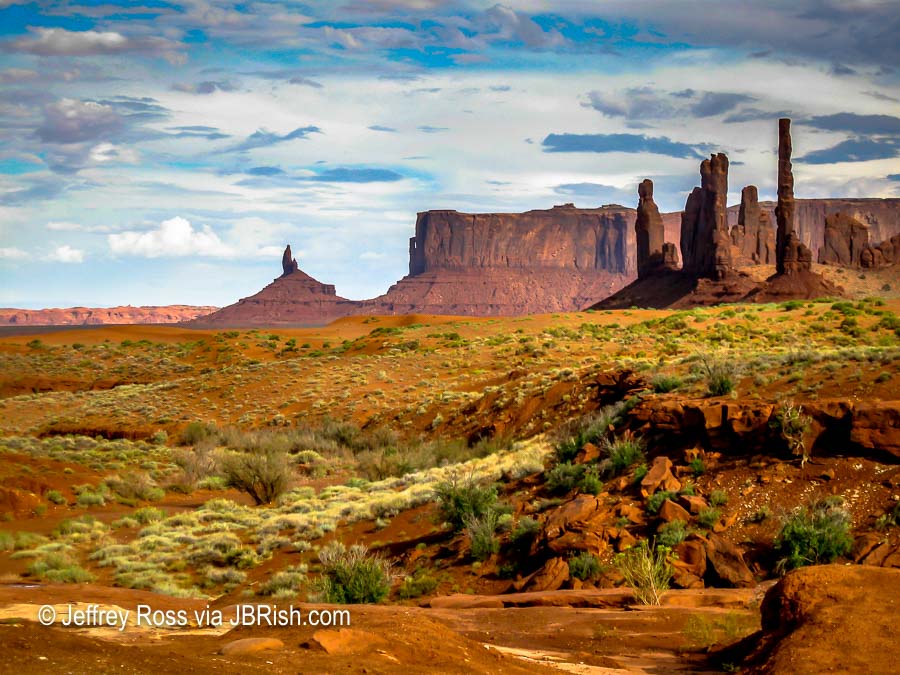
This shot remained dormant on my hard drive for years and then I began to learn about Adobe Lightroom. Once I understood the basics, I realized I could recapture some of the colors and nuances of the shot that inspired me to take the photograph in the first place.

Once processed, the scene is rendered more as I saw it that afternoon.


Processed picture of the Yei Bi Chei Spires and the Totem Pole

Keep in mind that this camera has a very small sensor and by today’s standard is probably equivalent to a smartphone or perhaps less than that. When looking at the picture, understand that the camera did capture information such as which areas are brown, red, green, blue, light, dark, etc. It took the software to help me bring out the colors and contrast nearer to as I recalled them when I stopped to press the shutter. Some of the detail is lost in the transition and the picture is more painterly than I would prefer, but it is certainly closer to my recollection than the original the camera recorded.

This is why post processing software and learning how to use it properly is so popular!

*********

Metadata

File Name: 8871_yei_bi_chei_spires_totempole.JPG
Capture time: Sept. 10, 2012
Exposure: 1/400 sec @ f/4.5
Focal Length: 16mm
ISO: 80
Camera: Canon PowerShot AS590 IS
Lens: 4.3-215mm

Edited in Lightroom

**********

See more JBRish.com photography posts HERE and visit Jeff’s Instagram site HERE


**********


All original content on this blog is copyrighted by Jeffrey B. Ross with ALL Rights Reserved. While reference links back to JBRish.com are appreciated and encouraged, please acquire approval for any reproduction of original content from this website.

©Jeffrey B. Ross – 2018 – JBRish.com


Photography: My Shot – Larnach Castle Garden, Dunedin, NZ


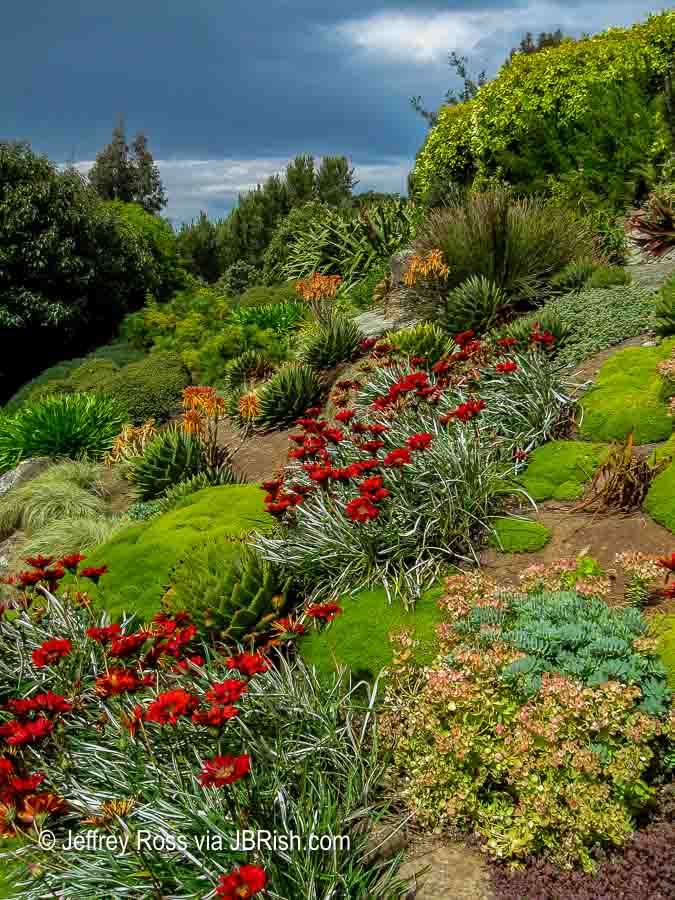
When we visited New Zealand in 2009, the only camera I took with me was a very small point-and-shoot Canon AS590 IS, which at that time was considered fairly good for its class. Even with this small-ish 8 megapixel count, I was able to capture some amazing pictures.

The photograph below was taken at Larnach Castle in Dunedin, New Zealand. The sky was overcast and the colors were vibrant in themselves. This photo was edited a bit in Lightroom, but trust me when I say that this was a striking picture before the editing process.

I encourage everyone to record their adventures as large or small as they may be with whatever camera or smart phone they have with them. The images will be a treasure to review and appreciate over time.

Interestingly enough, there were a number of plants in this garden that we grow in our Sonoran Desert area.


Stormy skies over Larnach Castle Garden, Dunedin, NZ

You can find more information about the Larnach Castle & Gardens HERE

**********

Metadata

File Name: larnach_cast_grdn_)133.jpg
Capture time: Early Afternoon
Capture date: December 17, 2009
Exposure: 1/1000 5.8mm
ISO: 80
Camera: Canon PowerShot AS590 IS
Lens: 4.3-215mm

Edited in Lightroom

**********

Read more photography posts HERE


**********


All original content on this blog is copyrighted by Jeffrey B. Ross with ALL Rights Reserved. While reference links back to JBRish.com are appreciated and encouraged, please acquire approval for any reproduction of original content from this website.

©Jeffrey B. Ross – 2018 – JBRish.com


Adventures in Oregon: Newport to Yachats


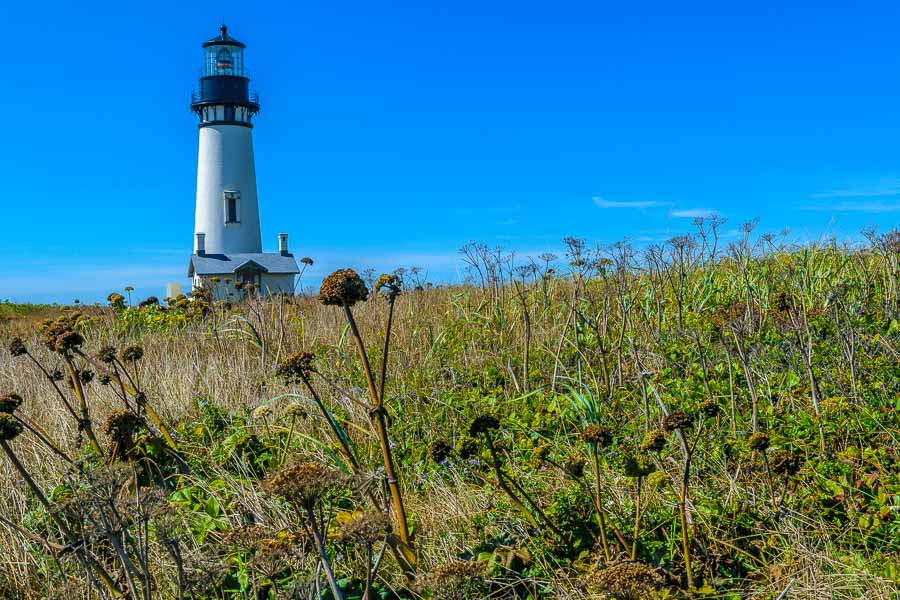
Yaquina Head Lightouhse
Yaquina Head Lighthouse ,Newport, OR

Lighthouses have often had a romantic and storied aura about them and they remain just as alluring today as they have in our nation’s past. Although numerous lighthouses are no longer in use, they still draw visitors to the edge of the oceans and nearby cliffs.


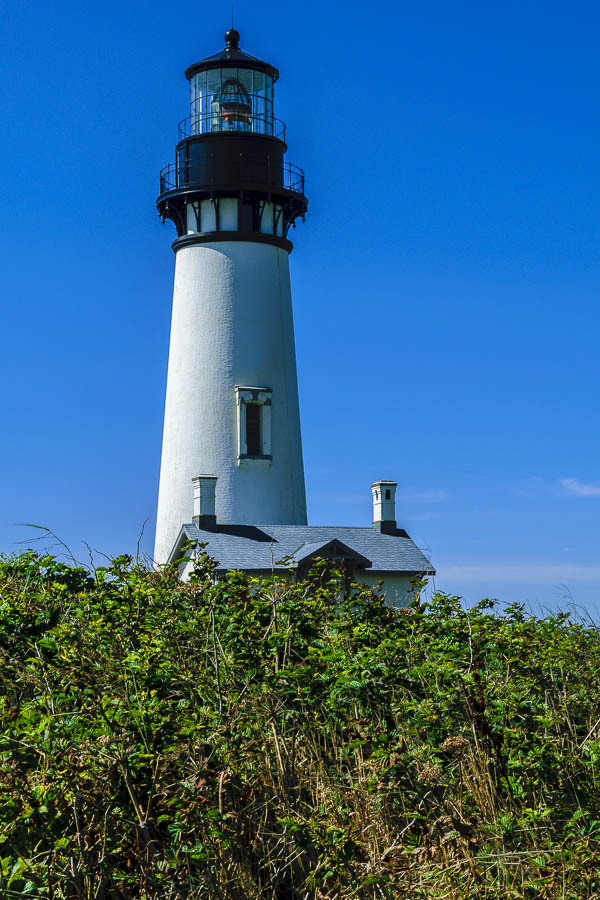
Yaquina Head Lightouhse

The Yaquina Head Lighthouse is located north of Newport, at Yaquina Head Outstanding Natural Area. If you are a photographer, plan to stop several times during the approach to the main parking lot as the views are excellent from a variety of vantage points.


Yaquina Head Lightouhse

If the day is busy, it will be a challenge to take photos without numbers of tourists in and around the lighthouse, but careful framing can keep the focus on the lighthouse itself.


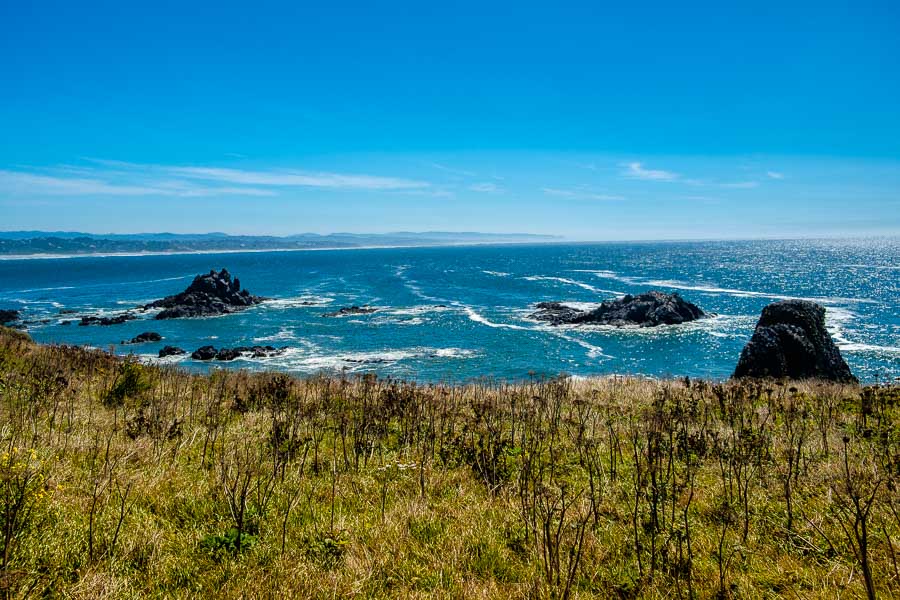
Ocean views provide their own beauty!

The lighthouse isn’t the only photo-worthy subject as the ocean cliffs and rock formations against the grassy bluffs provide another form of beauty!

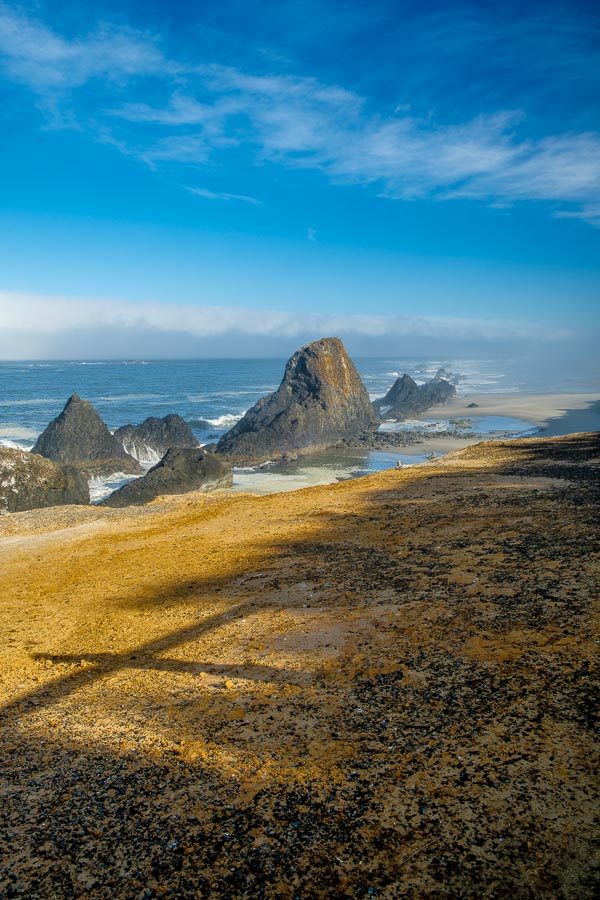
Just a short 20-plus minutes south brought us to another noted stop, Seal Rock. It was a pretty ocean front park with several magnificent rock formations. We didn’t see any seals this day, but the sunlight was most welcome.


Seal Rock - Sunrise
Seal Rock Recreation Site with the morning sun breaking through


Sunrise at Seal Rock

While the seals were not present this morning…


Sunrise at Seal Rock

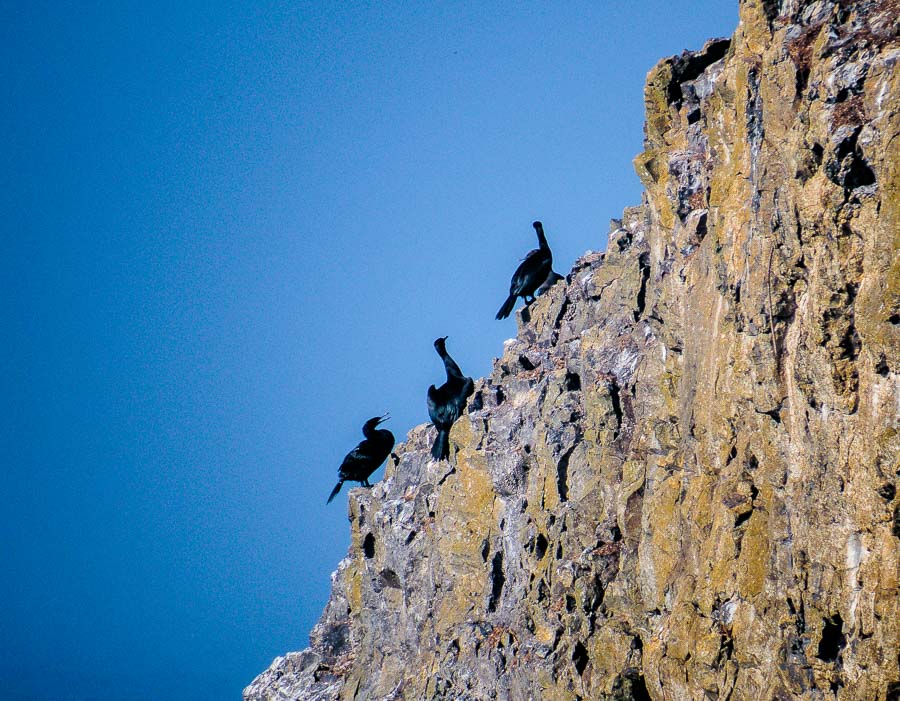
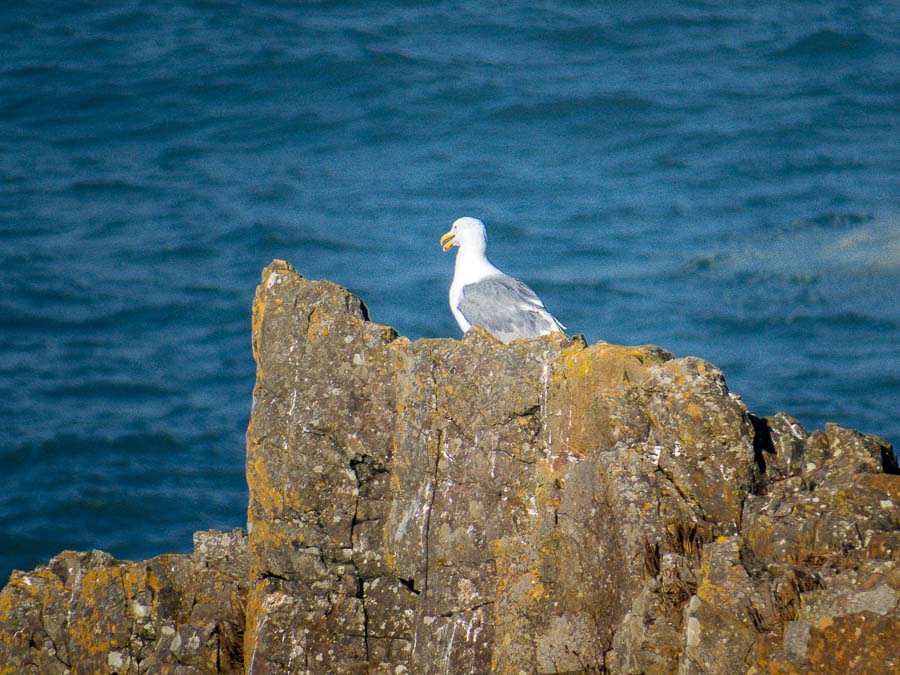
the Cormorants and Seagulls were enjoying the warmth of the sun!


Sunrise at Seal Rock

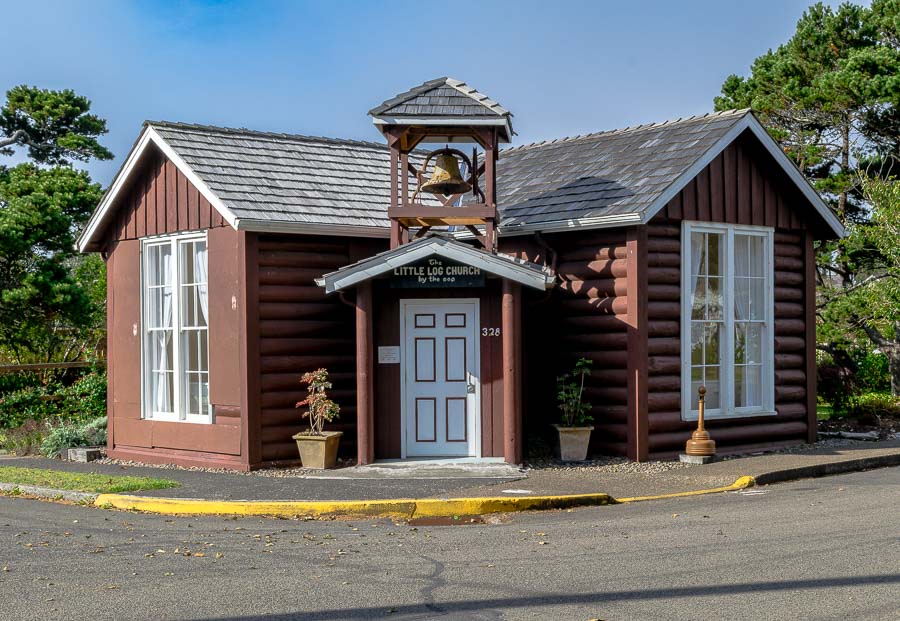
I enjoy unique and different buildings and Yachats had a historic church that was hewn from local timbers erected in the shape of a cross in 1930. The church was not open for visitors when we arrived, but I took a photograph to record the stop.


Little Log Church

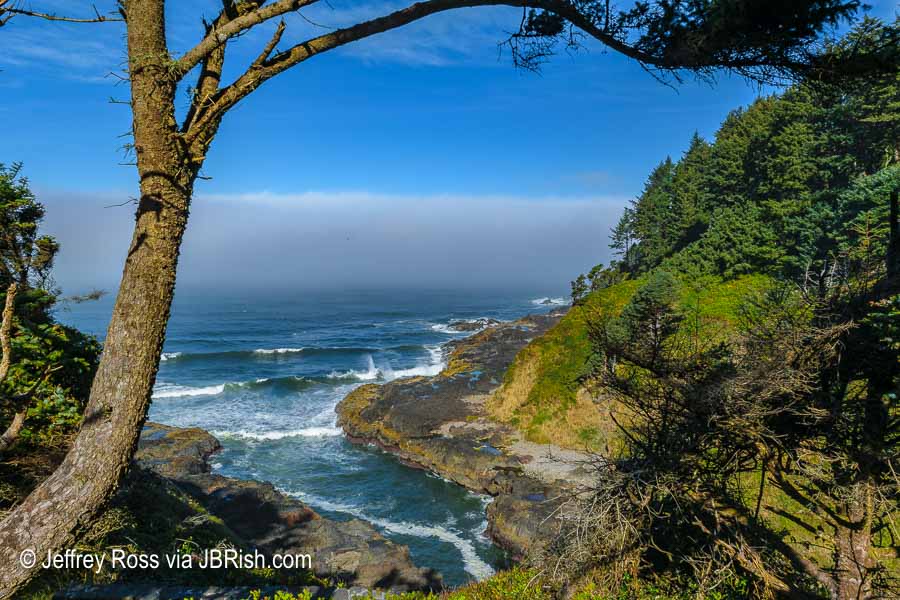
Just north of the Cape Perpetua Visitor’s Center, we stopped to investigate the Devil’s Churn. With a name like that, who could resist? This inlet is noted for the rushing, churning waters.


The Devil's Churn

One area that we found worthy of longer exploration was Cape Perpetua.


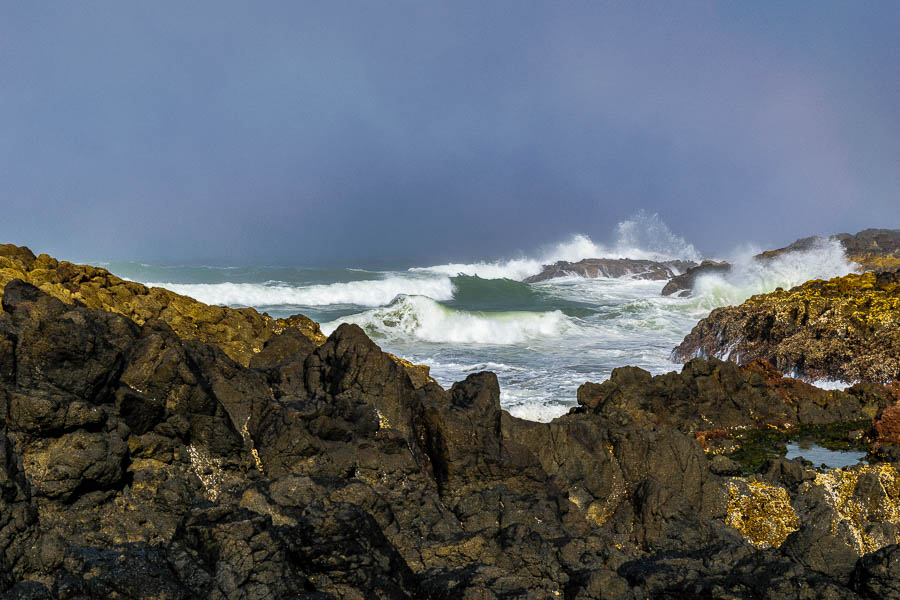
The power of the Pacific at Cape Perpetua
The Power of the Pacific could be felt at Cape Perpetua

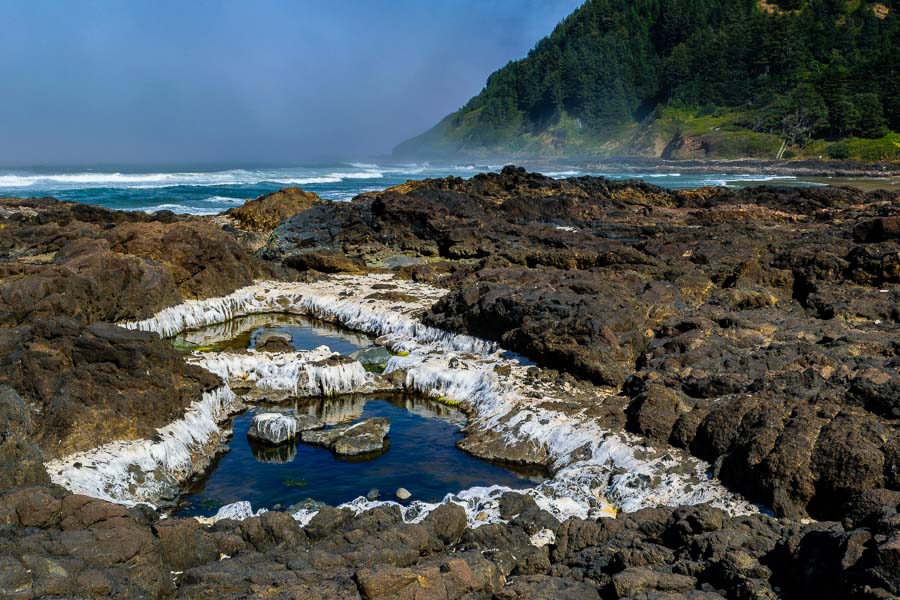
There were numerous tide pools and basins for the curious!


Ocean basin and tide pools to explore

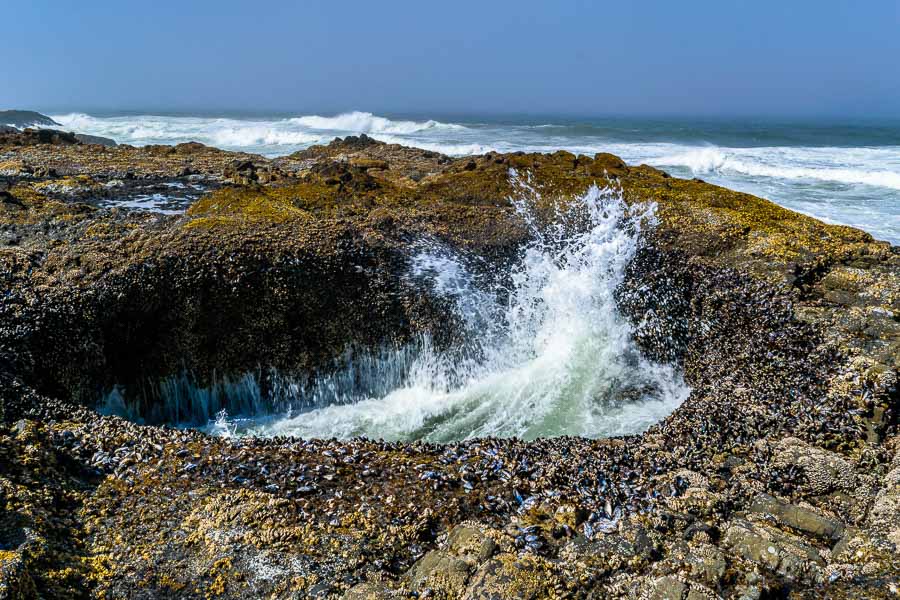
One intriguing, highly touted attraction was Thor’s Well (below). The depression is best seen during higher tides, but was interesting enough for us as water gushed up from beneath the hole in the rocky formation. At higher tides, the water spills into the hole creating an interesting visual effect – see photos HERE.


The Devil's Punchbowl at Cape Perpetua

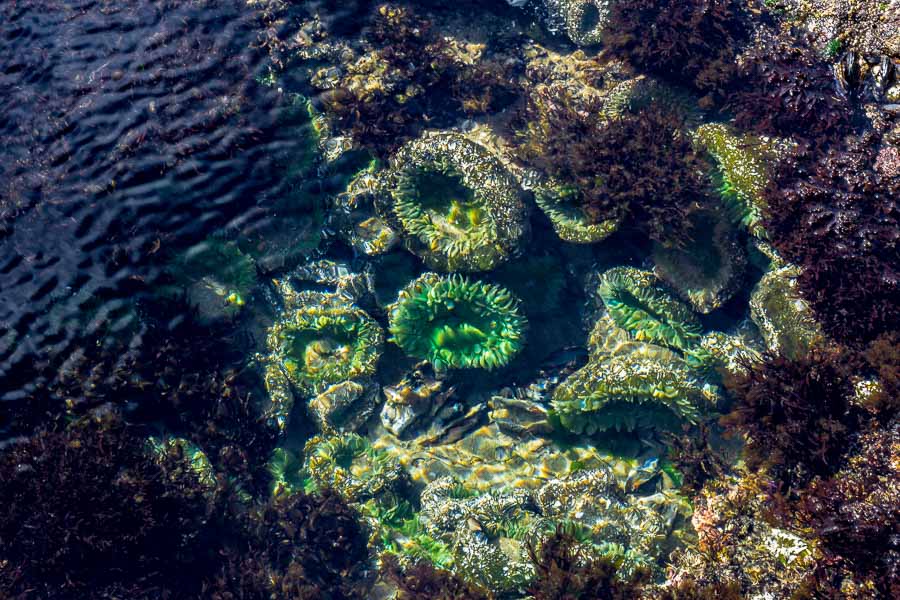
We also spent time exploring the tide pools and enjoying the beautiful creatures that live within. These anemones were a deep emerald green color!


A closeup of the anemones in a nearby tide pool

It was time to check our itinerary and head to our next stop; the Heceta Head Lighthouse.


**********

Read previous posts about our adventures hiking and exploring in Oregon:

Exploring Astoria, Oregon – Part 1

Exploring Astoria, Oregon – Part 2

Exploring Astoria, Oregon – Part 3

Adventures in Oregon: Warrenton to Seaside

Adventures in Oregon: Hiking at Indian Beach

Adventures in Oregon: Views from Ecola Point

Adventures in Oregon: Movin’ On Down the Road

Adventures in Oregon: Garibaldi’s Graces and Pier

Adventures in Oregon: Tillamook – Cape Meares Lighthouse

Adventures in Oregon: Pacific City, Neskowin & Lincoln City

Adventures in Oregon: Cascade Head and Hart’s Cove in Lincoln City

Adventures in Oregon: Cape Foulweather & Drift Creek Falls


Read more Hiking and Exploration posts HERE


**********


All original content on this blog is copyrighted by Jeffrey B. Ross with ALL Rights Reserved. While reference links back to JBRish.com are appreciated and encouraged, please acquire approval for any reproduction of original content from this website.

©Jeffrey B. Ross – 2018 – JBRish.com


Photography: My Shot – Yaquina Head Lighthouse

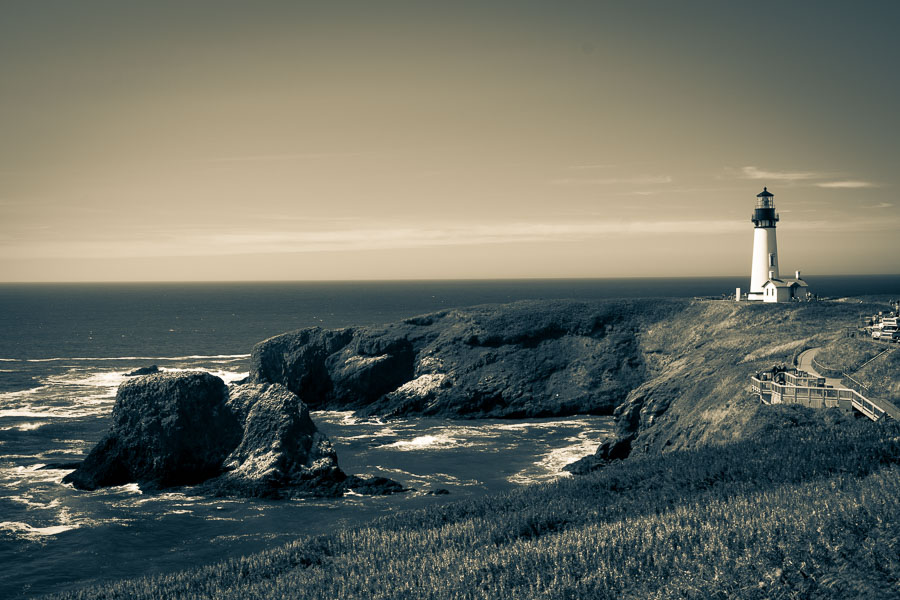
While hiking down the coast of Oregon, we enjoyed visiting a number of lighthouses along the picturesque coastline. A challenge photographers face when they arrive at such an area is that many other people want to enjoy the same view and that is a good thing!

The issue is how to capture a picture with as few distracting elements as possible. There have been several times when I have been at a prominent place in a national park where the scene was spectacular, but in the field of view there was a couple having lunch or a snack wearing bright orange or luminescent green garments.

Obviously this can be addressed by waiting for the people to move or fix it in post processing. In the picture below, there were a number of people, cars, RVs, etc.(middle right) that would prove problematic for the composition for reasons mentioned above. Rather than work on each piece in Photoshop, I decided to use a toned, black and white image (duotone) to maintain the focus on the distant lighthouse.

I hope it works as I thought it would!


Yaquina Head Lightouhse & Naural Area, Newport

*********

Metadata

File Name: oregon_coast_XT2A0212.RAF
Capture time: Sept. 11, 2017
Exposure: 1/30 sec @ f/13
Focal Length: 28.9mm
ISO: 200
Camera: Fuji X-T2
Lens: XF18-55mm, F2.8-4 R LM OIS

**********

See Jeff’s other photographs on Instagram


**********


All original content on this blog is copyrighted by Jeffrey B. Ross with ALL Rights Reserved. While reference links back to JBRish.com are appreciated and encouraged, please acquire approval for any reproduction of original content from this website.

©Jeffrey B. Ross – 2018 – JBRish.com


JBRish reaches a milestone!

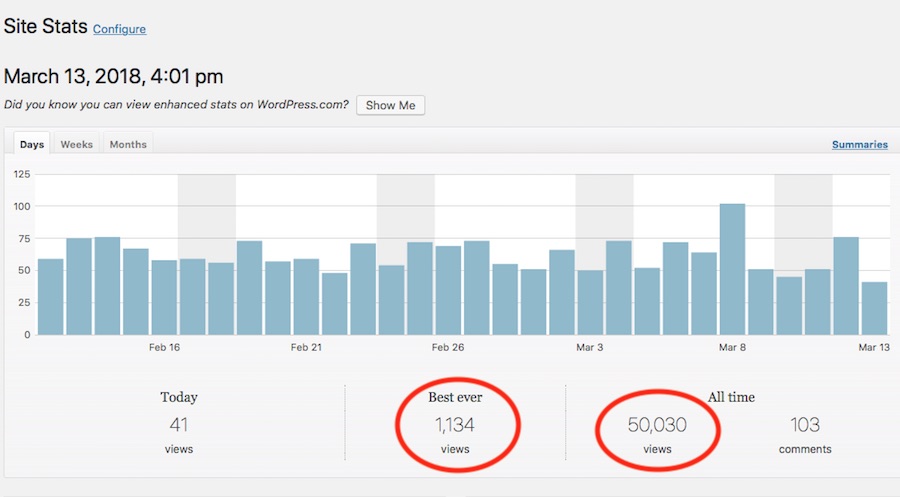
Admittedly JBRish is a very “small” website. The traffic has grown very slowly, but I do receive an average of 50 views a day. There are some days that far exceed that number and others that go down as low as the 30’s.


Early in the morning JBRish had 49999 views

It was exciting to see that JBRish.com was approaching the 50,000 view threshold and I caught the screen shot just in time!

This site is not monetized and is strictly a labor of love. The impetus for JBRish was my enjoyment of quotes, quips, photography, hiking and gardening.

Then one day I was trying to explain pickleball to a woman who was recovering from knee surgery. Pickleball does have some “unusual” rules and components and it was very difficult to give a complete description. The idea to include a pickleball page on my website was born. Not only do I use that page (and website) for general pickleball information, but it helps me to be a better USAPA pickleball ambassador.

I am happy to announce to JBRish readers that yesterday was a “red letter day” for us. We reached the 50,000 view benchmark. I know there are websites that have this many views every day or every few days, but this is a nice step for a personal blog like JBRish.


Arriving home from a variety of tasks, the 50,000 view threshold had been reached!

Arriving home from a variety of tasks, the 50,000 view threshold had been reached!

On the day I wrote about editing photographs taken with my Fuji X-T2 camera, the site received the most views, but I hope I can write another article soon that will top even that one. It will be hard, but it’s a worthy goal!

Thanks to all of JBRish readers, visitors, etc. I hope to continue to provide interesting information, quotes, quips, photography posts and of course, information about pickleball.


**********

All original content on this blog is copyrighted by Jeffrey B. Ross with ALL Rights Reserved. While reference links back to JBRish.com are appreciated and encouraged, please acquire approval for any reproduction of original content from this website.

©Jeffrey B. Ross – 2018 — JBRish.com


Photography: Shadow and Light: Mostly Black and White

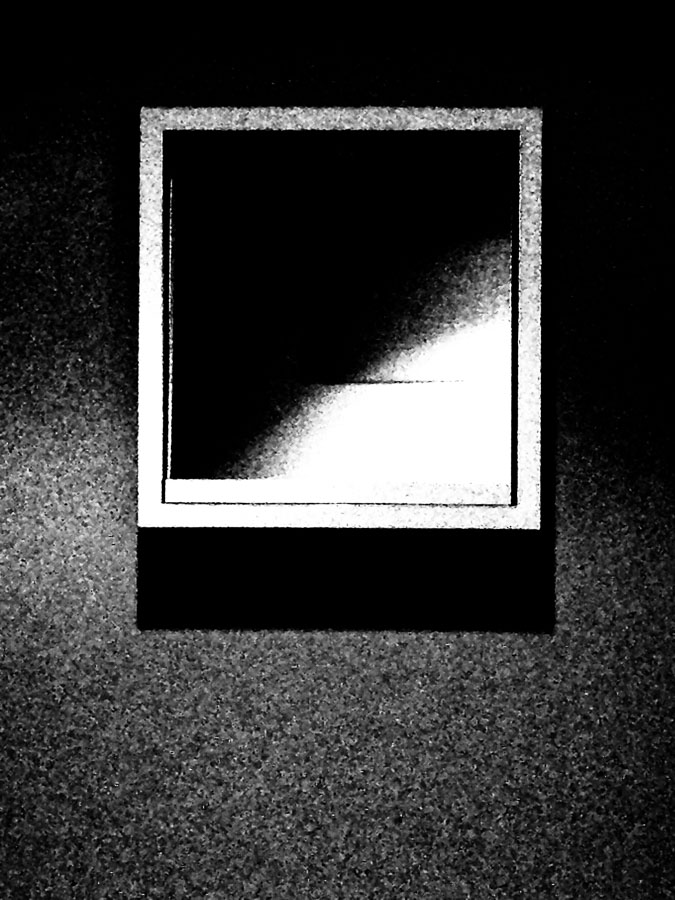
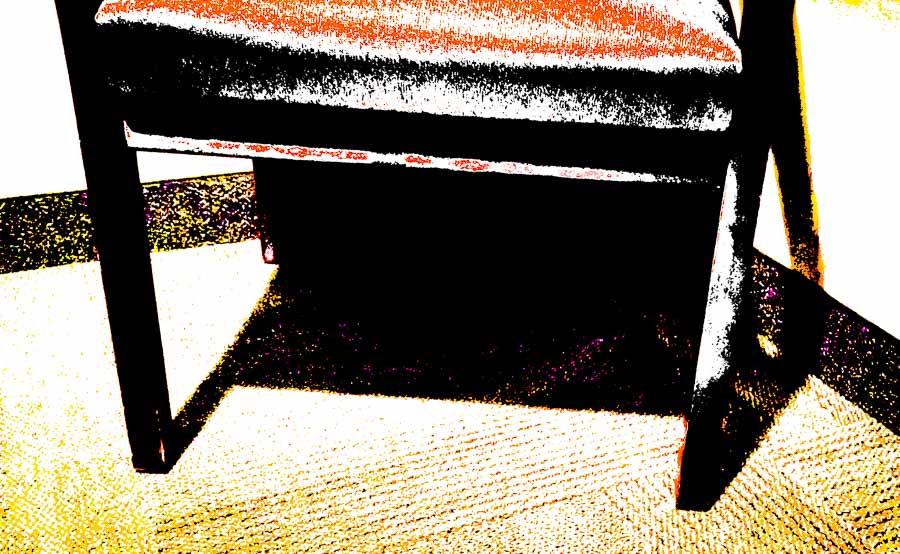
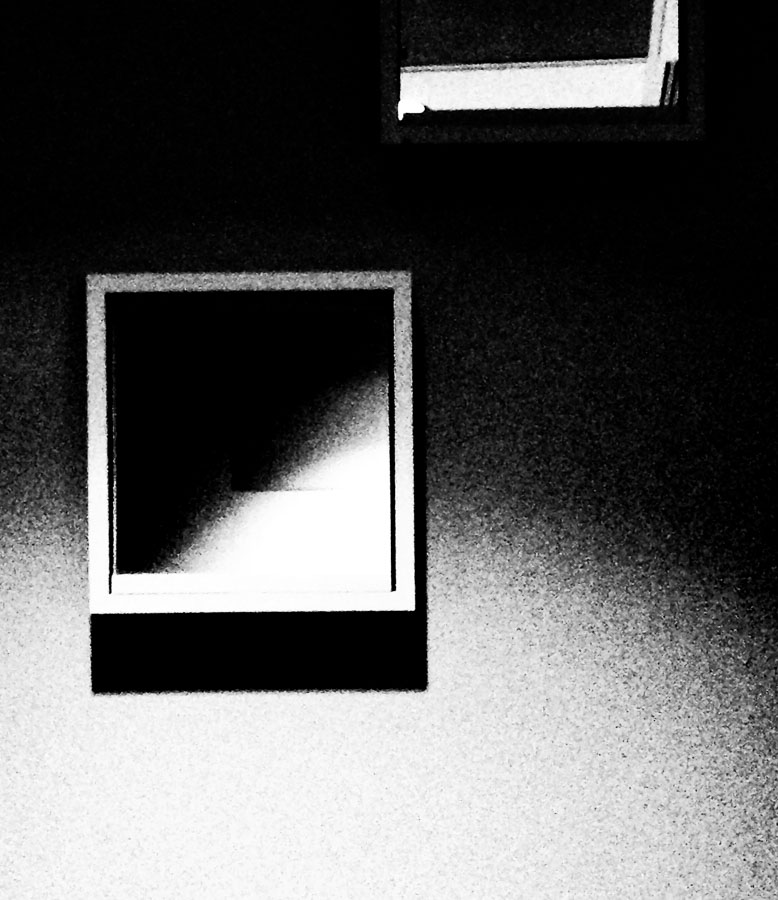
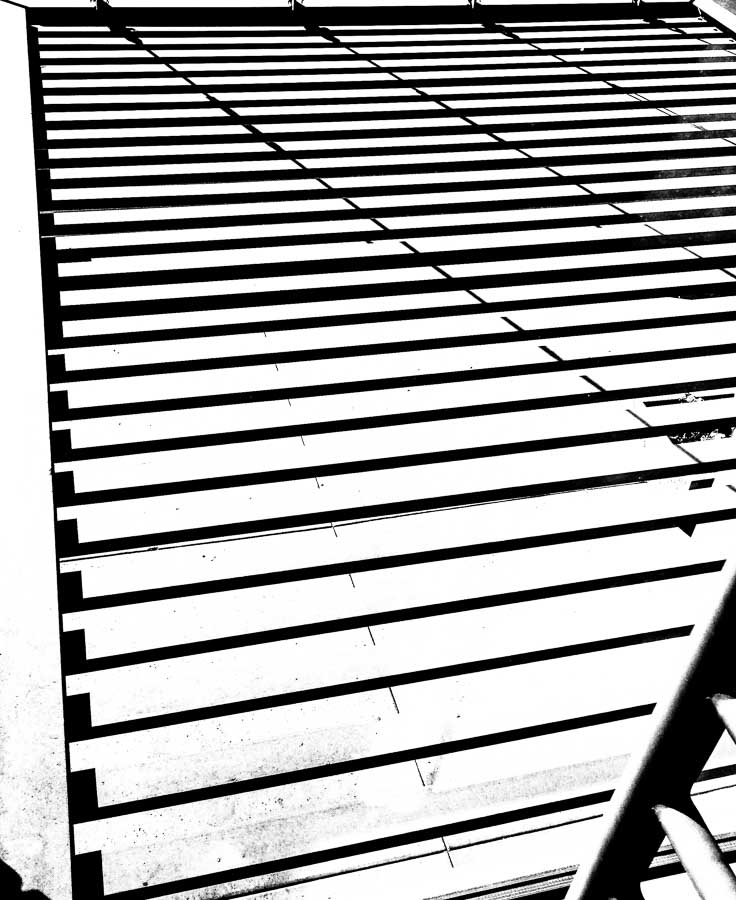
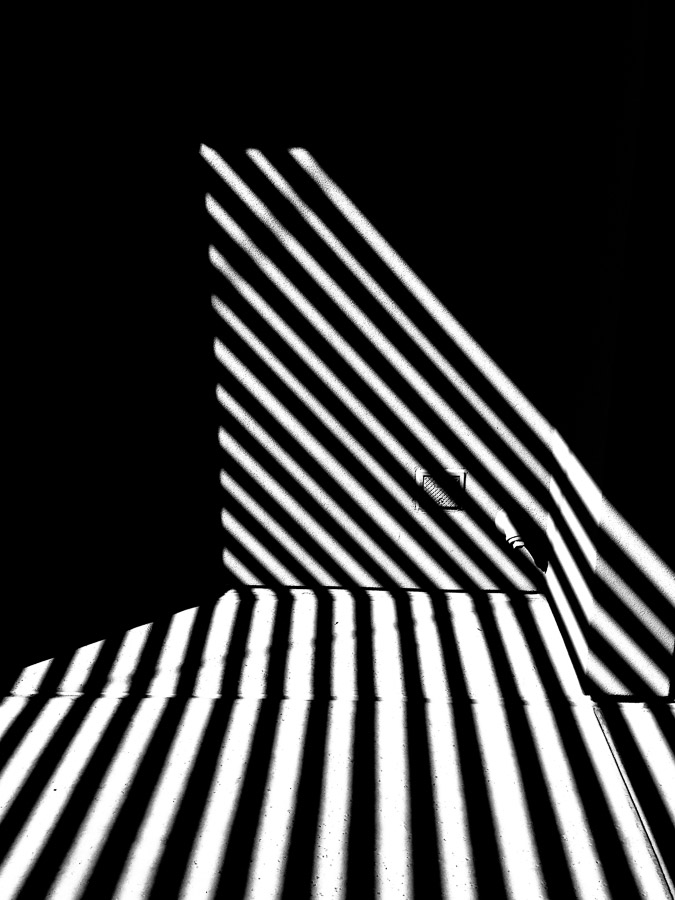
I have always appreciated and enjoyed the play of light and shadow especially when they create fascinating patterns. While visting my eye doctor for a routine exam during an early spring morning in the Phoenix, I was intrigued by the interesting patterns I found and how they would look once rendered in black and white.

I didn’t have my camera with me during the visit, but with smartphones nowadays most people have access to a camera and that is what I used. This project was not planned ahead of time. I became enchanted with the colors and shadows in and around the office and was inspired to capture these photos.

The images below were converted to black and white with other enhancements in Adobe Lightroom.


The Ophthalmic mirror

The Ophthalmic mirror for projecting the eye chart


pholstered red corner chair

An upholstered corner chair for a patient’s relative or friend


Two mirrors used by eye doctors

Most eye doctor’s use two mirrors to project the eye chart because rooms are usually too small for ideal projection of the image otherwise


Strong shadows cast by the building's architecture

The building’s architecture created amazing displays of light and shadow…and those lines


Mysterious display of light and shadow

An alcove by the lower entrance mysterious enough for a Raymond Chandler novel


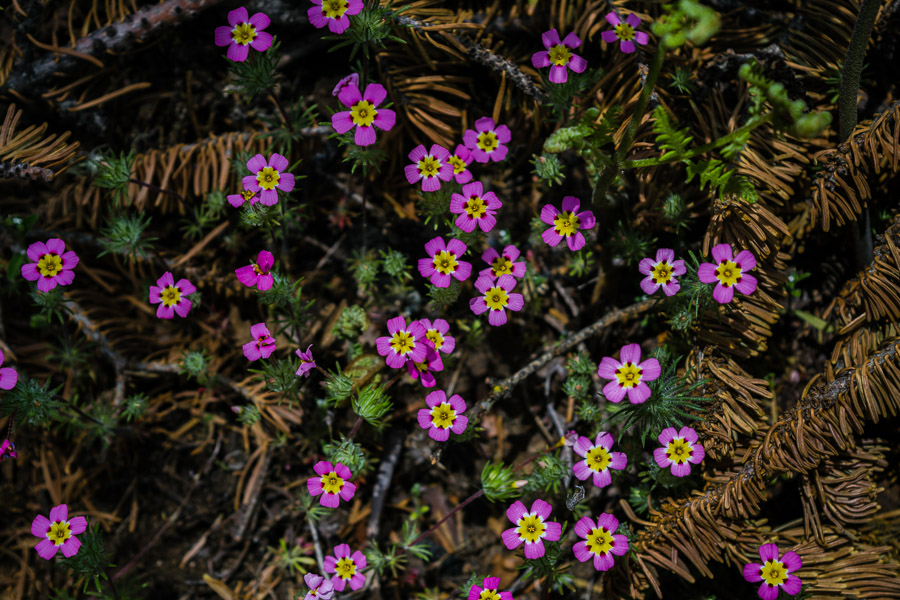
Yellow-Throated Gilia wildflower

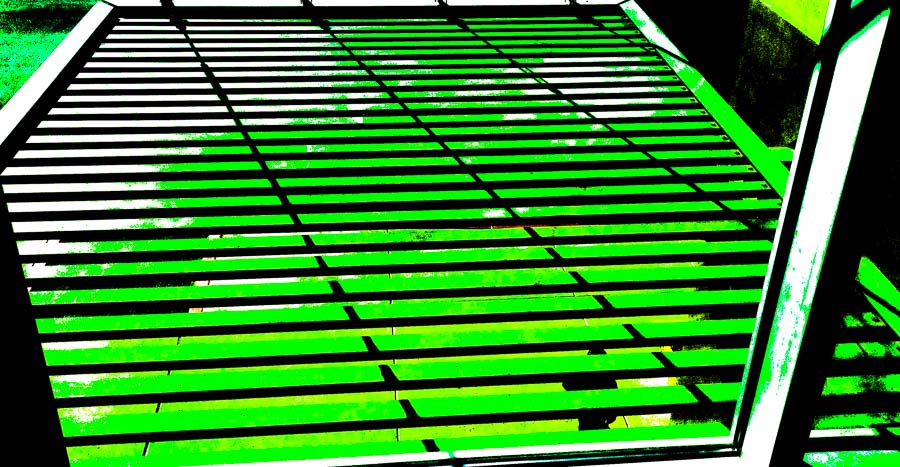
A variation on a theme with a bit of color added to a window view of the shade structure


That’s the beauty of photography, anyone with the ability to capture an image can find inspiration and creativity wherever they go. If you are a regular reader of JBRish.com, you know I enjoy quotes. Perhaps enjoy is too mild a term, but quotes are a big part of my creative process. So I will leave you with this:

“There is only you and your camera. The limitations in your photography are in yourself, for what we see is what we are.” ― Ernst Haas

Read more photography posts HERE


**********


All original content on this blog is copyrighted by Jeffrey B. Ross with ALL Rights Reserved. While reference links back to JBRish.com are appreciated and encouraged, please acquire approval for any reproduction of original content from this website.

©Jeffrey B. Ross – 2018 – JBRish.com


Photography: What is Post-Processing?

When it comes to photography, I consider myself a journeyman or apprentice. I work alone with the Internet serving as my mentor and it has provided great benefits to me as a student of photographic skills. I have always been interested in photography and back in the days of “only film,” I had a black and white darkroom.

Nowadays, digital photography makes things easier; at least for me. Post-processing is chemical free and done on a computer where mistakes can often be easily corrected with a few key strokes. If you are new to photography, you might be wondering: “What is post-processing?” Let me try to give you a simple explanation as I understand it.

When a digital photograph is taken on an automatic setting, the camera, which is really a computerized device, gathers all the information about the scene such as how dark it is, what colors go where, what area should be in focus, etc. and then it interprets the data and converts into a digital image. The current camera models are really quite capable and most will produce good to very good results on automatic settings.

There are times however when the camera may become “confused” because the scene is more difficult to analyze. A picture with lots of snow or many dark areas or one with high contrast will often cause problems. With many cameras, the settings can be changed from automatic to compensate for these difficult situations if the user is skilled enough to adjust the settings manually.

There will invariably be times, however, when a picture is less than ideal. Perhaps the photographer made an error in one of the settings. Some times a dial or setting is changed unintentionally and the error is not noticed until several shots later. The good news is that many mistakes can be remedied after the fact, i.e. post-processing.

In order to have the most options to re-work or revise photographs, some formats are better than others for allowing the photographer to compensate for mistakes such as underexposure or faulty composition. The most common form that offers leeway is the RAW image format, but what I am writing about below applies to almost every format including JPEG, PNG and others as well. It is just that RAW offers more latitude than some and is most common so there are many programs to help correct a picture via appropriate software.

In the RAW format, the camera caputers all the data, but doesn’t put it together for the user as it would in automatic mode. The camera offers the user the opportunity to make most of the decisions about how the photograph is to look. It is as though the camera is communicating with the user and saying: “OK, I know there is red in the scene and I know where it goes, but what is the exact hue of red that you want and what should the saturation and vibrance be?” The user can then use software to manipulate the camera’s information to create the scene as they saw it when the shutter was pressed.

The photograph below, for example, was taken at the Tucson Botanical Garden. When I put the image on my computer to view, it was lacking much of the “punch” and interest that encouraged me to take it in the first place.
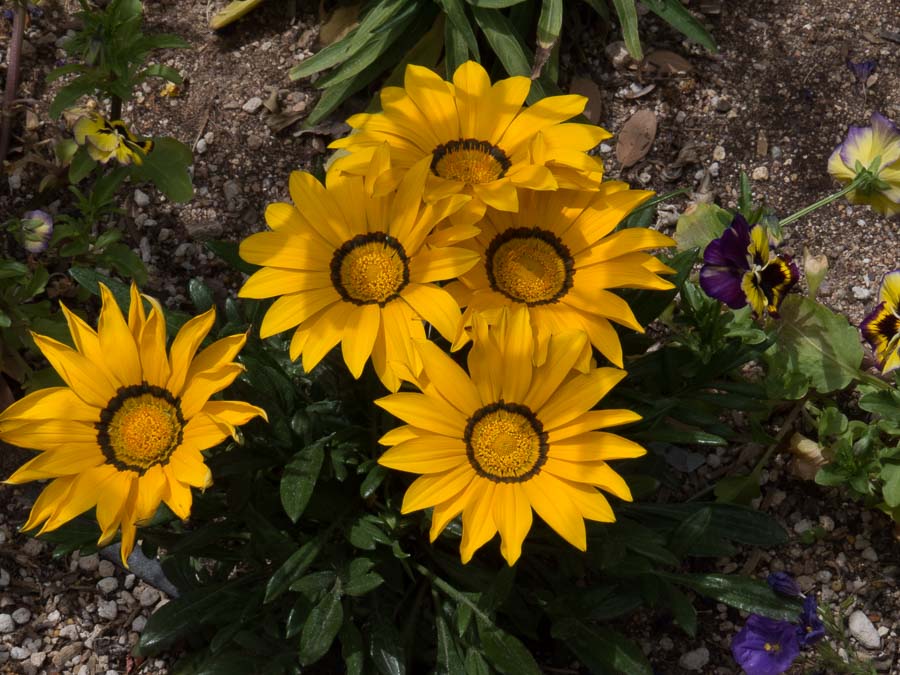


I didn’t realize it at the time, but there are too many distracting elements in the photograph. The eye is being pulled away from the main group of the yellow daisy-like flowers by the bits of colors in the pansies on the right.

The upper left also has some distracting plant material. My intent was to have viewers focus on the yellow cluster of flowers. Cropping (cutting off) some elements of the picture will help a bit. In the edit below, I removed as much of the pansies (right-side) as possible without cutting off any of the pretty yellow petals.
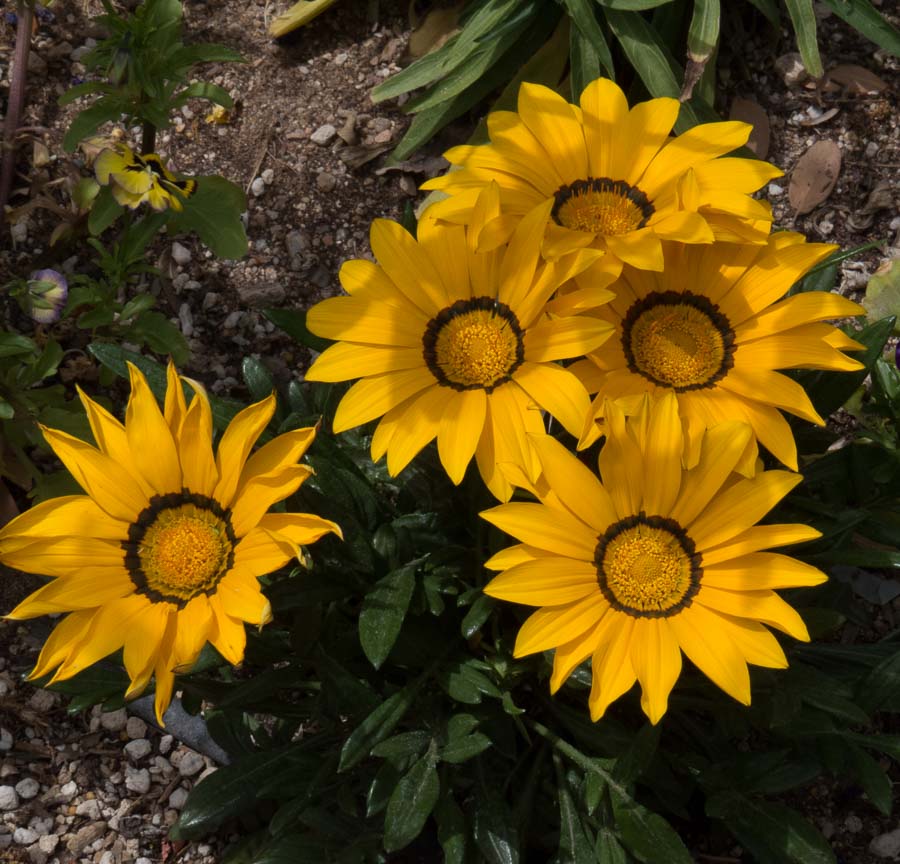


Once that was done, I used tools in Lightroom and Photoshop to darken the areas around the plant that were distracting. Making the corners and other areas darker helps to lead the eye directly to the flowers. I also enhanced the color to more closely represent the flowers as I remembered them. I tried to be careful to avoid removing the shadows which add an element of interest to the picture. I like the shades of yellow as they are altered by the varying intensities of the light.
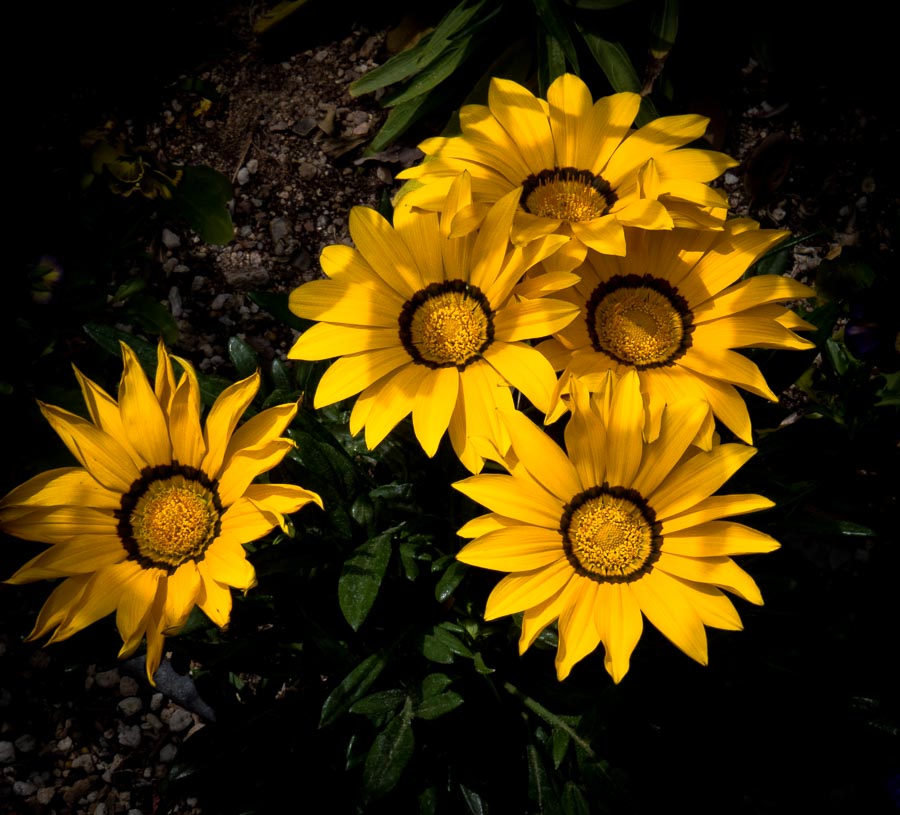


I was relatively happy with the result at this point, but I didn’t like the flower on the extreme left. It was on the wane and seemed to be drawing attention away from the main grouping of four. Experts suggest using odd numbers of objects in a photograph as they most often produce a pleasing result, but I wasn’t sure about this specific image.

I decided to remove the flower on the left to see how that looked.
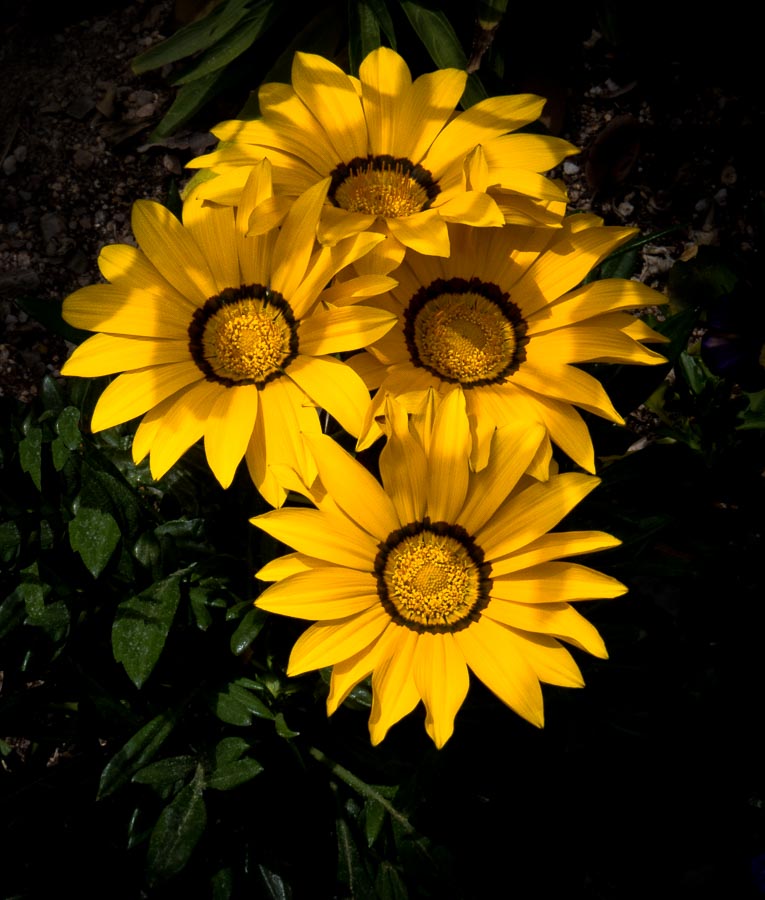


I like the edited picture above the best. What do you think? When you compare the original image to the final image, I think you will agree that post-processing, i..e. modifying the image after it has been taken, has created a more pleasing and artistic picture.

To quote one of America’s most famous photographers, Ansel Adams, “I don’t take photographs I make photographs.” This is what I try to do. I am an average user of post-processing software, but I continue to learn and enjoy making images. It is much fun and offers the photographer a chance to become a photographic artist.

*********

Metadata

File Name: yellow_flowers_0507-2.CR2
Capture time: 12:21:36 PM
Capture date: April 11, 2014
Exposure: 1/500 sec @ f/8.0
Focal Length: 17.14mm
ISO: 125
Camera: Canon PowerShot SX50 HS
Lens: 4.3-215mm

**********


JBRish.com originally published this post

See previous Photography Posts HERE

See Jeff’s other photographs on Instagram


All original content on this blog is copyrighted by Jeffrey B. Ross with ALL Rights Reserved. While reference links back to JBRish.com are appreciated and encouraged, please acquire approval for any reproduction of original content from this website.

©Jeffrey B. Ross – 2018 – JBRish.com


Hiking: Yellow-Throated Gilia, Sequoia National Park, CA

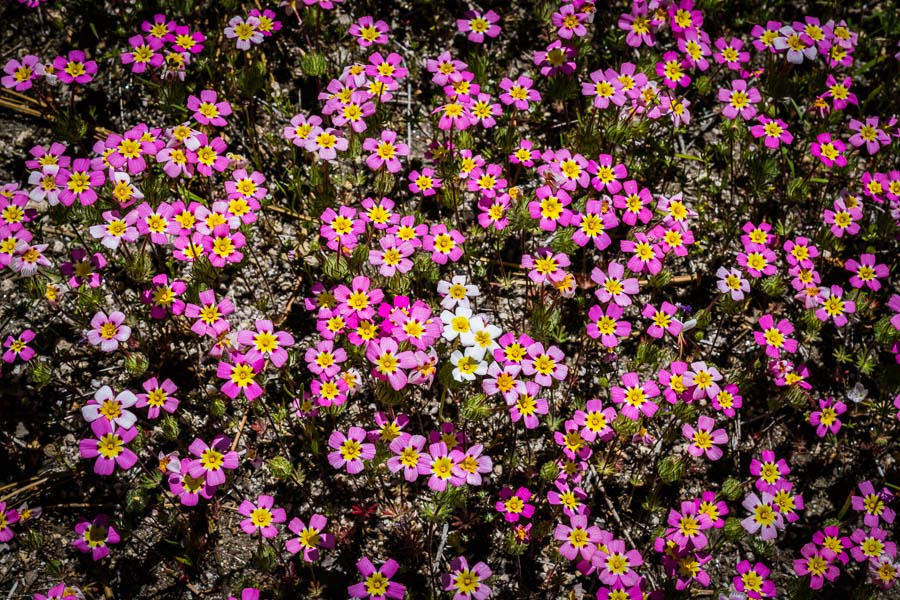
One of the reasons I enjoy hiking is that it offers opportunities for interesting discoveries; some anticipated and others serendipitous. We were hiking along the Crescent Meadow Loop Trail in Sequoia National Park nearly a year ago when we came across a patch of wildflowers tucked away in a wooded area…


Yellow-Throated Gilia wildflower

It was hard to believe that these were real. The colors were so vibrant and unusual in combination. It was an amazing sight. The next day we were on the Sunset Point Trail and there was a large swath of these wildflowers covering the entire hillside.


Yellow-Throated Gilia wildflower
Love those standouts adding their all white accents in the middle of the patch!

 
Nature is the art of God.” – Dante Alighieri

Read more about Yellow-Throated Gilia HERE


Read more JBRish.com posts:

Hiking/Exploring HERE, Nature HERE, Photography HERE


**********


All original content on this blog is copyrighted by Jeffrey B. Ross with ALL Rights Reserved. While reference links back to JBRish.com are appreciated and encouraged, please acquire approval for any reproduction of original content from this website.

©Jeffrey B. Ross – 2018 – JBRish.com