When it comes to photography, I consider myself a journeyman or apprentice. I work alone with the Internet serving as my mentor and it has provided great benefits to me as a student of photographic skills. I have always been interested in photography and back in the days of “only film,” I had a black and white darkroom.
Nowadays, digital photography makes things easier; at least for me. Post-processing is chemical free and done on a computer where mistakes can often be easily corrected with a few key strokes. If you are new to photography, you might be wondering: “What is post-processing?” Let me try to give you a simple explanation as I understand it.
When a digital photograph is taken on an automatic setting, the camera, which is really a computerized device, gathers all the information about the scene such as how dark it is, what colors go where, what area should be in focus, etc. and then it interprets the data and converts into a digital image. The current camera models are really quite capable and most will produce good to very good results on automatic settings.
There are times however when the camera may become “confused” because the scene is more difficult to analyze. A picture with lots of snow or many dark areas or one with high contrast will often cause problems. With many cameras, the settings can be changed from automatic to compensate for these difficult situations if the user is skilled enough to adjust the settings manually.
There will invariably be times, however, when a picture is less than ideal. Perhaps the photographer made an error in one of the settings. Some times a dial or setting is changed unintentionally and the error is not noticed until several shots later. The good news is that many mistakes can be remedied after the fact, i.e. post-processing.
In order to have the most options to re-work or revise photographs, some formats are better than others for allowing the photographer to compensate for mistakes such as underexposure or faulty composition. The most common form that offers leeway is the RAW image format, but what I am writing about below applies to almost every format including JPEG, PNG and others as well. It is just that RAW offers more latitude than some and is most common so there are many programs to help correct a picture via appropriate software.
In the RAW format, the camera caputers all the data, but doesn’t put it together for the user as it would in automatic mode. The camera offers the user the opportunity to make most of the decisions about how the photograph is to look. It is as though the camera is communicating with the user and saying: “OK, I know there is red in the scene and I know where it goes, but what is the exact hue of red that you want and what should the saturation and vibrance be?” The user can then use software to manipulate the camera’s information to create the scene as they saw it when the shutter was pressed.
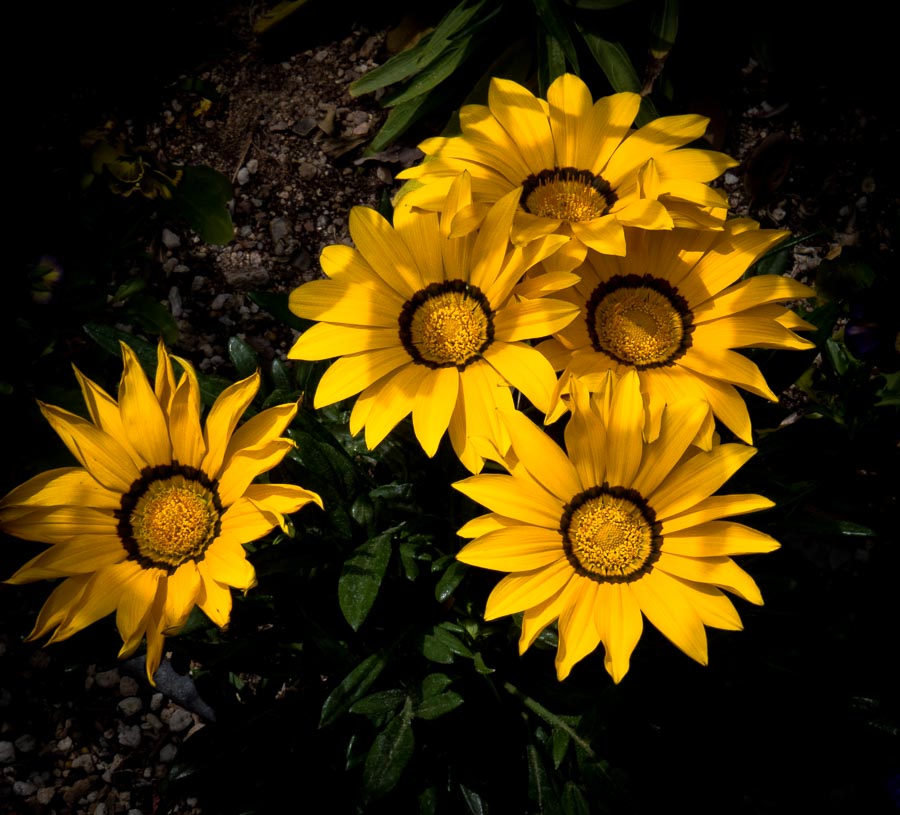
The photograph below, for example, was taken at the Tucson Botanical Garden. When I put the image on my computer to view, it was lacking much of the “punch” and interest that encouraged me to take it in the first place.

I didn’t realize it at the time, but there are too many distracting elements in the photograph. The eye is being pulled away from the main group of the yellow daisy-like flowers by the bits of colors in the pansies on the right.
The upper left also has some distracting plant material. My intent was to have viewers focus on the yellow cluster of flowers. Cropping (cutting off) some elements of the picture will help a bit. In the edit below, I removed as much of the pansies (right-side) as possible without cutting off any of the pretty yellow petals.

Once that was done, I used tools in Lightroom and Photoshop to darken the areas around the plant that were distracting. Making the corners and other areas darker helps to lead the eye directly to the flowers. I also enhanced the color to more closely represent the flowers as I remembered them. I tried to be careful to avoid removing the shadows which add an element of interest to the picture. I like the shades of yellow as they are altered by the varying intensities of the light.
I was relatively happy with the result at this point, but I didn’t like the flower on the extreme left. It was on the wane and seemed to be drawing attention away from the main grouping of four. Experts suggest using odd numbers of objects in a photograph as they most often produce a pleasing result, but I wasn’t sure about this specific image.
I decided to remove the flower on the left to see how that looked.
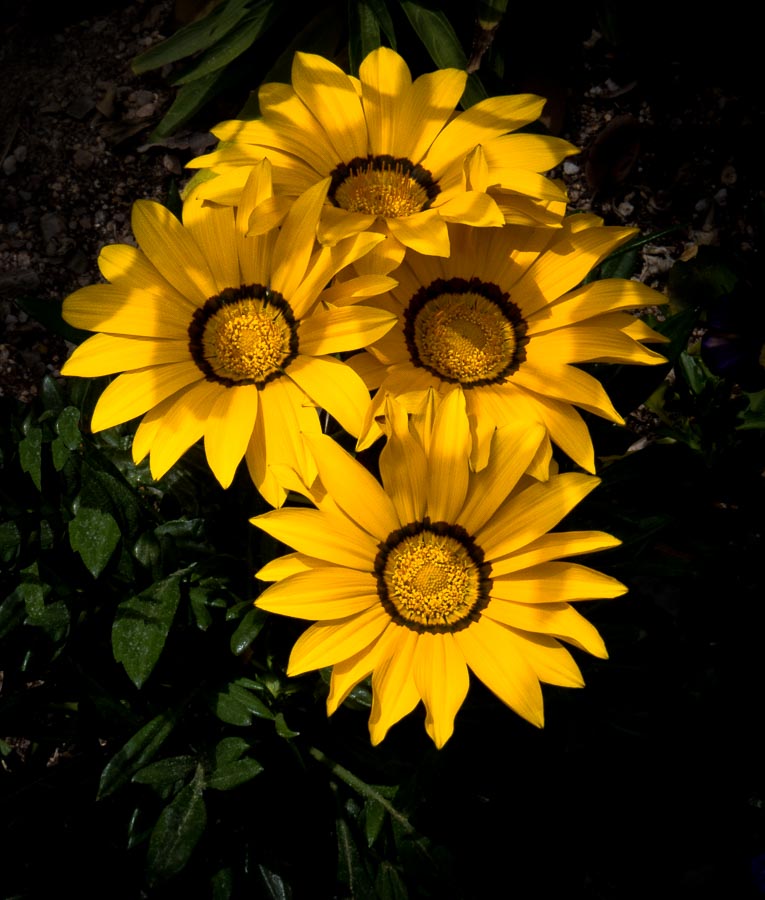
I like the edited picture above the best. What do you think? When you compare the original image to the final image, I think you will agree that post-processing, i..e. modifying the image after it has been taken, has created a more pleasing and artistic picture.
To quote one of America’s most famous photographers, Ansel Adams, “I don’t take photographs I make photographs.” This is what I try to do. I am an average user of post-processing software, but I continue to learn and enjoy making images. It is much fun and offers the photographer a chance to become a photographic artist.
*********
Metadata
File Name: yellow_flowers_0507-2.CR2
Capture time: 12:21:36 PM
Capture date: April 11, 2014
Exposure: 1/500 sec @ f/8.0
Focal Length: 17.14mm
ISO: 125
Camera: Canon PowerShot SX50 HS
Lens: 4.3-215mm
**********
See previous Photography Posts HERE
See Jeff’s other photographs on Instagram
All original content on this blog is copyrighted by Jeffrey B. Ross with ALL Rights Reserved. While reference links back to JBRish.com are appreciated and encouraged, please acquire approval for any reproduction of original content from this website.
©Jeffrey B. Ross – 2018 – JBRish.com