Birding with an Opportunistic & Occasional Birder

We recently spent ten days hiking the trails of Yellowstone National Park. This was a bucketlist item for us and we were thrilled to be able to check off this box. Although we are senior citizens, we logged more than seventy miles along the pathways and mountains of this beautiful and intriguing geographical area.

We were enjoying the beautiful meadows and wooded areas while hiking to Cascade Lake. There were bison in the area (more about that in a later post) and while photographing and admiring these large animals, I saw a silhouette of the bird below. At first it appeared mostly black.


Northern Harrier Hawk

I took several steps closer to get a better look and rather than a raven as I originally thought, I knew this was a falcon or a hawk. What I normally do in this situation is I take several pictures while moving a bit closer for each click of the shutter. In this way, I hope to capture shots that will enable me to identify the bird without chasing it away.
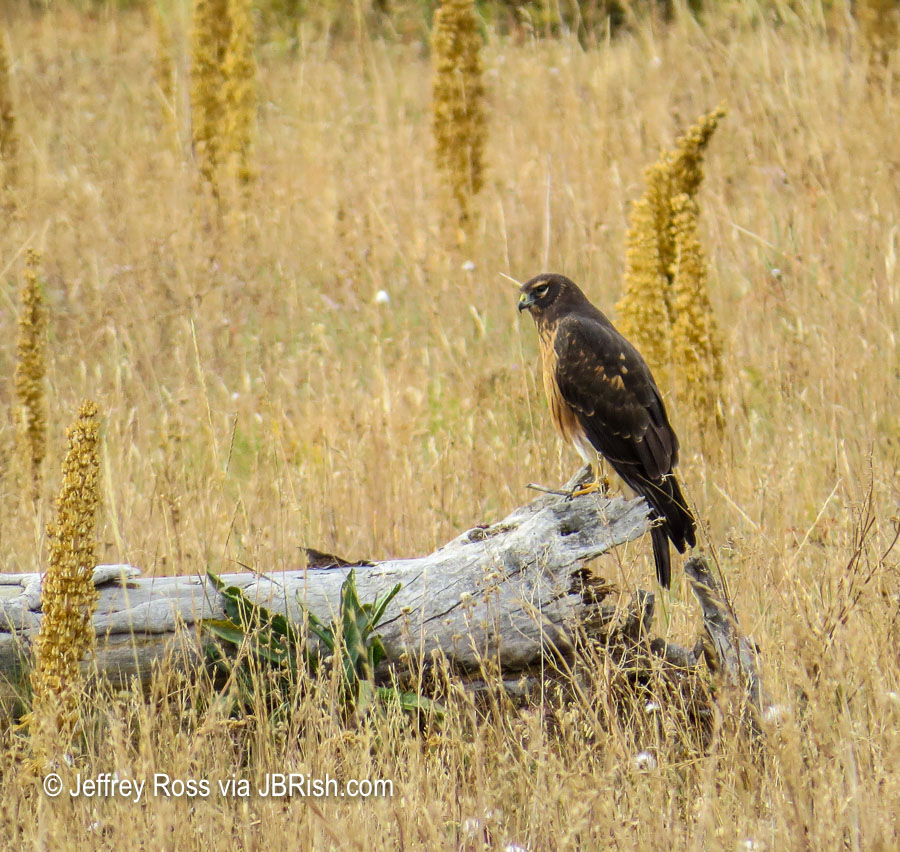

Northern Harrier Hawk

This was a very confident bird. As you can note, it was clearly perched in an open and perhaps vulnerable spot. As I moved a bit closer, it did not move on inch. The only change in posture was for this hawk to turn its head to look at me.

I always try to respect the animals I photograph by giving them plenty of room. I do not get very close because, after all, this is their home and I do not want to frighten them or change their behavior. I try to observe from a distance. I have a Canon bridge camera which does allow me to get fairly close with an equivalent 600mm lens.

After trying to identify this bird, I thought it might be a Harris Hawk, but as I normally do when I am unsure, I post a question in the Bird Identification forum on the BirdForum website. If you are interested in birding or bird identification, I cannot recommend this resource more highly. The members are very helpful in guiding novices to learn how to properly identify birds.

After making my guess and posting the three pictures from this post on the forum, I learned that this was a Northern Harrier Hawk and that the facial markings, referred to as a mask, is the clincher in this identification.

This was a bird that I had seen from a very far distance in Arizona, but I did not have a photograph of it. I was glad to add these photos to my birding collection. I now have seen and identified more than ten percent of all birds that visit North America some time during the year according to the American Birding Association (ABA).

Check out the BirdForum if you have in interest in birds and/or birding.


Northern Harrier Hawk

To read more JBRish.com posts about birding, click HERE.


**********


All original content on this blog is copyrighted by Jeffrey B. Ross with ALL Rights Reserved. While reference links back to JBRish.com are appreciated and encouraged, please acquire approval for any reproduction of original content from this website.

©Jeffrey B. Ross 2014 – 2018 — JBRish.com

Birds of Arizona – Red-tailed Hawk ( Buteo jamaicensis )

For casual bird watchers, identifying a particular bird can be quite a challenge. One would think that a Red-tailed Hawk would look very much like every other Red-tailed Hawk, but it isn’t quite that easy.

Unfortunately, there are often variations on a theme. One problem, for example, is that a juvenile bird often looks quite different than it does as an adult. This can reveal itself with differnt feather patterns or colors or perhaps a less developed feature that, when the bird is mature, would be quite prominent.

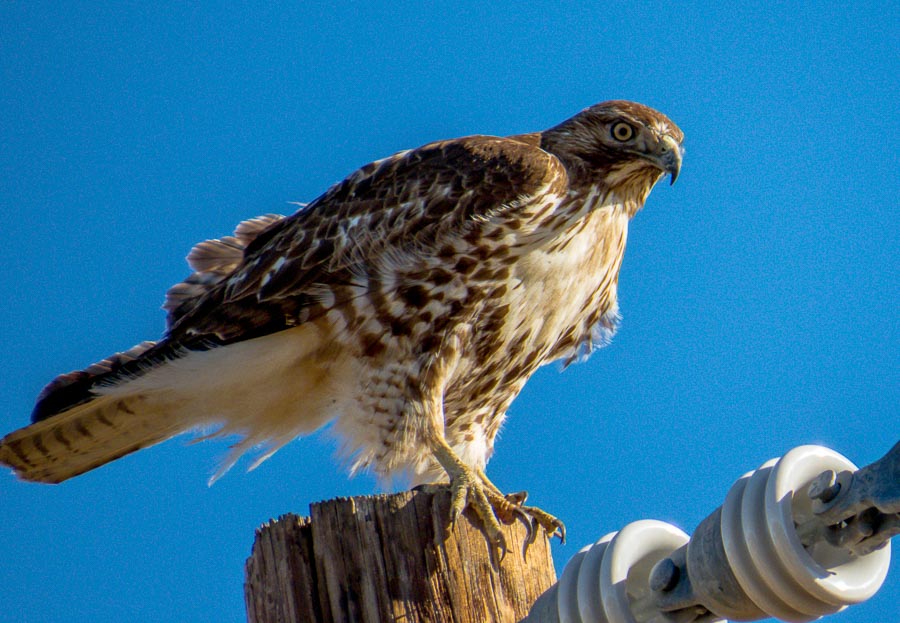
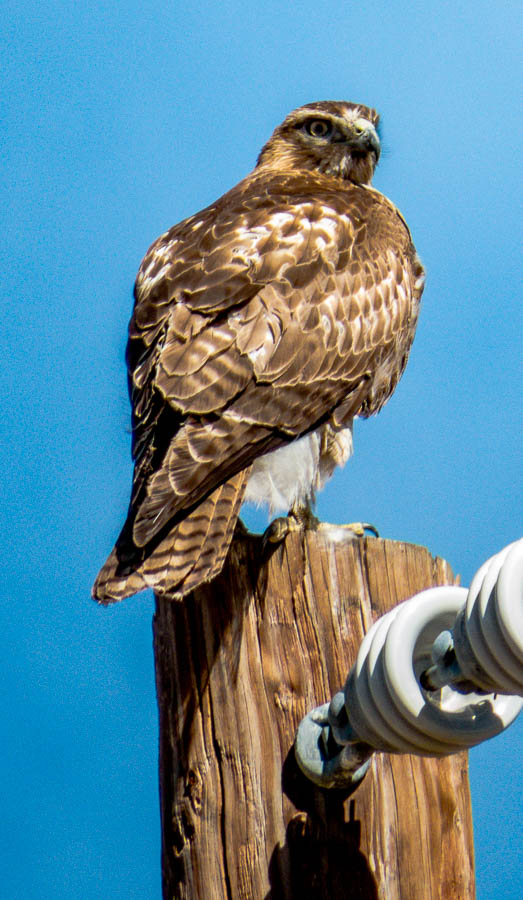
Facing this challenge, I often farm out the job of identification to the wonderful world of birders on the Internet. That is how I was able to determine that the bird below is a juvenile Red-tailed Hawk.

As you can see, we have a power pole near our house and very often one hawk or another will stop by to enjoy a meal or keep a lookout for the next one. While they are atop this perch, I am often able to walk close to them to capture a portrait.


Red-tailed Hawk
As I approached, the bird wanted to keep an eye on me.


Red-tailed Hawk
Here the bird decided to turn around to face me.


Red-tailed Hawk
When approached, hawks don’t necessarily run away, but will often just stare back!

Read more identifying Red-tailed Hawks – Telling Juvenile from Adult Red-tailed Hawks

 
********************
Metadata for the bottom Photograph

File Name: 000022_49.CR2
Capture time: 9:55:03 AM
Capture date: February 6, 2016
Exposure: 1/640 sec @ f/6.5
Focal Length: 215mm
ISO: 200
Canon PowerShot SX50HS
Lens: 4.3-215mm
Edited in Lightroom

See previous JBRish posts about birds HERE


**********


All original content on this blog is copyrighted by Jeffrey B. Ross with ALL Rights Reserved. While reference links back to JBRish.com are appreciated and encouraged, please acquire approval for any reproduction of original content from this website.

©Jeffrey B. Ross – 2018


Birds of Arizona – Phainopepla ( Phainopepla nitens )

Yesterday was an interesting day for me as the weather prediction was not excellent, but still fair and relatively mild with a predicted high in the low 80’s and we were eager to take a hike. We decided to select a route off of the Granite Mountain Trailhead (The Bootlegger Trail) which is part of the McDowell Mountain Preserve.

Whenever I hike, I anticipate capturing a picture of a bird that is either better than one that I currently have of that bird or, as a bonus, a bird for which I do not have a picture.

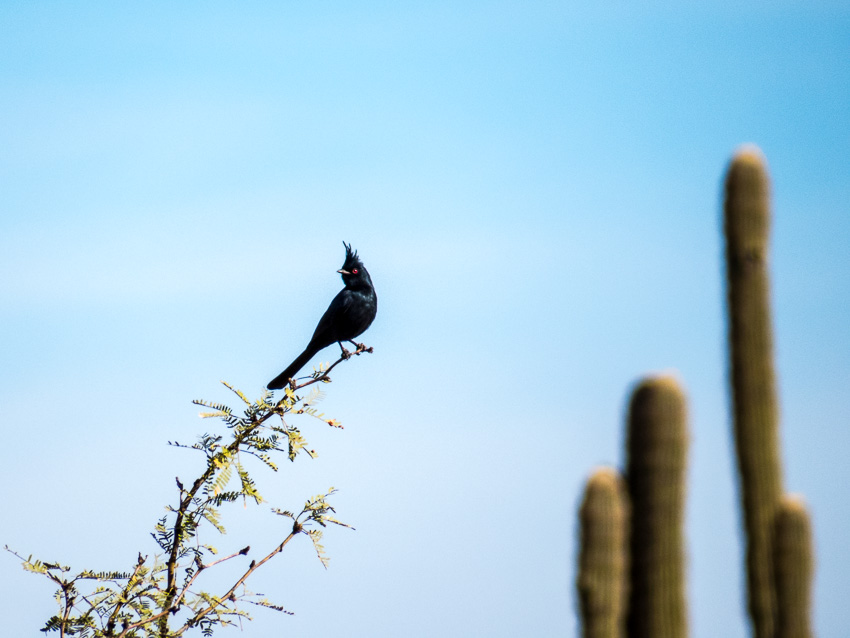
I have seen many Phainopeplas, but I have never been able to take a good picture of one. I also know that this is the time of the year that they visit the Sonoran Desert. I spotted one just 100 yards from my backyard a few days ago, but it was not in a very nice setting so I passed.

Today I was able to take a “starter picture” of a Phainopepla that we spotted along the Bootlegger Trail. I am labeling this a starter because I am hoping to capture a photograph that is even better one of these days!

As I have stated on this blog before, I am an amateur photographer with very limited bird photography experience and just a bit more as a birder. The only camera I have with a long reach is my Canon PowerShot SX50HS and that is the equipment I used for the shot below.


Phainopepla captured at the McDowell Mountain Preserve
Phainopepla captured at the Granite Mountain Trailhead along the Bootlegger Trail which is part of the McDowell Sonoran Preserve

Phainopeplas remind me of Cardinals or Waxwings because of their sleek profile and the tuft. Males are black while females are more grey. Interestingly enough, they have a red eye which is very striking and not always easy to capture in a photograph. I am placing a cropped image below to show more detail even though it may not be as sharp as I would like.


Phainopepla captured at the McDowell Mountain Preserve
A cropped version of the image above

Now I have one more picture for my collection!

Read more about Phainopeplas HERE

 
********************
Metadata

File Name: 000017_IMG_0806.CR2
Capture time: 9:28:51 AM
Capture date: November 15, 2017
Exposure: 1/500 sec @ f/7.1
Focal Length: 215mm
ISO: 80
Canon PowerShot SX50HS
Lens: 4.2-215mm
Edited in Lightroom

See previous JBRish posts about birds HERE


**********


All original content on this blog is copyrighted by Jeffrey B. Ross with ALL Rights Reserved. While reference links back to JBRish.com are appreciated and encouraged, please acquire approval for any reproduction of original content from this website.

©Jeffrey B. Ross – 2017


Identification for the Birds

Here is a problem every novice or occasional birder is bound to face…

We were enjoying a beautiful hike through Zumwalt Meadow in Kings Canyon, CA observing all of the plants, scenery and wildlife we encountered.

Keep in mind that much of this trail has tree roots, rocks, boulders, fallen branches, etc. so keeping eyes ahead or up is not an option for those hiking along. We would stop when a sudden motion or noise caught our attention or we just wanted to gaze at the scenery. We are avid gazers and thus would probably be considered somewhat pokey when it comes to the more speedy hikers.

But I digress… We were climbing upward through a somewhat narrow corridor formed by boulders on either side and ahead, no more than twenty feet away, an attractive multi-colored bird landed in a tree. I was almost sure this was one that I hadn’t identified yet so of course I was very interested in photographing the bird for future identification.

NOTE – For those who want to know why I didn’t or more truthfully, couldn’t, identify the bird right there and then, read my earlier post – Photography and Birding: Good Photo, Bad Photo

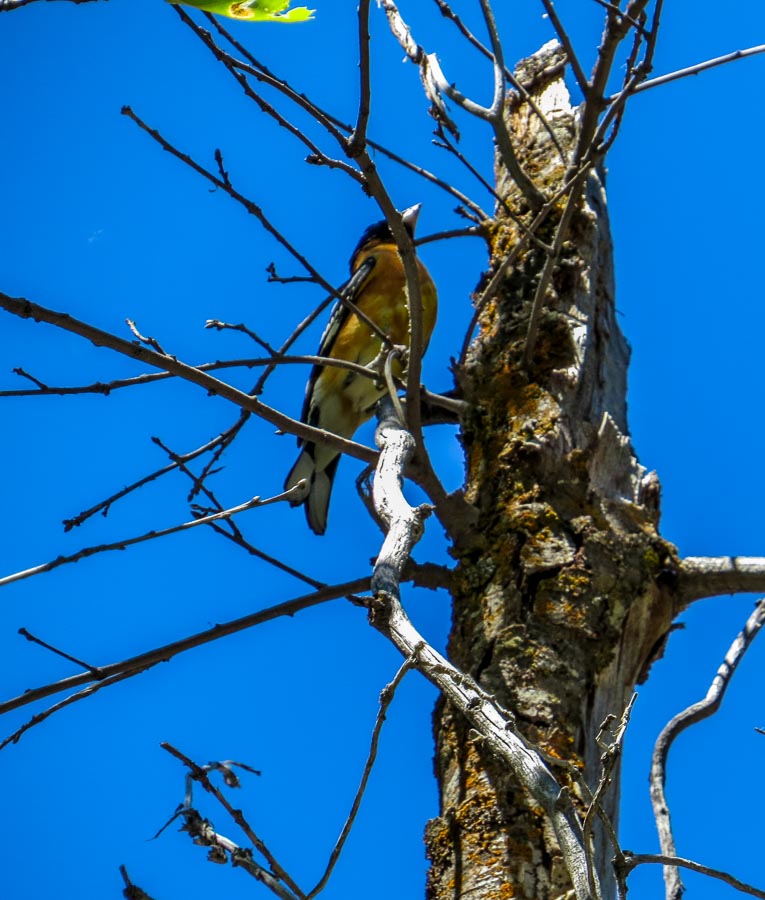
The bird was mostly black, with orange-brown sides, a buff bottom and rump with white markings on black wings. The face also had some blotches of other colors as well. Immediately I thought this was an oriole of one type or another.


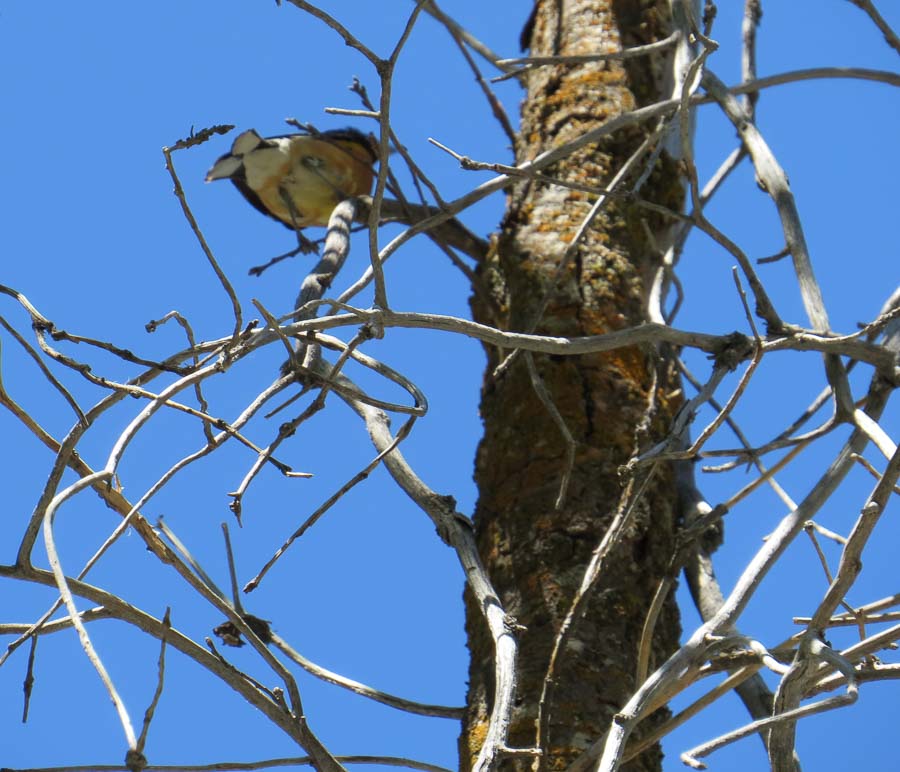
Black-headed grosbeak

By the time I was able to stop and take note, the bird was flitting from branch-to-branch and this (above) was the first photograph I was able to capture. Hmmmm – pretty hard to ID from that shot.

What was infuriating was that the bird would jump down closer to me, let’s say eight feet away, but would be among a mass of branches; drats!


Black-headed grosbeak

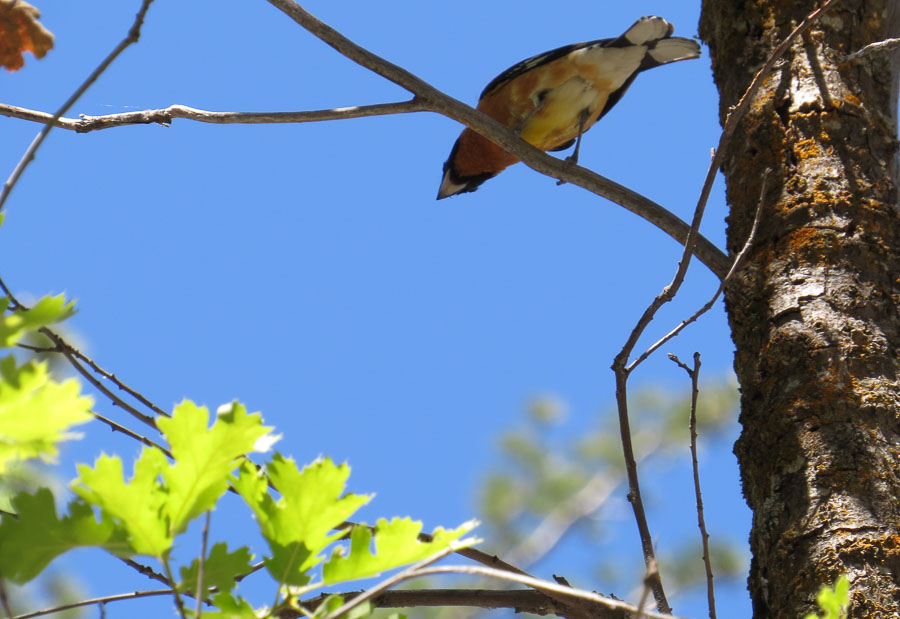
There was one instance, when the bird was just above my head and I got a good luck at its rump and underparts.


Black-headed grosbeak

Although the bird was skittish, it appeared to have a certain curiosity as it lingered in the area for a long time; in bird minutes!


Black-headed grosbeak

In the field it is hard to tell exactly how good the photographs are and whether or not there would be enough information to piece an identification together, but using all of the photos, I believe I was able to correctly ID the bird.

Let’s take a look….

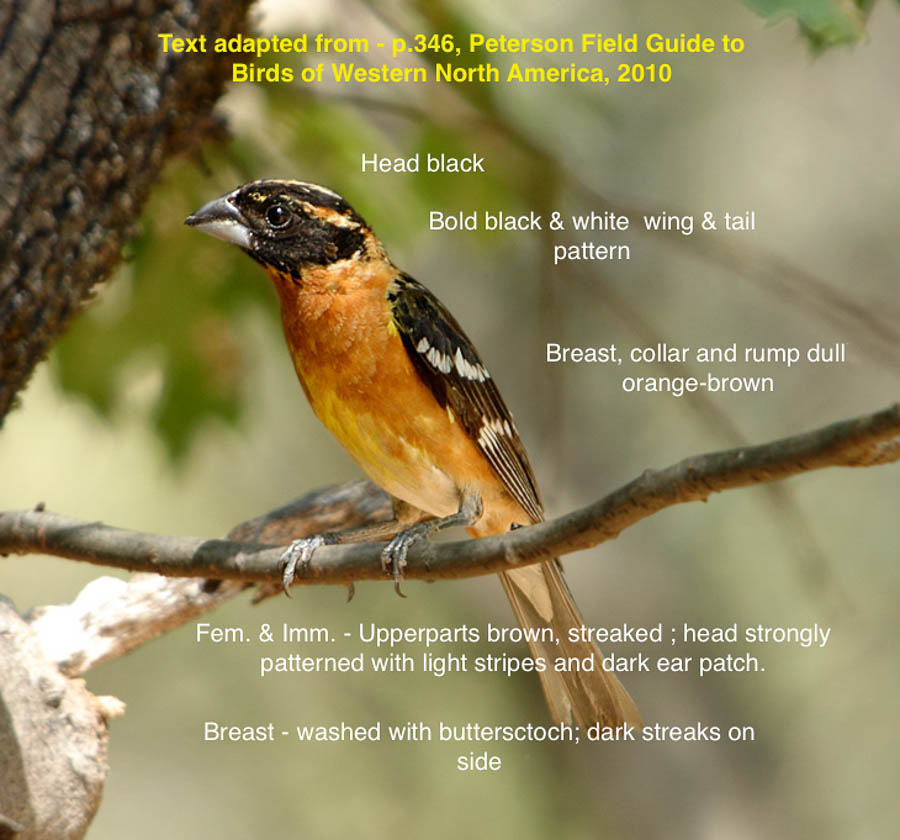
Using the Internet, I was able to find a few reference photographs. This was one of the better shots


Black-headed grosbeak
Photograph By Alan Vernon – Male Black headed grosbeak (Pheucticus melanocephalus)Uploaded by Snowmanradio, CC BY 2.0, https://commons.wikimedia.org/w/index.php?curid=12140735

NOTE – Text added by JBRish


Looking at my less than stellar photos, I was able to locate most of the same markings. For those new to birding, keep in mind that males and females often have different markings and colorations. I knew this wasn’t an oriole as I originally suspected primarily because of the shape of the beak. An oriole would have a much more pointed beak.

NOTE – This is why I like to take multiple photographs and work the identification at my leisure.

What are your thoughts? Leave them in the comment section below.

To read more JBRish.com posts about birds or birding, click HERE.


**********


All original content on this blog is copyrighted by Jeffrey B. Ross with ALL Rights Reserved. While reference links back to JBRish.com are appreciated and encouraged, please acquire approval for any reproduction of original content from this website.

©Jeffrey B. Ross – 2017


Photography and Birding: Good Photo, Bad Photo

Introduction

We were recently visiting Sequoia & Kings Canyon National Parks on one of our bi-yearly hiking vacations where we take to America’s beautiful national parks and spend a week or so hiking up and down mountains and admiring as many beautiful and natural areas as possible during the time we have set aside.

As stated on this blog before, I am an occasional bird watcher. For those who are just chiming in, I enjoy locating and identifying birds especially when I am in a new area. Here’s my problem…I am not a very well educated birder. I am a rank novice, but I don’t let that discourage me.

How I Bird

Here is my approach. A couple of years ago, I purchased a bridge camera with a long zoom lens. It has the equivalent of a 24-1200mm lens on a 35mm camera. That is a long zoom and it allows me to photograph birds at quite a distance. Truth must be told here…I can’t say this is a great camera. It is a good camera and certainly good enough for me. When I chose the Canon SX50 HS, it was a “cost-benefit” decision. In other words, it was a camera that had what I wanted at a price I thought was reasonable and I was willing to compromise a bit on picture quality.

That being said, it has done most of what I asked of it. The one thing I now know that I didn’t know before is that it has a relatively slow autofocus and doesn’t always select the object of my photographic desire. Even the best cameras, costing ten times more than my selection, have misfires as well.

OK, so let’s get to the meat of this post. I have my bridge camera and we are hiking through Zumwalt Meadow near Road’s End, Kings Canyon. BTW when they say Road’s End, they mean it. That is where the road ends!

The meadow was beautiful. We had some concern that parts of the Zumwalt Meadow trail would be under water, but we got lucky and the water at receded enough that we could complete the loop.

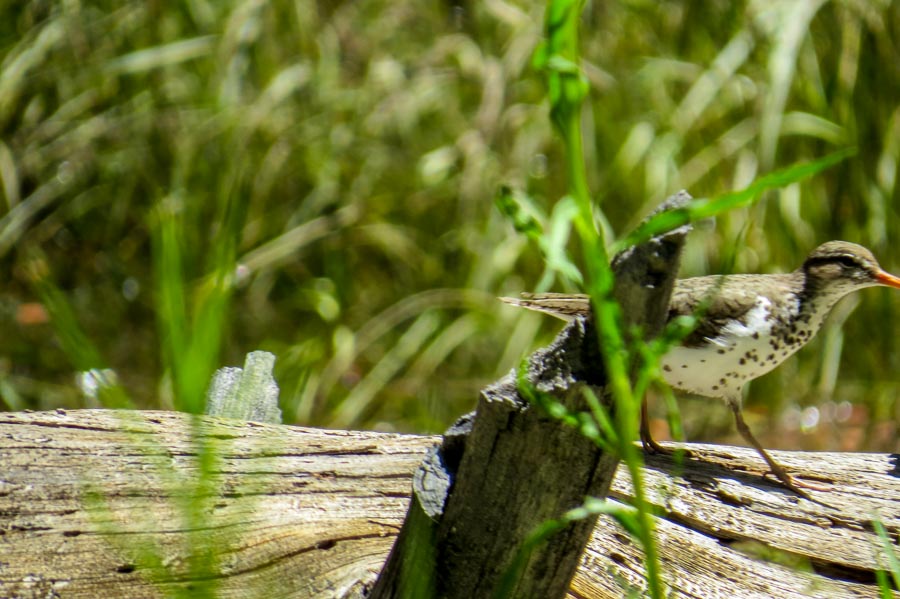
During our walk, shortly after we crossed the boardwalk portion, I saw a quick moving bird a distance away. Surprisingly, it looked like a shore bird that I would see on the coastline. What was it doing here?

I quickly got my SX50 HS ready and began to focus on the moving subject. I fired away and, at the time, I knew I was missing some of the shots because the focus was “hunting” for the bird, but I also knew it was getting some pictures of the bird.

Lucky for me, I was able to capture three photos that, added together, enabled me to identify the avian mystery.

WARNINING *** These photos are not of great quality. They are what I call “good enough.” I generally take time to compose and double check focus, etc., but with moving birds it is a bit difficult.

The Evidence

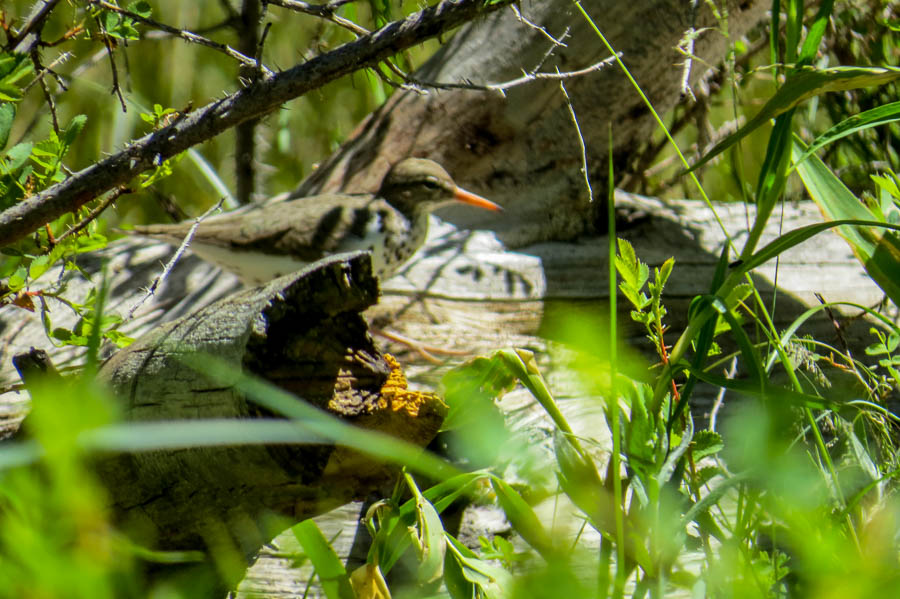
Here is the worst picture of them all.


Sandpiper Photo number 1
Spotted Sandpiper moving across a fallen log

As you will note from the photograph, there is a lot of debris between me and the bird. Now remember the camera is zoomed in so it is difficult to keep the bird in the viewfinder. If you ever tried to follow a bird or even find a stationary bird using a binocular, I think you will understand the problem.

The camera had a hard time deciding what was the area of focus. It appears the camera locked on the branch or broken part of the log as the main subject. I really can’t find fault with that. The bird was scurrying so there was no way for me to change the focus options at that point. This is a small version of the photo so it may look sharp to you, but the bird is not in focus.

My main goal in this situation is to get the pictures of the bird and worry about the details later. It doesn’t always work, but more often than not I have success (check out Photography – When is good enough, good enough? A bird story).


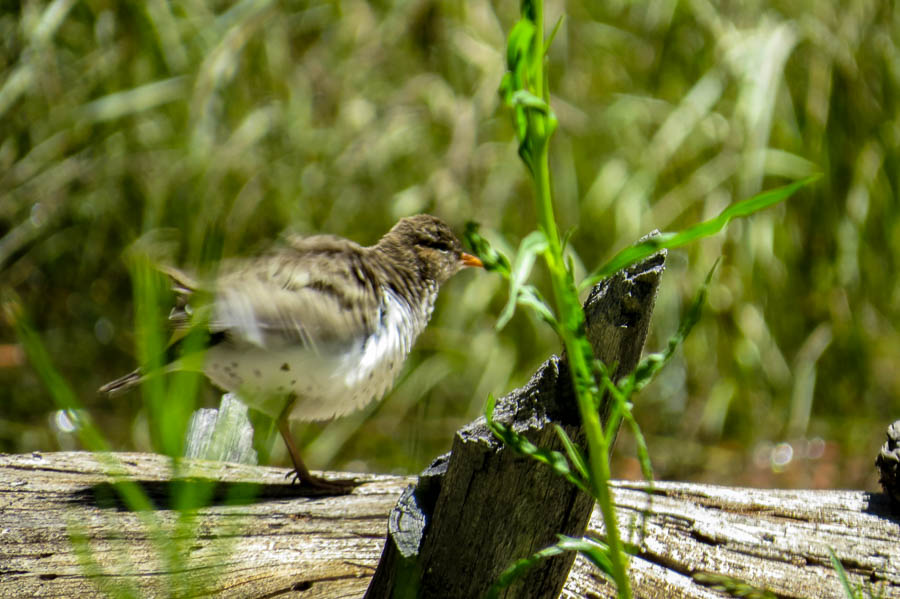
Spotted sandpiper picture number two
A photo of the Spotted Sandpiper just as it started to move its wings

The photo above is a bit better because more if it is in focus and the movement of the wings still leaves the head relatively clear.


Spotted sandpiper photo number three
This was the last photo I took in the sequence before the bird was totally hidden by the nearby foliage

This is perhaps the sharpest overall photograph I was able to capture of this particular bird. It is a shame that the sandpiper was slightly out of frame and the beak is only partially visible, but that’s the way it goes sometimes!

Please understand…I am not blaming the camera. I am not as skilled in using this equipment as I should be, but I do the best I can. That being said, when I added all three pictures together, I have a good idea of what this bird looks like.

Solving the Mystery

My modus operandi is to review my photos when I get home and then gather my bird identification books and a good piece of birding software – iBird Ultimate – to identify the mystery bird.

Let me say one thing about iBird Ultimate. This is a great program for someone like me. One of the major benefits is that the user can enter a geographic location in the United States and it will show which birds may be visiting at that time of the year. This helps to narrow the search.

Additionally, if you find a bird that looks like the potential subject, there are usually several additional photos to view which enables users to see a variety of views and variations for that particular bird.

Once I queued up my resources, I was easily able to determine this bird was a Spotted sandpiper. The last thing I do, which is much fun, is I take out my ABA North America birding list and mark off the bird as “seen.” Now I have one less bird to worry about although I will continue to seek a better photograph if the opportunity presents itself.

Read more about the Spotted Sandpiper HERE.


**********


All content on this blog is copyrighted by Jeffrey B. Ross with ALL Rights Reserved. While reference links back to JBRish.com are appreciated and encouraged, please acquire approval for any reproduction of original content from this website.

©Jeffrey B. Ross


JPEGs from Drab to Fab – Maybe

Full Disclosure: I am not a professional photographer. I like photography and it is a hobby. I am not an expert in either photography or post processing. Putting that aside, I do enjoy trying to capture the best photographs I can and to make them look as nice as possible using Adobe’s Lightroom and Google’s Nik Collection.

I didn’t have anything approaching a “real” DSLR until last year when I purchased a Nikon D3300. I was going to rent some Fuji gear, but it was less expensive at that time to make an outright purchase of the D3300. We were planning our trip to Yosemite National Park and the Sierra Nevada Mountains in California. I wasn’t ready to spend a couple of thousand dollars on camera equipment; at least not yet.

I currently own three cameras:

  • Canon PowerShot AS590 IS – This Camera is many years old, but keeps on ticking. It has been my companion whenever I go on a photographic expedition. It has an 8.0 megapixel CCD with 4x optical image-stabilized zoom.
  • Canon PowerShot SX50 HS – I purchased this camera for two reasons: 1) I wanted to see if I would enjoy shooting in the RAW format and doing post processing and 2) I wanted a camera with a lot of reach. This has a 50x optical zoom lens which, as Canon claims, goes from 24mm to 1200mm (35 mm equivalent). This is a step up from the AS590 above with 12.1 megapixels and it has helped with my bird identification hobby.
  • Nikon D3300 – This is my newest camera and comes closer to the full DSLR experience. I do enjoy this camera and I am still learning how to harness the full potential. It has a 24.2 Megapixel DX-format sensor and it came with the 18-55mm kit lens. It did as well as I expected during our trip to Bishop, CA and Yosemite National Park.

With the above out of the way, let me just say that I have a lot of fun turning images from “drab to fab” using Lightroom with Googles’s Nik Collection and doing some intermediate post processing. Let’s just look at one example from my least advanced camera, the Canon AS590.

We were hiking in Utah and on the way home, we stopped at the Grand Staircase–Escalante National Monument. It was a very gray day with rain threatening. The only camera I owned was my little Canon that was three years old at the time.

Assessing the weather we were having, we knew we had little time to explore so we parked the car on the side of one of the named trails, the Toadstool Trail, and began to walk toward several beautiful rock formations.

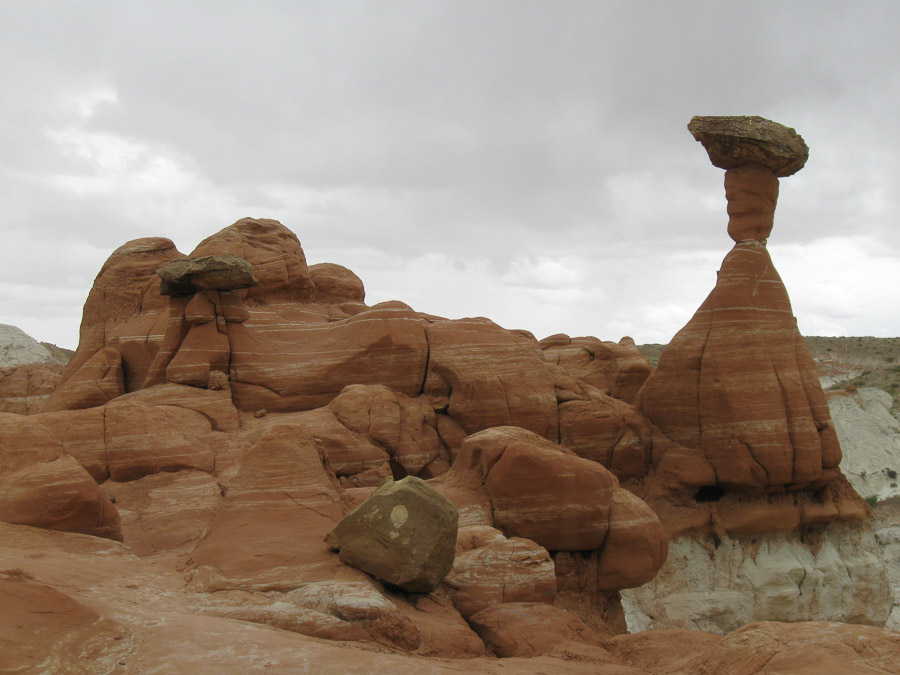
The toadstools are rock pillars with larger flatish rocks on top of them. Thus they look like (abstractly) toadstools. Below is one of the photographs that I took that day.

Unprocessed photo of the toadstoolsThis JPEG photograph was taken with an AS590 IS and is unprocessed
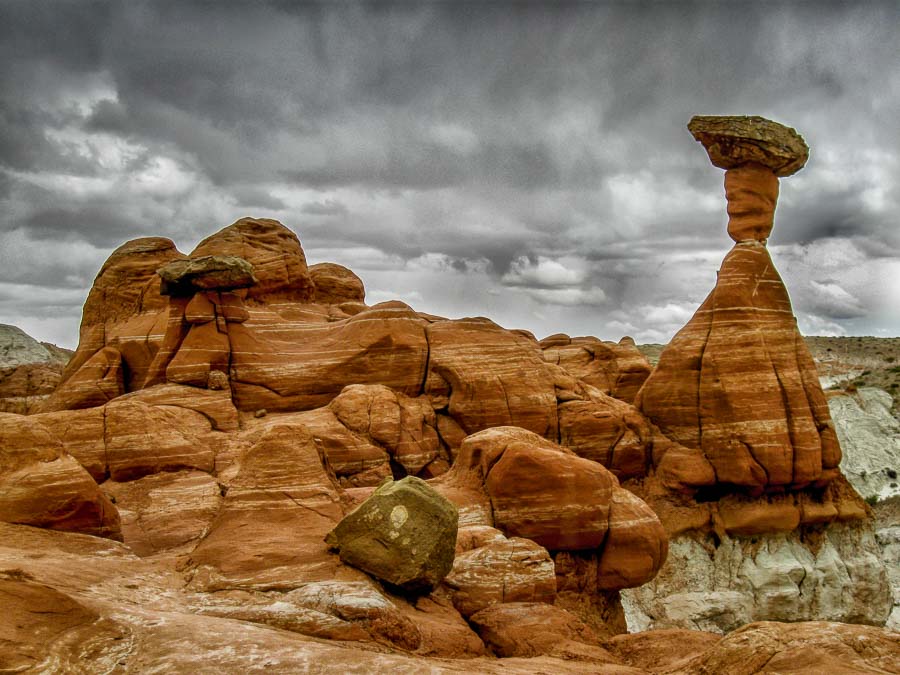
Understand that this is a JPG only image. It is straight out of camera (SOOC). If you read many of the punditori, they will tell you that there is not much that can be done with post processing and a JPG image and that may be true, but “not much” doesn’t mean that nothing can be done.

I upload all my images to Lightroom (LR) because it is a good cataloguing tool. When done correctly, it is easy to organize and then find any given photograph you have taken. I follow blogs of photographers who have hundreds of thousands of images indexed in LR. I have less than 10,000 photos in my LR catalog, but I am working on it.

When I took the photo above, the rocks appeared to have more red tones in them and there was much more contrast in the clouds. Unfortunately, my camera could not render all the nuances my eye was seeing. Although this is a JPEG image, I decided to process it as I would my RAW images.

This is the final image after doing some work in LR. This is closer to what I remember seeing. I have enhanced the colors and contrast, but that’s what I want…a more beautiful photograph.

Processed photograph of the toadstoolsThis is the same photograph as the one above with post processing done in Lightroom
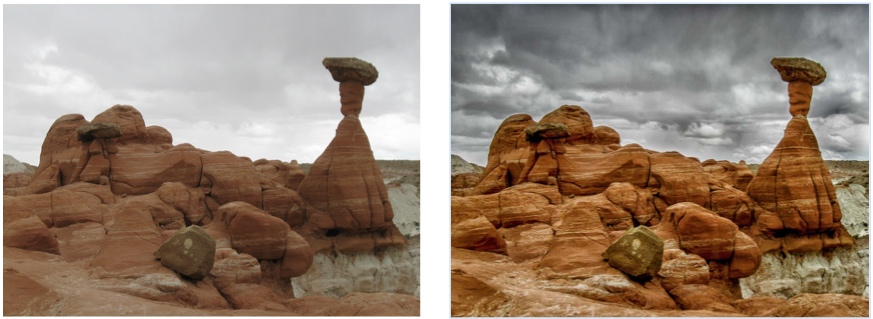
It is hard to compare the two photographs above when they are separated by the narrative. Although this will not provide much detail, the set of smaller images below should impart the basic idea.


Side by side Comparison of the two images aboveThis is a side-by-side comparison of the two images above
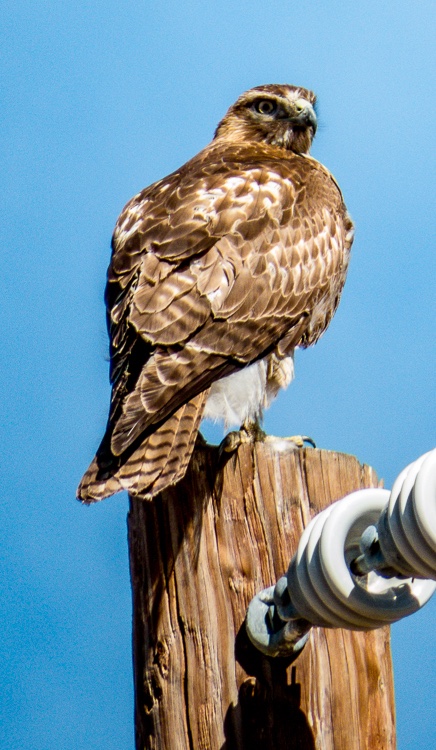
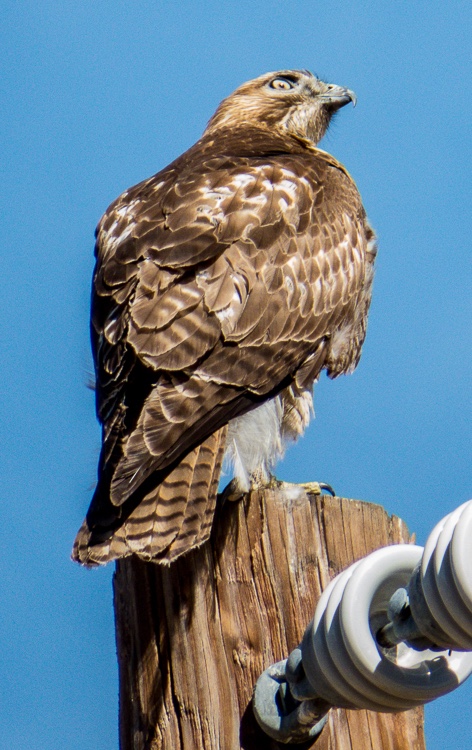
So…what do you think? Don’t you feel the photograph on the right is a more beautiful landscape than the shot on the left? Leave a comment or ask a question in the comment section.


JBRish.com originally published this post
All photographs are Copyright by Jeffrey B. Ross with ALL Rights Reserved

See previous Photography posts HERE

A Juvenile Red-tailed Hawk in the Desert

As followers of JBRish.com know, I live on the edge of the desert in North Phoenix only a few miles from Cave Creek, Arizona. As such, we have an interesting array of wildlife including many birds. One of my hobbies is trying to identify as many birds as possible when I can see them and/or capture them with a camera.

Today, a hawk landed on a telephone pole near the back corner of our yard. I have a Canon Powershot SX50 HS which has a very large zoom and allows me to get relatively close to birds even if they are far away. Since this bird was large, it made it just a bit easier.

I took these two pictures just before the hawk flew away.


juvenile Red-tailed Hawk


juvenile Red-tailed Hawk

It turned out to be a juvenile Red-tailed Hawk (Buteo jamaicensis)

What birds reside in your area?


JBRish.com originally published this post

To See More JBRish Bird Pictures Click Here

Hummingbird Banding and Study – SABO

During a recent weekend, my wife and I took four days to visit Sierra Vista and the surrounding area to do some hiking and birding. We enjoyed hiking in the Coronado National Memorial and nearby Brown Canyon. This area is a hotspot for bird watchers. Our Bed and Breakfast, Casa de San Pedro (CDSP), caters to nature enthusiasts and birding hobbyists.

Little did we know when we made our reservations, that on one of the days we would be visiting CDSP, there would be a hummingbird banding. This was exciting news indeed! I had no idea how they would go about capturing, assessing, banding and releasing these very tiny creatures. I was very interested to witness the process.

Humming Bird Evaluation and Banding

(photos are below the narrative)

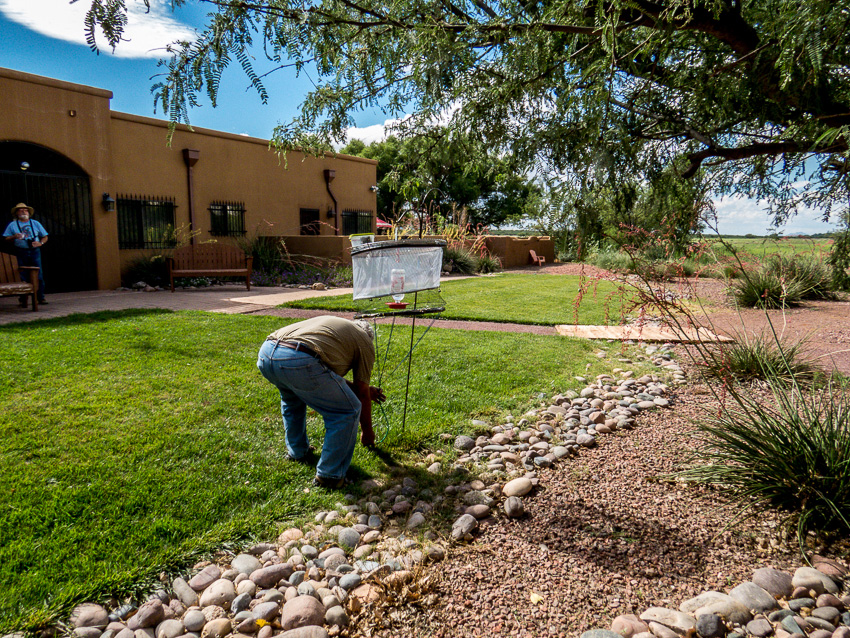
The first step is setting up the capture feeder is for one of the volunteers to place a capture net over the feeder.

SABO volunteer setting up capture net

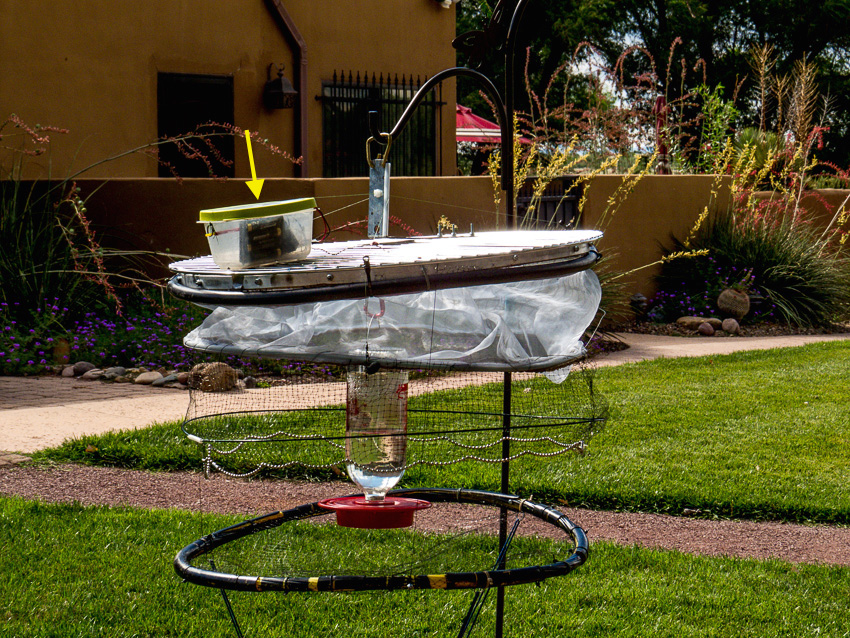
The top of the feeder has a battery-operated mechanism which uses remote control to drop the net. When the bird is at the feeder, i.e. inside the net area, the net is triggered. (yellow arrow points to battery compartment)

View of capture net and battery holder

The remote control device stands at the ready.

Remote control is ready to be triggered

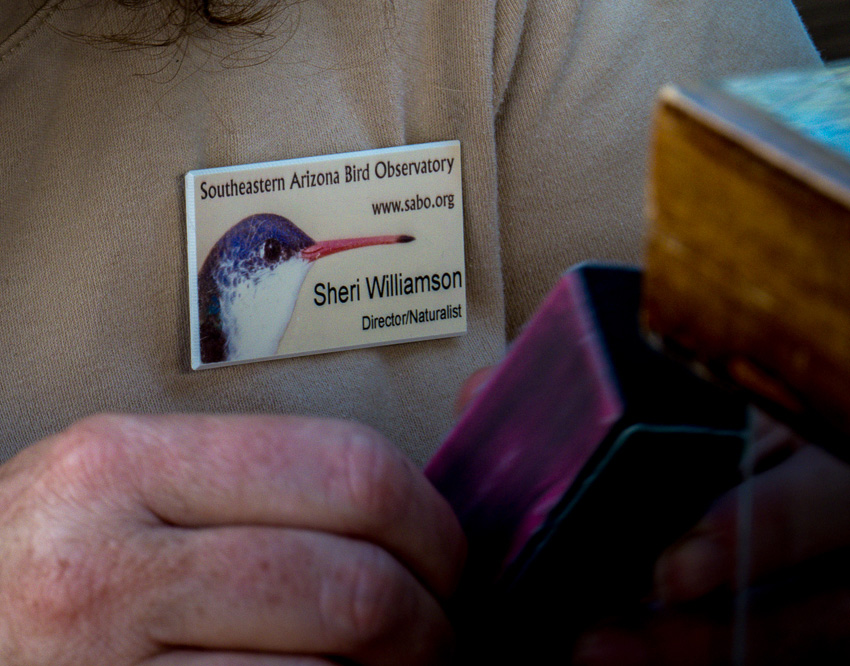
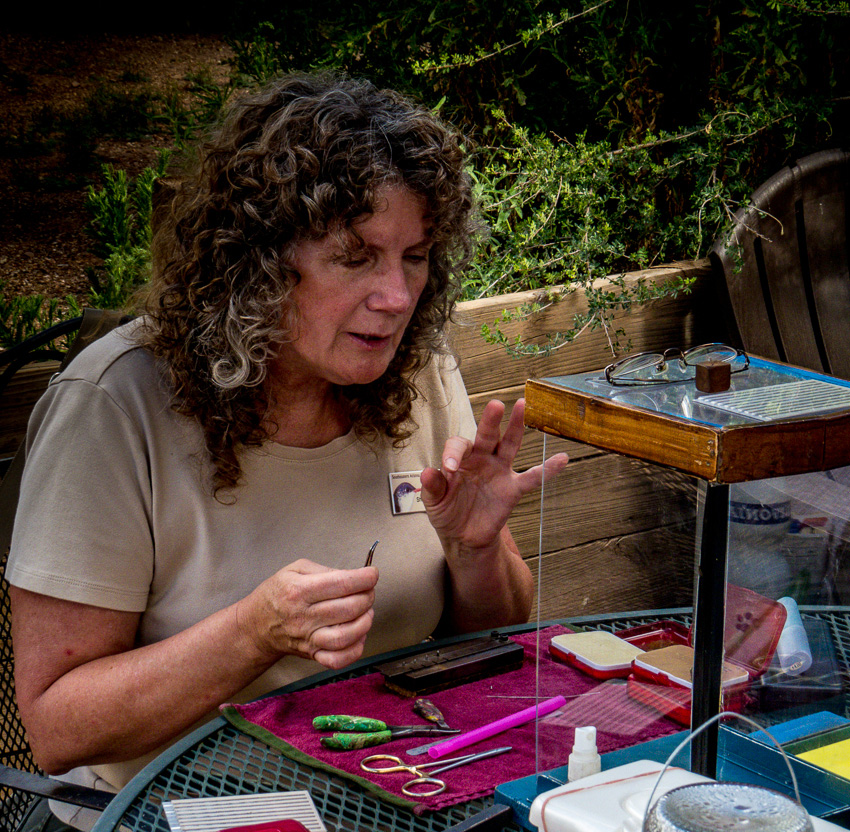
The Director of this program is Sheri Williamson, author of A Field Guide to Hummingbirds of North America (Peterson Field Guides)

Sheri Willaimson's name badge

Sheri Williamson explaining the process

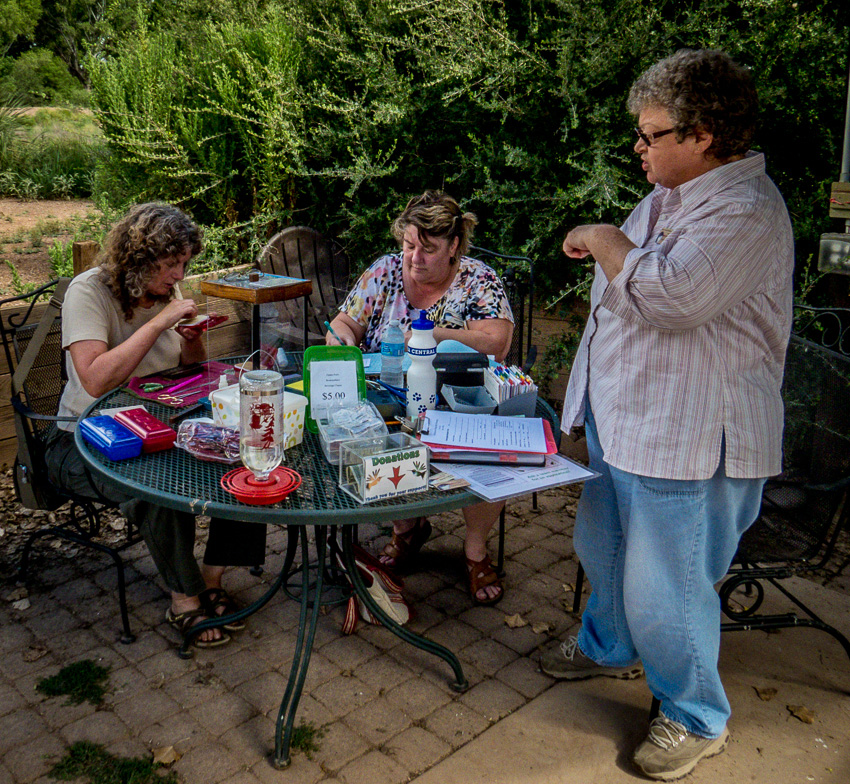
The banding was a collaborative effort. Volunteers worked to record specific data about each bird, collect donations from attendees, assist in transporting captured birds from the feeder area to the work station and finally safely releasing each bird.

Work table with SABO volunteers

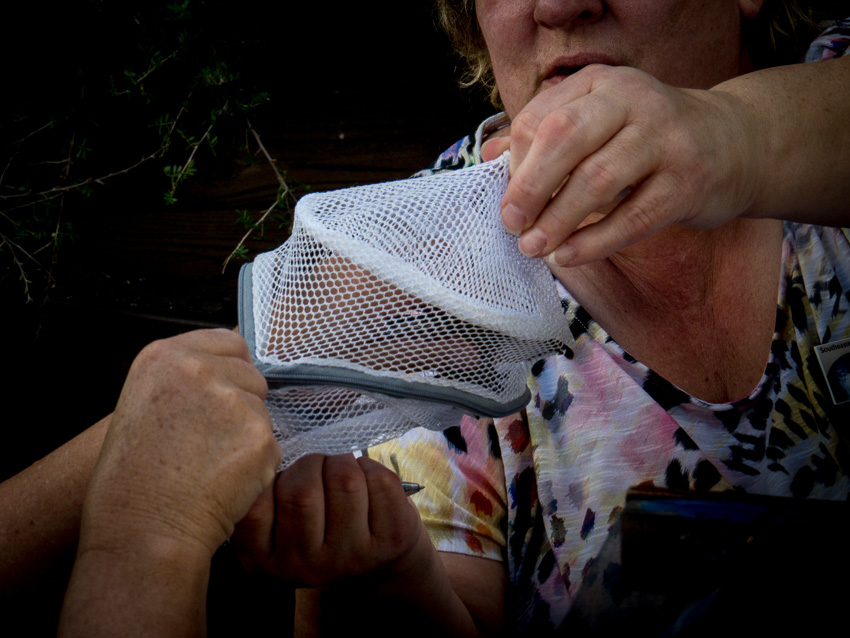
Once the net is dropped around the feeder, the bird is placed inside a laundry delicates holder to safely move it from one area of the field to another.

Captured bird in delicates bag

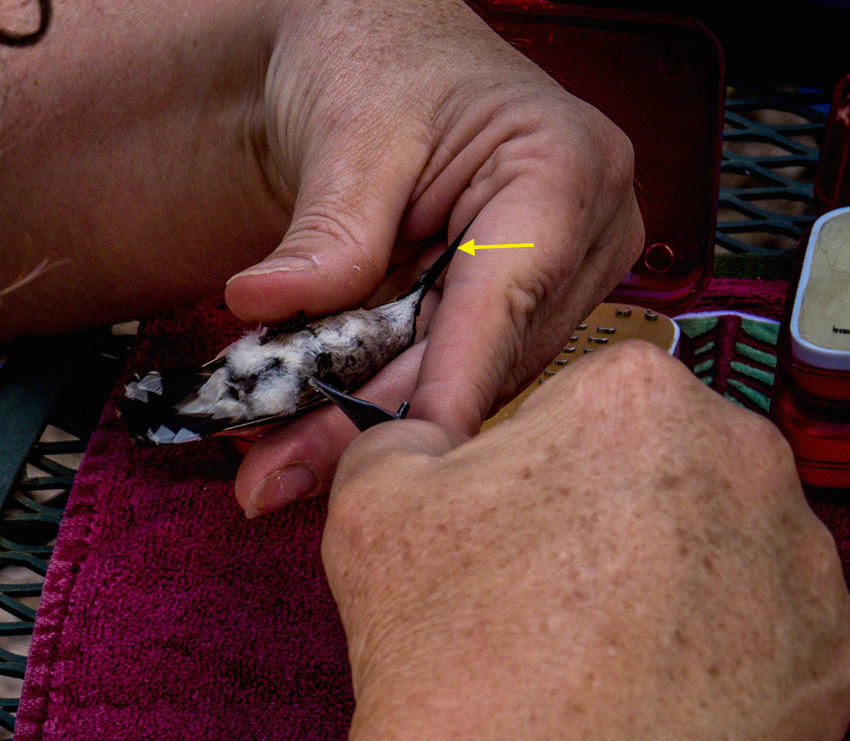
Sheri works to band a female Black-chinned Hummingbird. The yellow arrow points to the thin bird bill.

Assessing the bird

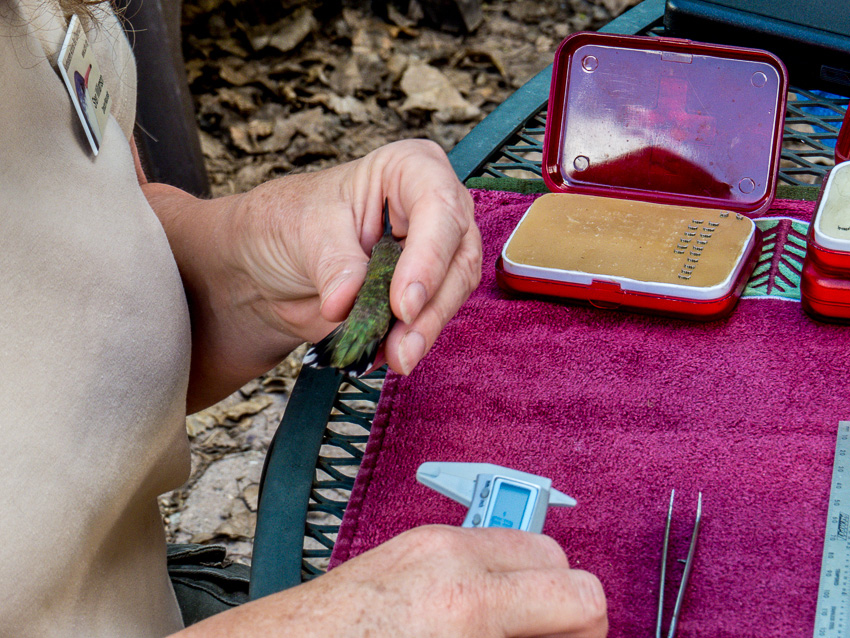
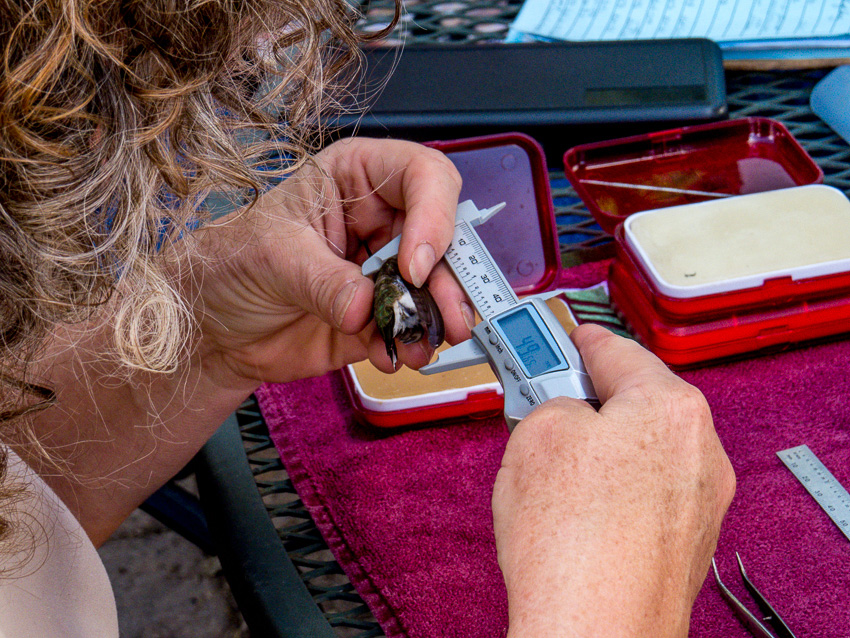
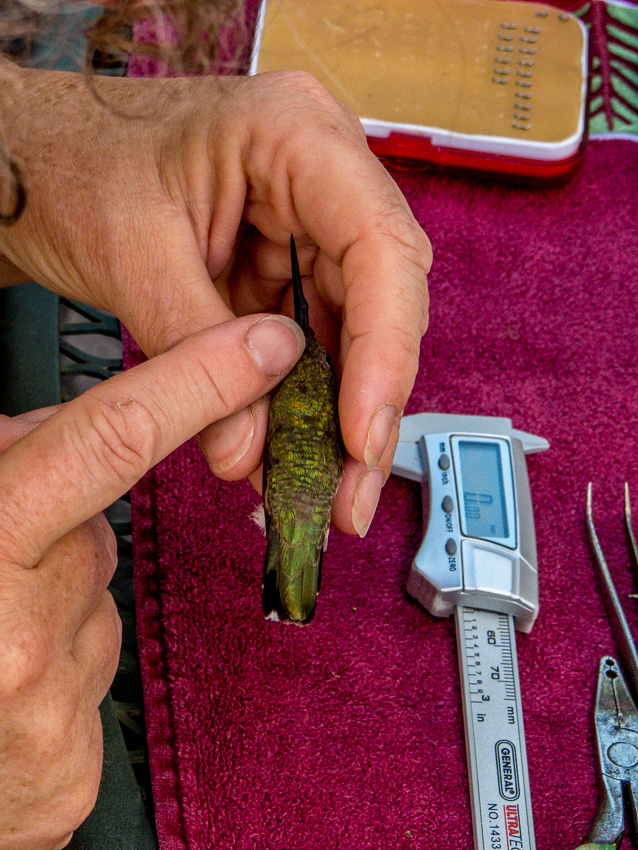
A variety of measurements were taken including the length of the bill, the length of the bird, the length of the wing, etc.

Measuring the bird

More measurements and assessment.

More measurements

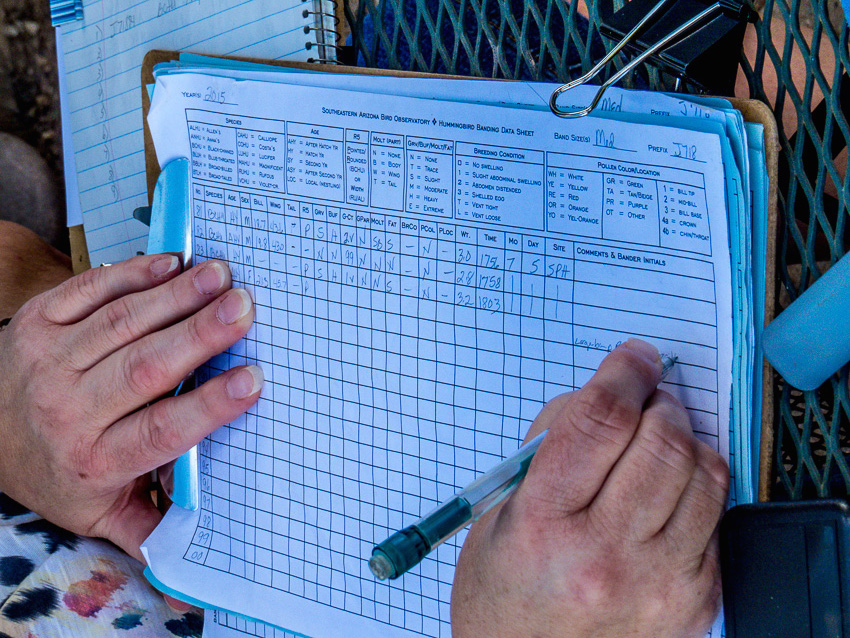
Here is a look at the record book (rotated to make it more legible (if zoomed in for a look).

Recording the data

Sheri explains the examination process. …According to SOBA’s website:

The band is applied to the bird’s “leg” (actually the tarsus, equivalent to the long bones in our feet) using specially made pliers. The fit is checked, then the bird’s vital statistics are recorded: species, age, sex, lengths of wing, tail, and bill, weight, plumage condition, molt (loss and replacement of feathers), amount of visible fat, pollen color (if visible) and location, signs of impending or recent egg laying in adult females, and any peculiarities such as scars, odd-colored feathers, or presence of parasites. Pollen may be collected for later identification to help us understand what natural resources the birds depend on during migration and nesting.

Explaining the procedure

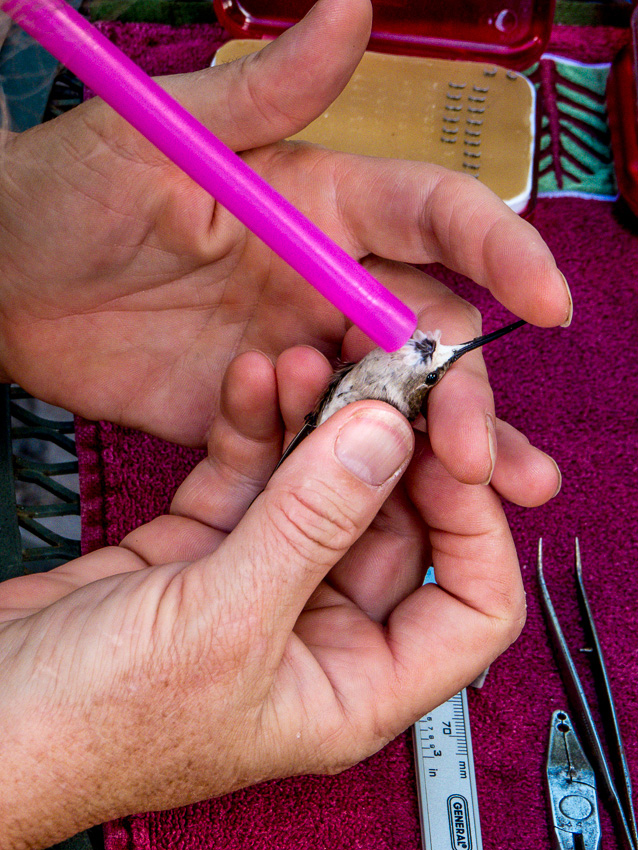
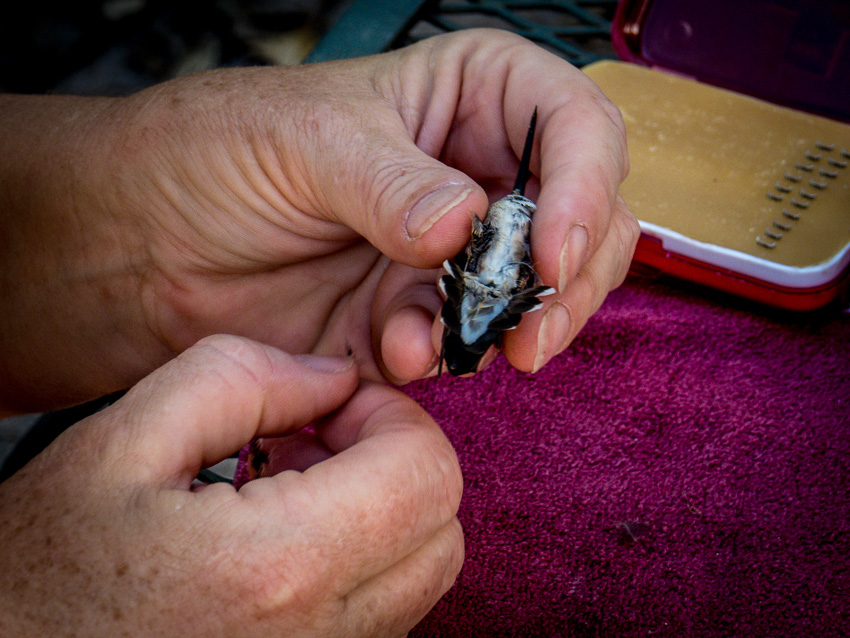
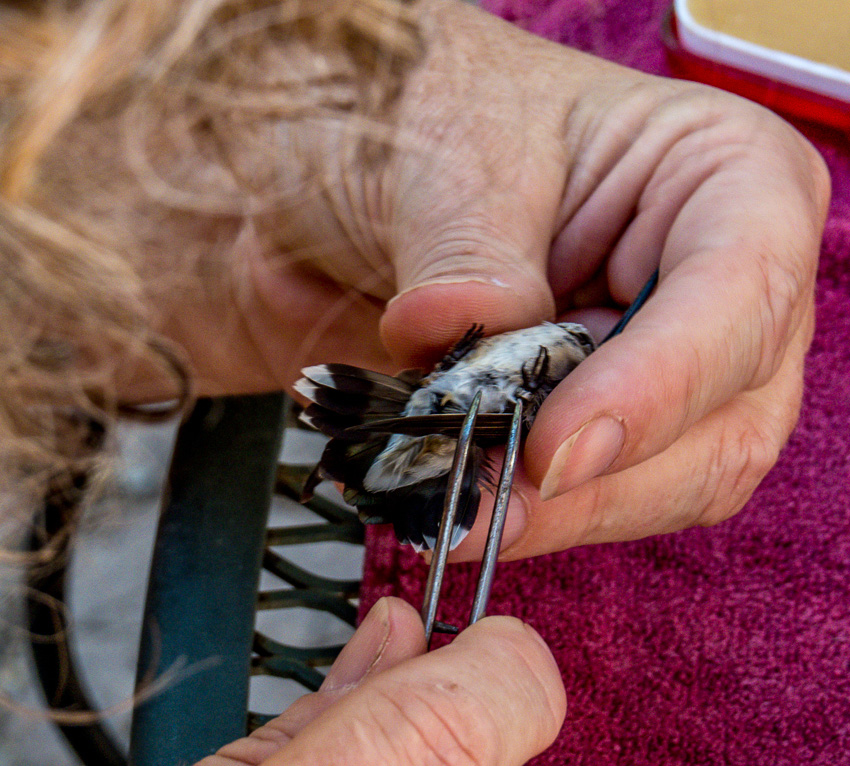
A straw is used to separate the feathers to check for parasites, evaluate plumage, etc.

Blowing through a straw to look under the feathers

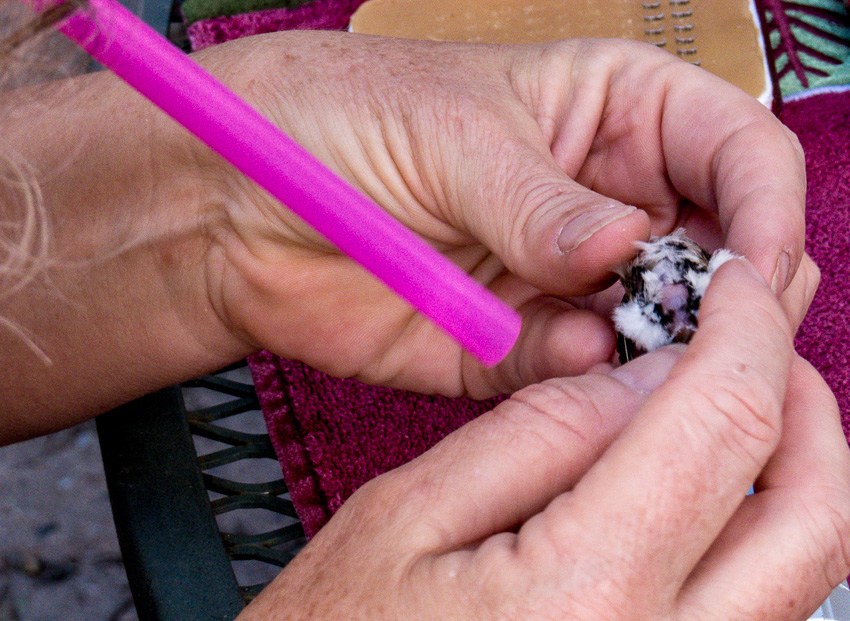
The female Black-chinned Hummingbird had an egg which could be seen through the translucent skin although it is not readily visible in the picture.

Female's underside had an egg visible

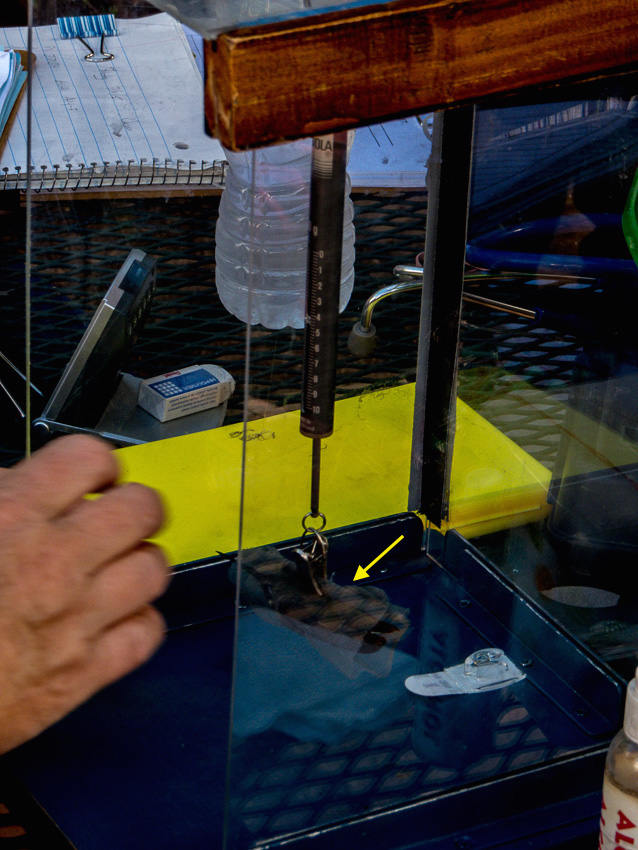
Each captured bird is weighed. These hummingbirds weighed between 3 – 3.5 grams; a fraction of an ounce. According to Wikipedia, a penny weighs 2.5 grams.

Weighing the bird

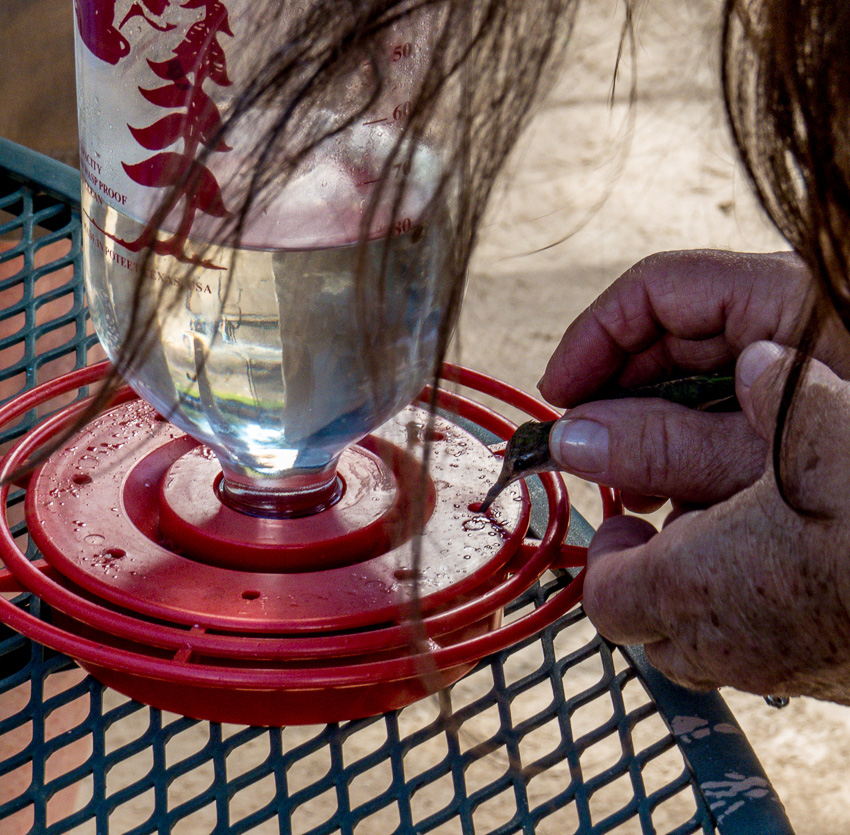
Before release, each bird is offered a drink for their journey back home.

Bird is offered a drink before release

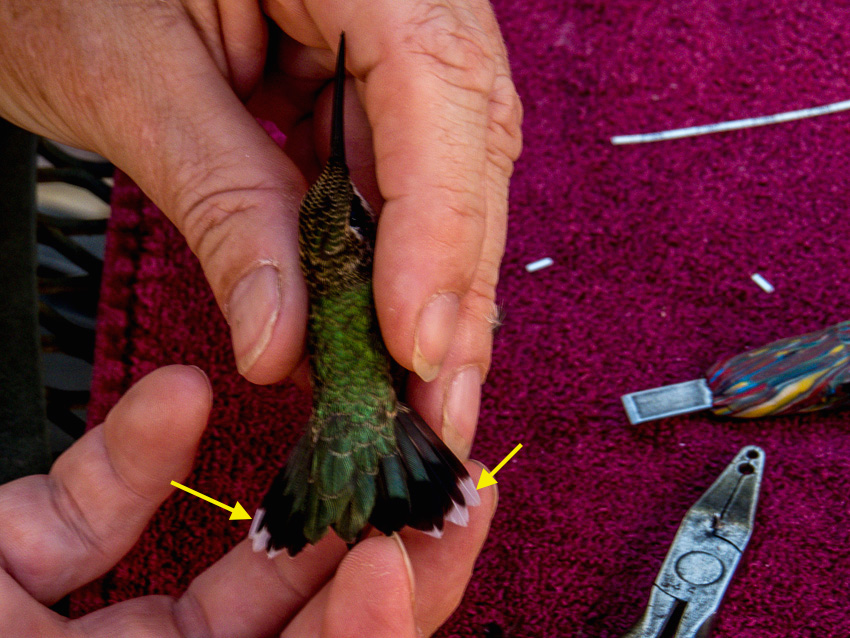
The second bird trapped was a male Black-chinned hummer. While it may be difficult to tell them apart, especially when upside down, the white tipped tail feathers are a reliable indicator.

Male Black-chinned hummingbird

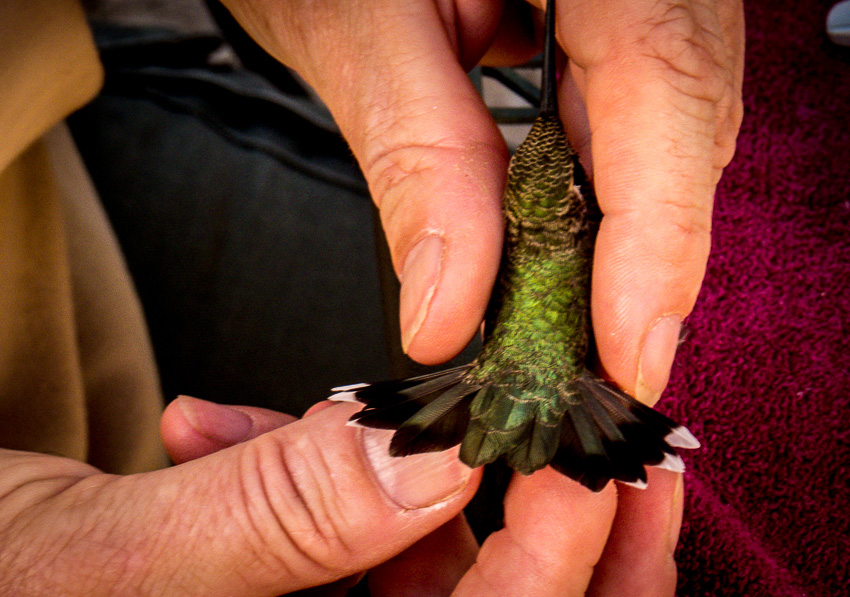
From above the bird, the feathers create a very obvious pattern and enhances the male plumage.
Male Black-chinned hummingbird feather pattern

Sheri Williamson shows admiring onlookers the beautiful feather patterns of this male Black-chinned hummingbird.

Another view of the male Black-chinned hummingbird tail feather pattern

Sheri checks the band on this bird to assure that it is loose enough to be comfortable.

Checking the ID band for fit

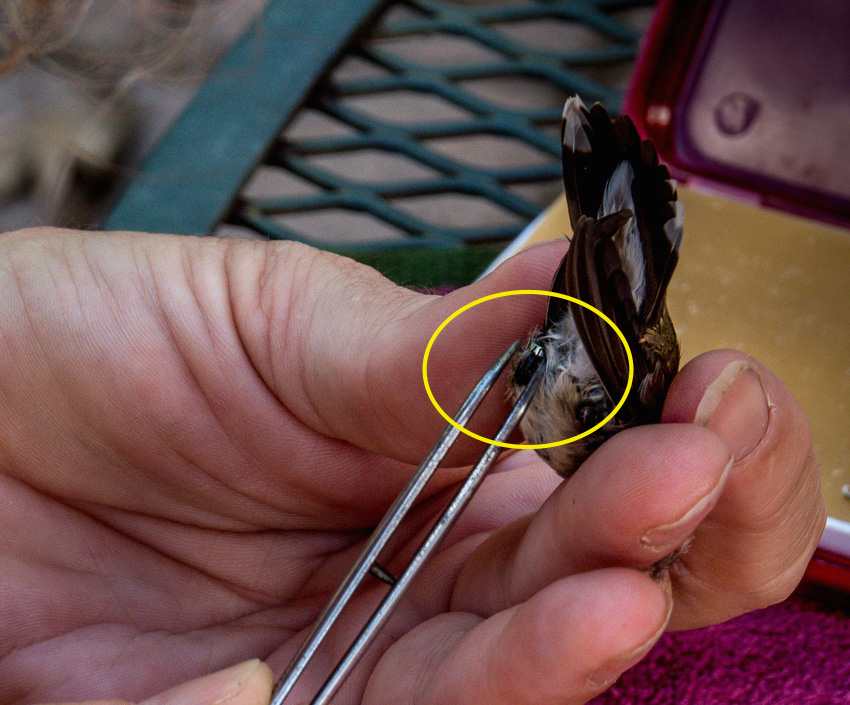
The small band is encircled in this photo.

ID Band is very small

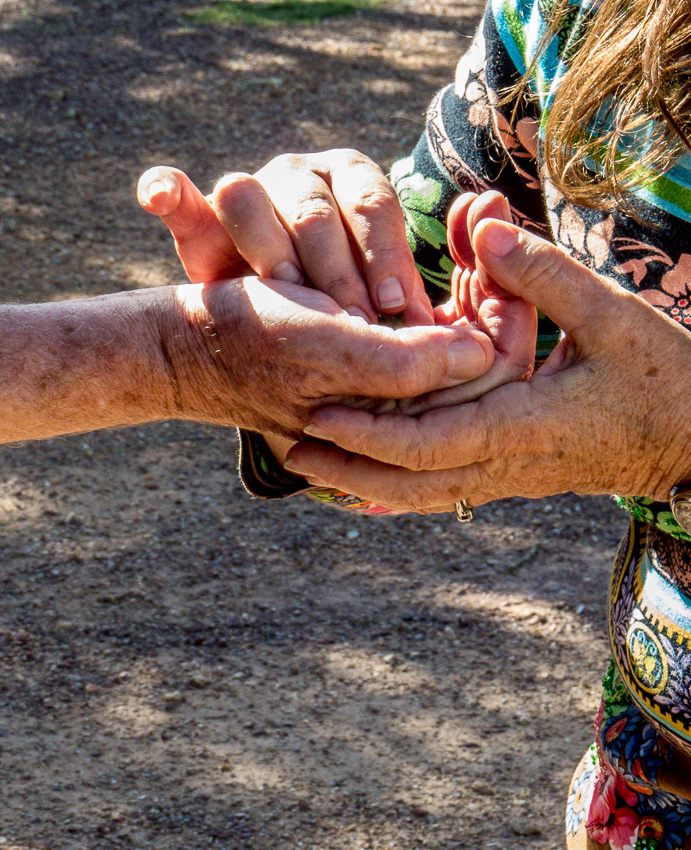
Banding attendees are offered an opportunity to release a bird. The bird is very carefully placed in a hand and…

A bird in the hand prior to release

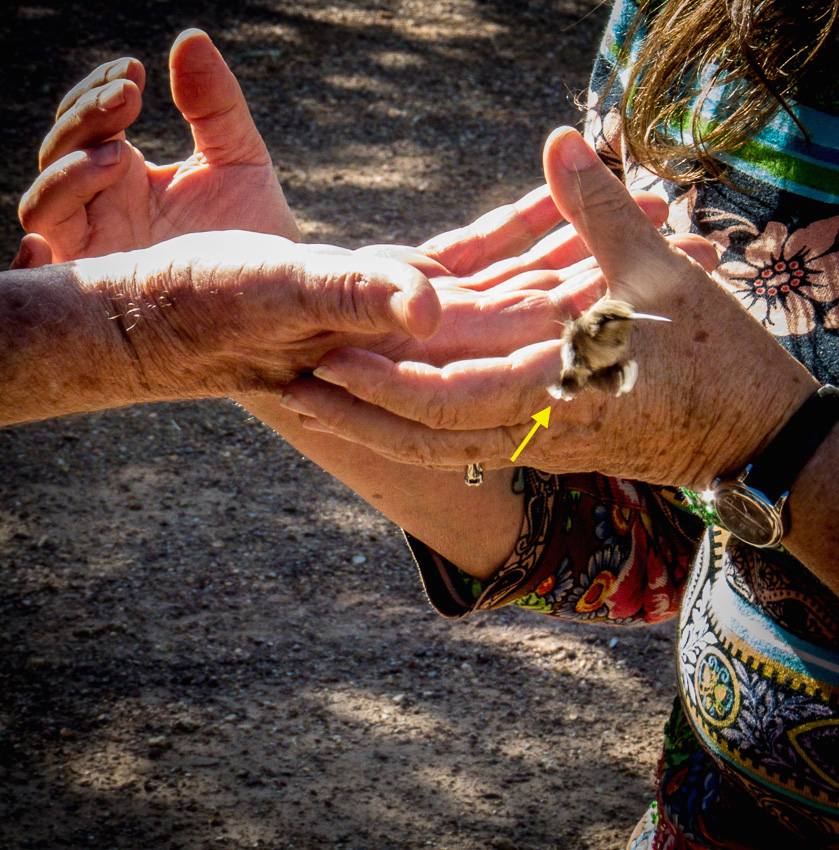
then released (yellow arrow points to the bird)

Hummingbird being released

Read More:

Southeastern Arizona Bird Observatory

Southeastern Arizona Bird Observatory Hummingbird banding page

Sheri L. Williamson’s Website


.JBRish.com originally published this post

Lightroom 6 First Panorama – Las Cruces, NM

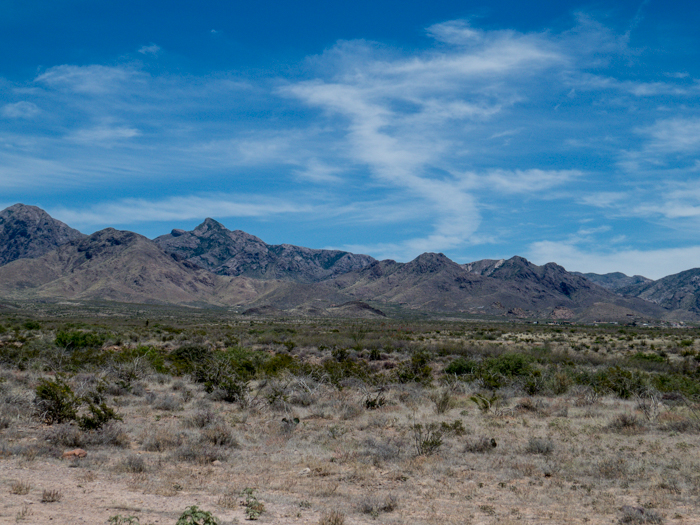
Readers of my blog may have noticed that I enjoy the outdoors, hiking, birding, etc. My wife and I were recently hiking in the recently created Organ Mountain-Desert Peaks National Monument in Las Cruces, New Mexico.

There were many excellent sightings that I hope to write about in the future, but for now I want to tell you about my very first attempt at creating a Panorama using Lightroom 6.

I have only been using LR for less than a year and I have been making progress in learning about the various tools. When LR 6 arrived with “built-in” panorama creation tools, I couldn’t wait to try it.

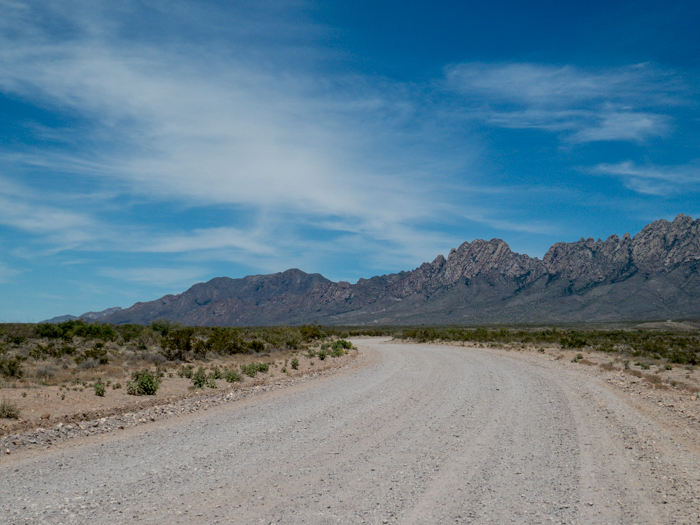
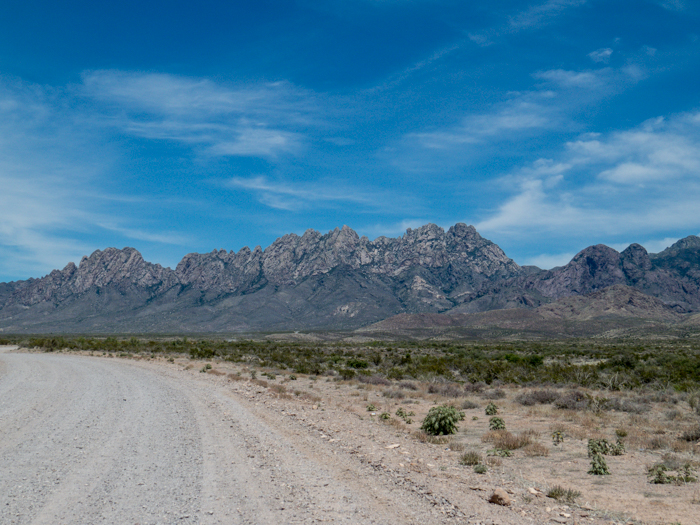
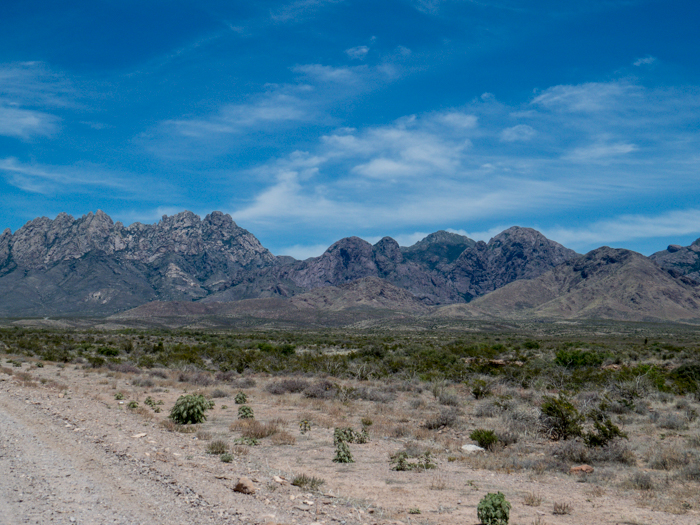
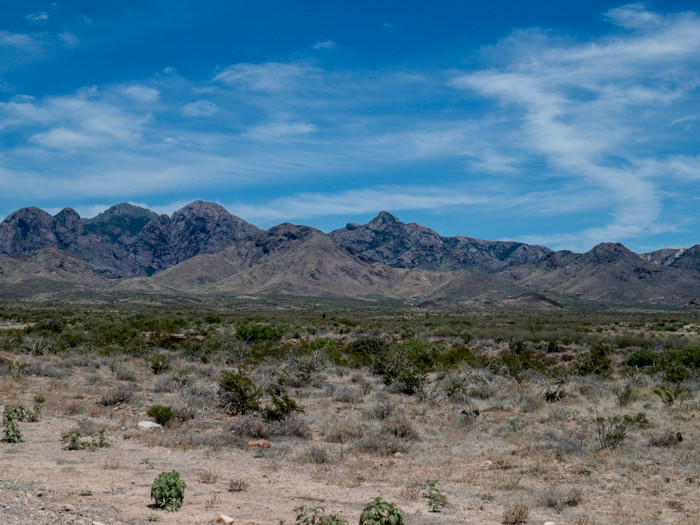
The Organ Mountains are very large and cannot be captured easily in one shot so I decided to create a Panorama.

I took the following seven pictures with hopes of being able to “stitch” them together using LR.

Organ Mountains, Las Cruces, NM - Panorama Picture 1

Organ Mountains, Las Cruces, NM - Panorama Picture 2

Organ Mountains, Las Cruces, NM - Panorama Picture 3

Organ Mountains, Las Cruces, NM - Panorama Picture 4

Organ Mountains, Las Cruces, NM - Panorama Picture 5

Organ Mountains, Las Cruces, NM - Panorama Picture 6

Organ Mountains, Las Cruces, NM - Panorama Picture 7

I wasn’t sure exactly how to accomplish this task so I searched online and found Julieanne Kost’s blog post about it. She is an excellent and gifted instructor. I have used several of her videos before. If you are interested, you can watch her video below:

I heard that when doing a panorama, one should have about a 30% overlap and although I wasn’t too exact about this, I took a guestimation as I captured the various pictures while moving my camera as level as I could across the distant view.

Here is the final result via a thumbnail-ish rendering.

Organ Mountains, Las Cruces, NM - Panorama

You can see a large-sized image here at the link below:

Organ Mountains, Las Cruces, NM

The image needs a bit more editing, perhaps reducing the “noise” in the sky, etc., but I am pleased with my first attempt. Are you encouraged to try creating a panorama?

Birds at the Gilbert Water Ranch – 20150412 – Part 1

I awoke at 3:30am this morning to prepare for my “bird watch” outing at the Gilbert Water Ranch in Gilbert, Arizona. We had to be at the park by 6am and my wife and I were going to car pool with a person we had never met so we needed to be on time. Their home was 22-25 minutes away and they wanted to leave at 5:25. Of course I needed my requisite cup(s) of coffee and I also needed to get my STATUS QUOtes out to my mailing list.

[Self promotion here: If you like quotes, really good quotes, check out my STATUS QUOTes posted daily on this blog. Click here – STATUS QUOTes– to view the entire category.]

In any event, all went smoothly and we met up with our tour guide, Kathe, and proceeded to the Gilbert Water Ranch arriving on schedule. We saw a good number of birds this day. I might also mention that this is a transition time for birds in our area and some are moving out while less are moving in ahead of the long, hot summer days.

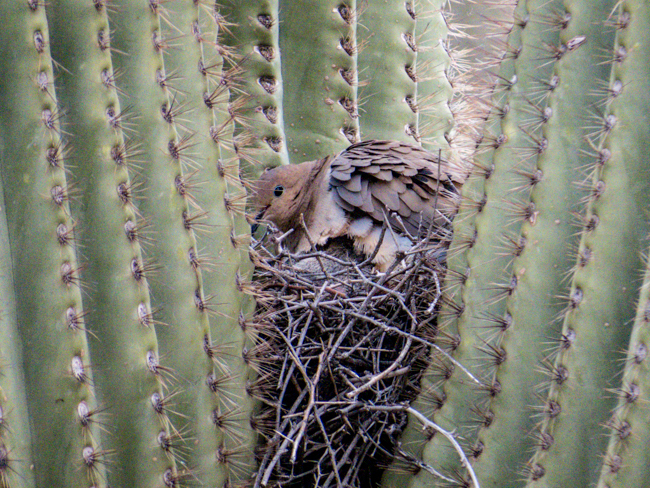
As we started our tour, a some birds already on my seen list were spotted. The first new-ish experience for me was a Mourning Dove in the crook of a Saguaro cactus. I have seen many Mourning Doves, but not in the arms of a Saguaro! Most likely this was a nest built by a Curve-billed Thrasher and usurped by the dove.
Mourning Dove in Saguaro Cactus Nest

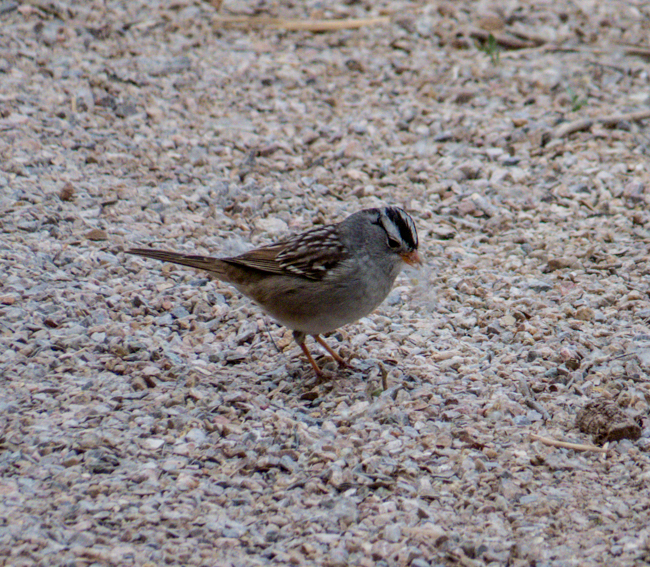
As we walked along the paths meandering through the reclamation ponds, we came across a white-crowned Sparrow. I am sure I had seen these before, but never noted it so this was a new entry on my list.

white-crowned sparrow

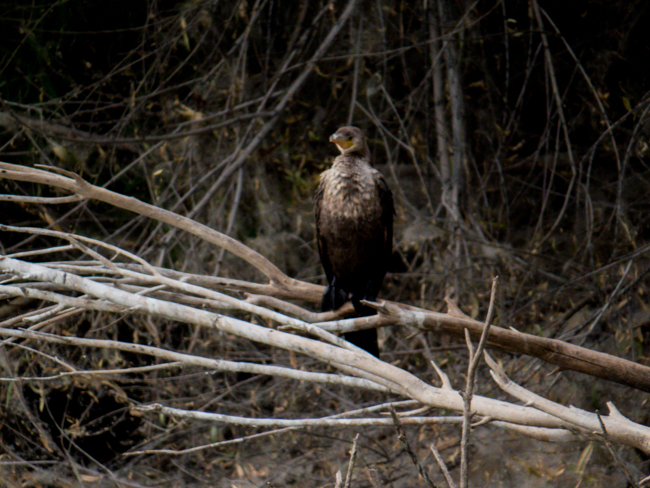
Even though this is the desert, we do have riparian and oasis-type areas that draw water birds. One such resident this day was the Neotropic Cormorant.

Neotropical Cormorant

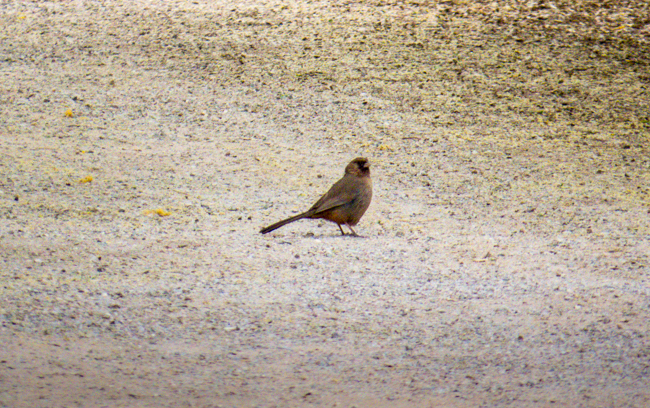
Walking on the path ahead of us was an Abert’s Towhee.

Disclaimer here: There wasn’t much light early on the walk because it was cloudy. My Superzoom really needs a lot of light to render crisp, clear shots so this may be a bit “fuzzy,” but certainly good enough for my bird-spotting history.

Abert's Towhee

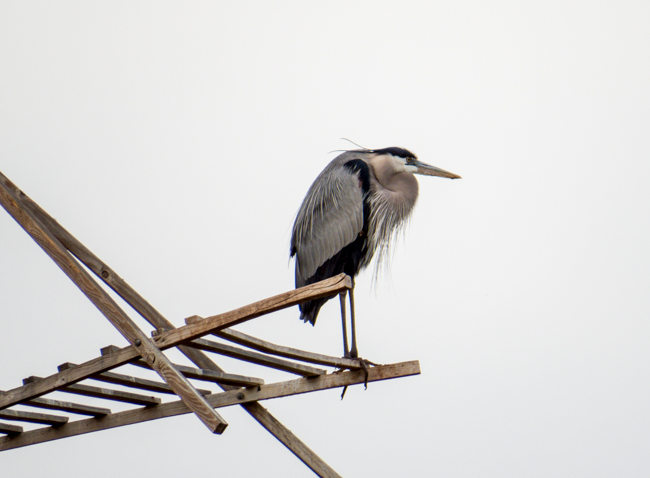
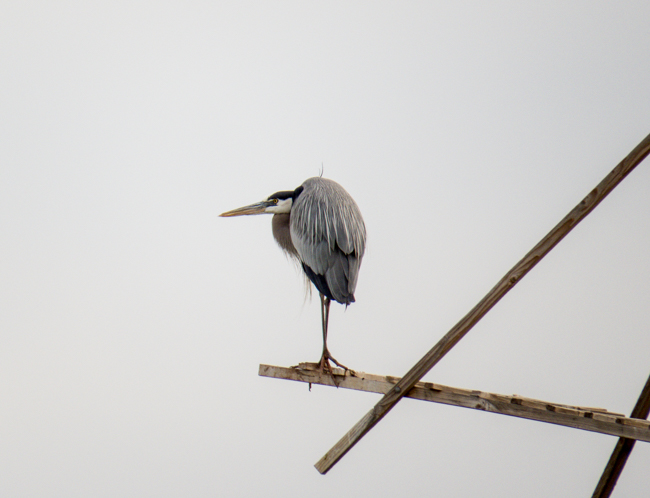
There were several sightings of Great Blue Herons. This particular bird remained perched on a man-made platform for some time so we could get a clear picture.

Great Blue Heron

Great Blue Heron

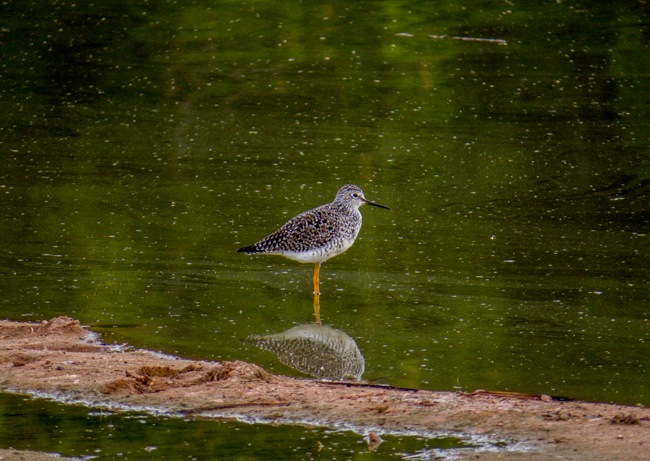
When we came to the bird below, there was some discussion whether this was a Lesser Yellowlegs or a Greater Yellowlegs. For those non-birders, this is what we do! After referring to the the Sibley Field Guide and a brief debate, it was decided that based on the size of the bird and markings, it was a Lesser Yellowlegs.

Lesser Yellowlegs

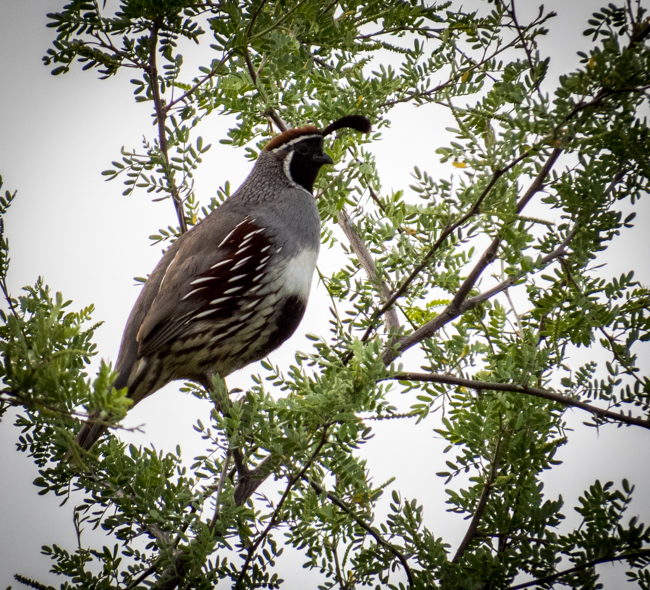
As I might have mentioned in one of my previous posts somewhere on this blog and most certainly on my previous Internet persona, Gardening on the Moon, we live on the edge of the desert and one bird we have in large numbers is the Gambel’s Quail. These birds are round and not exactly aerodynamic and thus they would rather walk or run than fly. Approaching them in a car often causes them to scurry ahead, but when forced, they do take to the air. It is unusual to spot them perched high in a tree as the bird below was spotted posing for its closeup.

TGambel's Quail

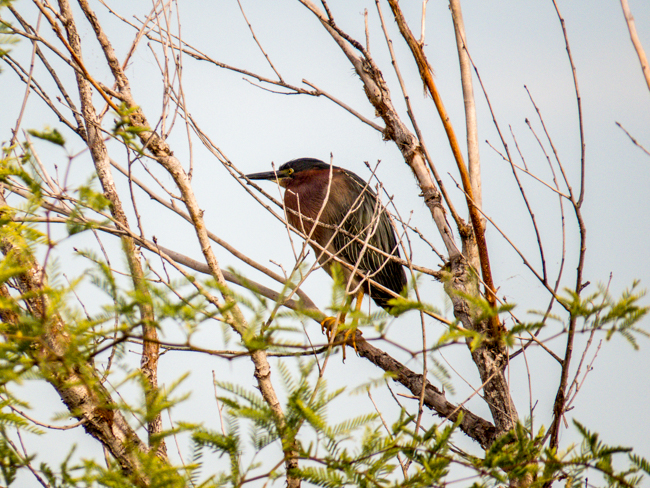
The last bird I will present today is a Green Heron. It is an unusual name for a majestic bird that doesn’t actually contain much green anywhere in its plumage! Supposedly under certain conditions, it has a blue-green “gloss.”

Green Heron

We saw a good many other birds this day and I will post our other sightings soon. Until then, I hope you have enjoyed following me along my birding journey.