Photography Quote — 20170904

Today’s Photography Quote


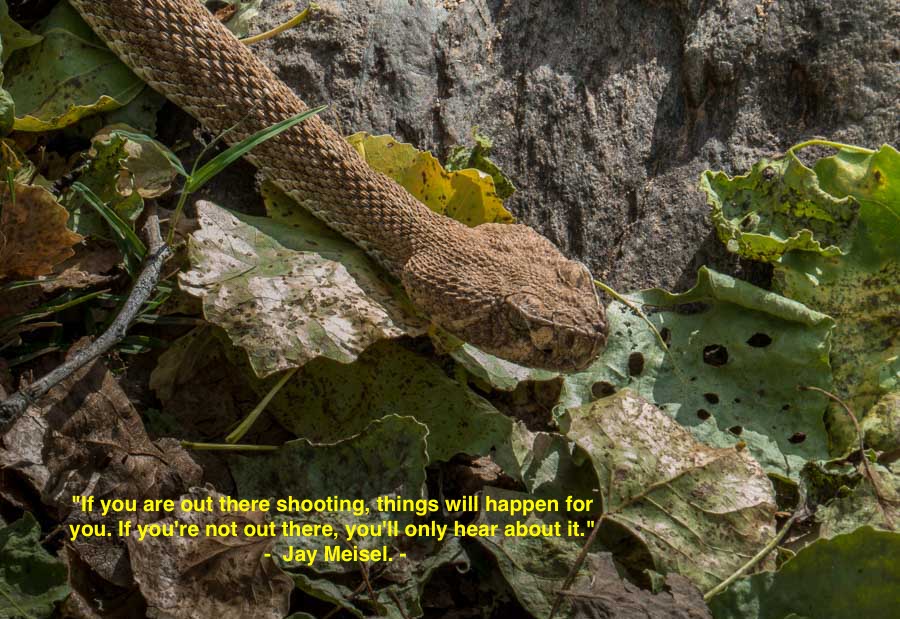
“If you are out there shooting, things will happen for you. If you’re not out there, you’ll only hear about it.”
– Jay Meisel
– Original Photograph ©Jeffrey B. Ross –


NOTE – As residents of the Sonoran Desert who like hiking, encountering snakes is nothing new for us. This photograph was taken in Cave Creek, AZ along one of the trails at the Jewel of the Creek preserve. shortly after this sighting, we came across another rattlesnake and turned back because we had young children with u.s

Jay Meisel’s quote reminds us that if you are interested in photography, you have to be out there taking pictures to find interesting subjects and events.

***********************************

Photo Meta Data

File Name: IMG_1960.CR2
Capture time: 3:13 PM
Capture date: March 30, 2015
Exposure: 1/500 @ f5.6
Focal Length: 83.27mm
ISO: 200
Canon Powershot SX50 HS

*Edited: Lightroom with text added in Preview (Apple Software)

 
See previous STATUS QUOtes Photography Quotes HERE


**********


All content on this blog is copyrighted by Jeffrey B. Ross with ALL Rights Reserved. While reference links back to JBRish.com are appreciated and encouraged, please acquire approval for any reproduction of original content from this website.

©Jeffrey B. Ross – 2017


otographs

Fuji X T-2: Making the Lens Cap

Stay Put on the Kit Lens

Some say TO-MATE-TO and some say TOM-AT-TOE so I guess it is whatever one is accustomed to that really counts; at least to them. I do a lot of hiking photography. You know the type – mountains, lakes, waterfalls, paths, bridges, streams, animals, etc. Because I am on the move a lot and the trails can be very dusty, I keep my lens cap on the lens when I am not actually taking photographs.

There have been several times when I have had to backtrack on the trail to find my lens cap and one time, another hiker was kind enough to retrieve it for me when I didn’t realize right away that I had lost it. He had picked it up along the way and handed it to me!

Do you like a tethered lens cap or do you prefer to have it totally removable?

Since I want to take it off and replace it when done, I like to have it tethered because most lens caps/covers don’t stay on the lens that well. With all the technology and innovation taking place, one would figure this problem would have been solved by now.

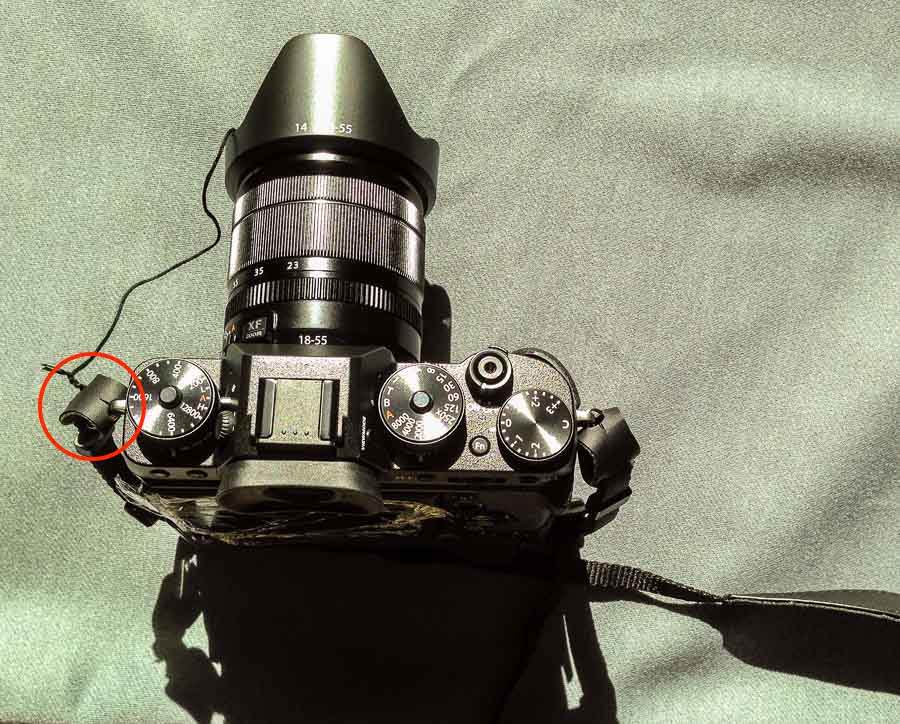
My new Fuji X T-2 does not have a tethered lens cap AND the lens cap does not easily stay put on my 18-55mm kit lens. Add the lens hood (more about that later) and it is even harder to get that cap to hunker down. I decided to do what I did with my Nikon D3300 and create my own tether.


Fuji X T-2 lens cap

Fuji X T-2 lens cap

This is my procedure for attaching my lens cap so that it does not get lost:


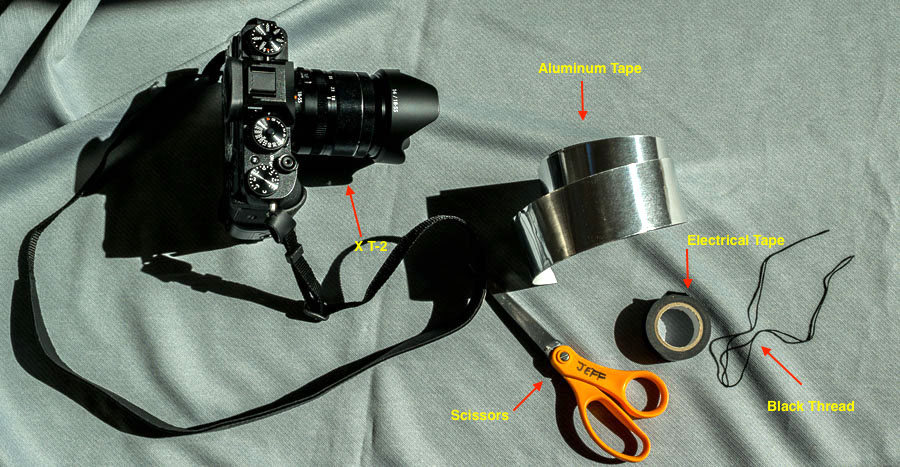
Supplies needed to tether the lens cap

  • Get some relatively thick black thread.
  • Take a piece of strong tape. I use tape that is designed to be put on metal chimney flues so you can understand that it has a rather strong adhesive and it can stand the heat! This is sometimes referred to as aluminum tape.


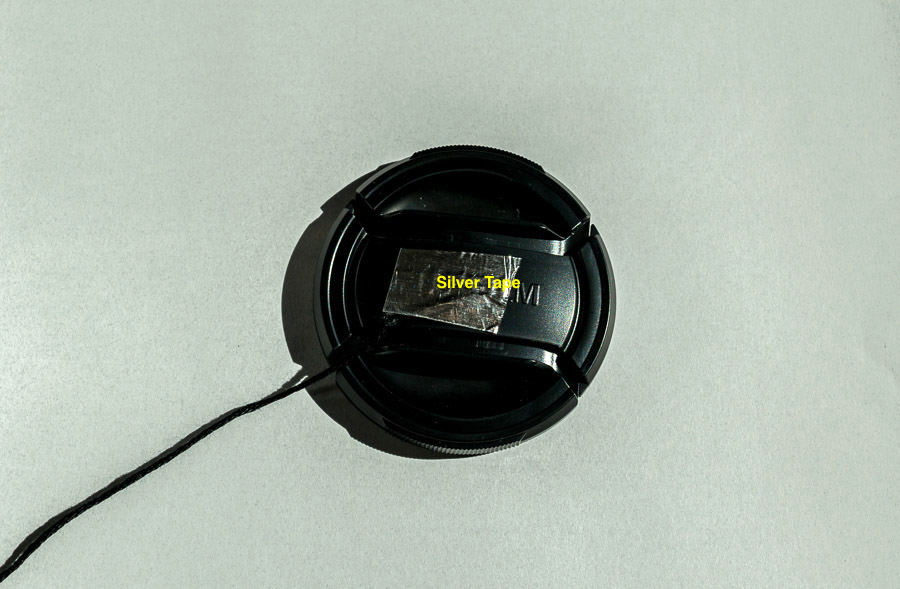
Thick black thread attached to lens cap
Thick black thread attached to lens cap with aluminum tape (silver)

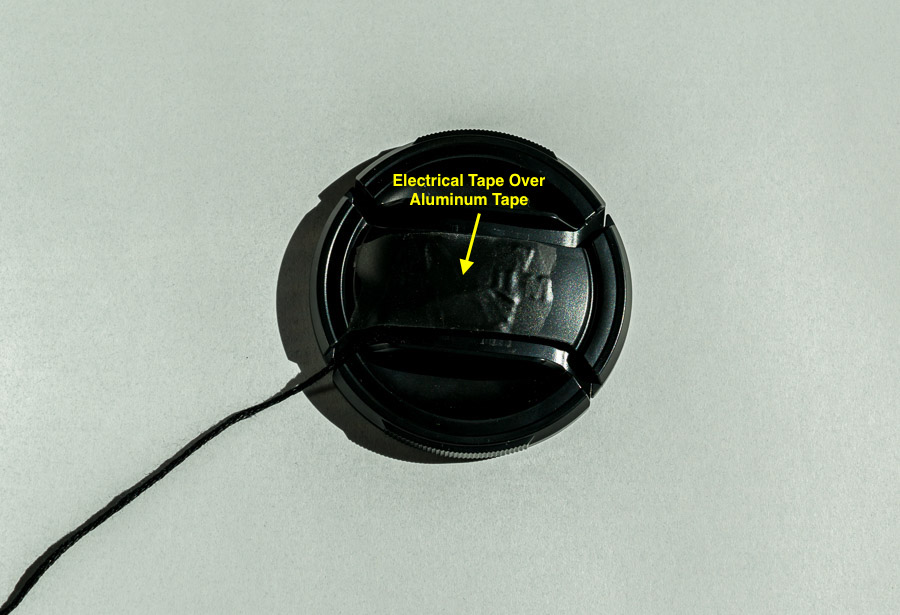
  • I tape one end of the thread to the lens cap with the aluminum tape and then cover that silver tape with black electrical tape.


Black electrician's tape is used to cover the silver foil tape
Black electrician’s tape is used to cover the silver foil tape

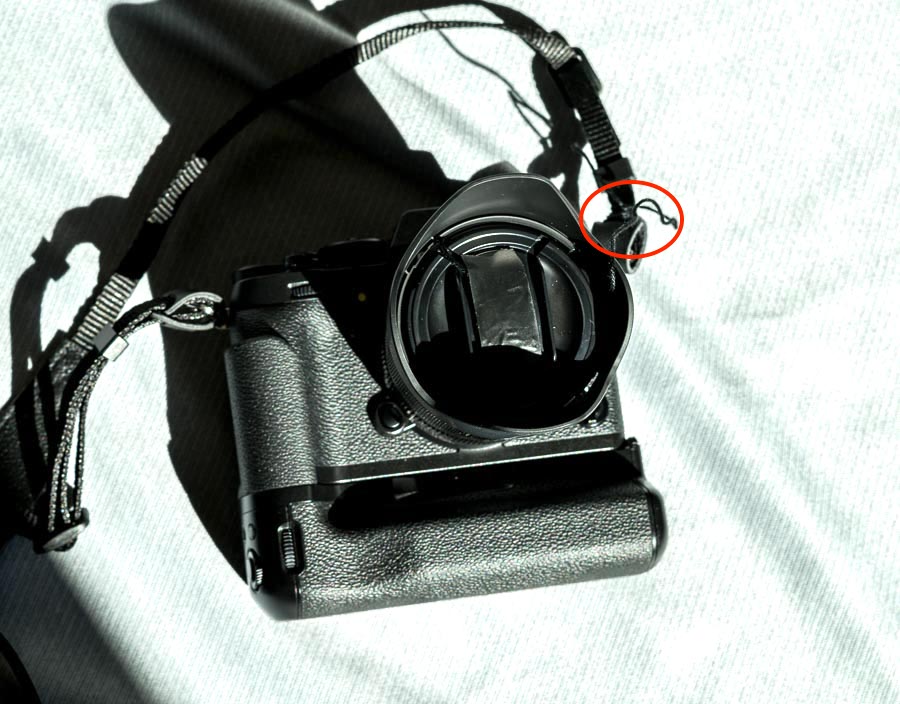
  • I then tie the other end of the black thread to the strap loop.


Thread is tied to strap loop

NOTE – If you think you will want to remove the lens cap completely to attach a different sized filter, change lenses, etc., make a double strand (loop) with the thread and “loop it” through the strap. This way, the lens cap can easily be removed by backing it out of the loop when necessary.


Thread is tied to strap loop
Thread is tied to strap loop (red oval)

Now when the cap is unleashed, it can hang by the side of the camera. I often hold it in my hand to keep it from swinging or being a distraction.

X T-2 with tethered lens cap

Lets talk about the lens hood. The lens hood is a pretty typical “tulip” type lens hood. It appears to be made of plastic. One would think that a professional level camera, even if ordered with the kit lens, would have a more robust lens hood. I would have paid a few dollars more for a better lens hood; just sayin’!

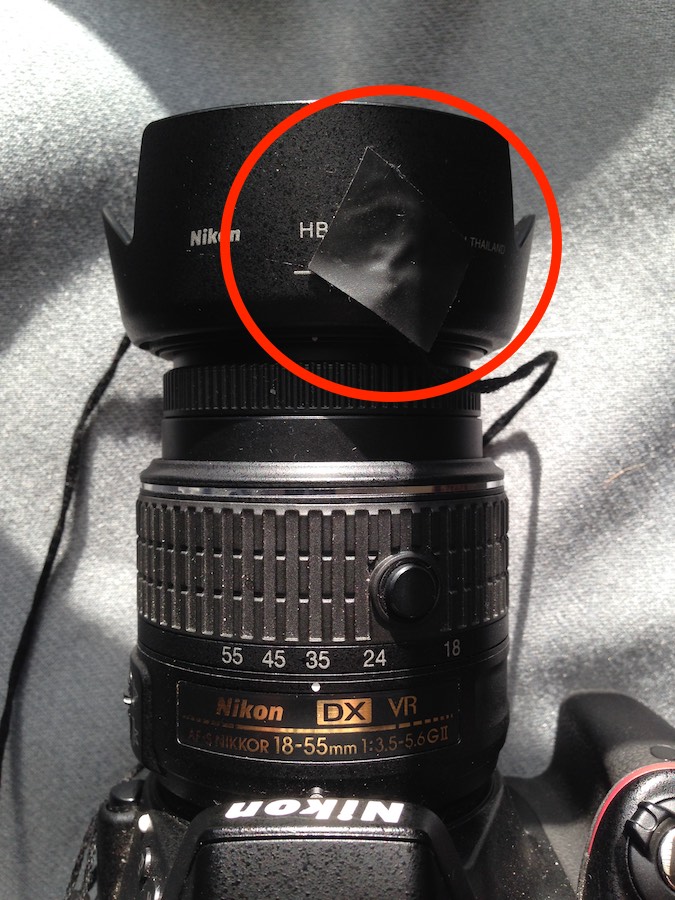
My Nikon D3300 lens hood does not stay on the lens with much active use so I tethered that to the camera too. Here is what that looks like…


Nikon D3300 with tethered lens hood

So far the Fuji lens hood has remained relatively loyal to the lens and has not wiggled off errantly so I will leave it as is unless it becomes necessary to tether that as well.

I am very happy with the X T-2 so don’t get me wrong. I am just modifying it to suit my particular photography style. You might or might not like to work that way. This just keeps me from lens cap hunting and enables me to keep my lenses as clean as possible through a day of hiking.

I will talk about my first photographic experiments with the new Fuji X T-2, but since, in my previous post, I said I would share a picture, here is the first picture I took with the new X T-2; Explanation and discussion to follow in another post.


First photo with my new Fuji X T-2

UPDATE – Don’t be disappointed with your Fuji RAW files when imported into Lightroom. Read about the way to post process those images to bring out the color and detail Fuji X T-2: Improving LR Post Processing Process

Read more photography posts HERE


**********


All original content on this blog is copyrighted by Jeffrey B. Ross with ALL Rights Reserved. While reference links back to JBRish.com are appreciated and encouraged, please acquire approval for any reproduction of original content from this website.

©Jeffrey B. Ross – 2017


Identification for the Birds

Here is a problem every novice or occasional birder is bound to face…

We were enjoying a beautiful hike through Zumwalt Meadow in Kings Canyon, CA observing all of the plants, scenery and wildlife we encountered.

Keep in mind that much of this trail has tree roots, rocks, boulders, fallen branches, etc. so keeping eyes ahead or up is not an option for those hiking along. We would stop when a sudden motion or noise caught our attention or we just wanted to gaze at the scenery. We are avid gazers and thus would probably be considered somewhat pokey when it comes to the more speedy hikers.

But I digress… We were climbing upward through a somewhat narrow corridor formed by boulders on either side and ahead, no more than twenty feet away, an attractive multi-colored bird landed in a tree. I was almost sure this was one that I hadn’t identified yet so of course I was very interested in photographing the bird for future identification.

NOTE – For those who want to know why I didn’t or more truthfully, couldn’t, identify the bird right there and then, read my earlier post – Photography and Birding: Good Photo, Bad Photo

The bird was mostly black, with orange-brown sides, a buff bottom and rump with white markings on black wings. The face also had some blotches of other colors as well. Immediately I thought this was an oriole of one type or another.
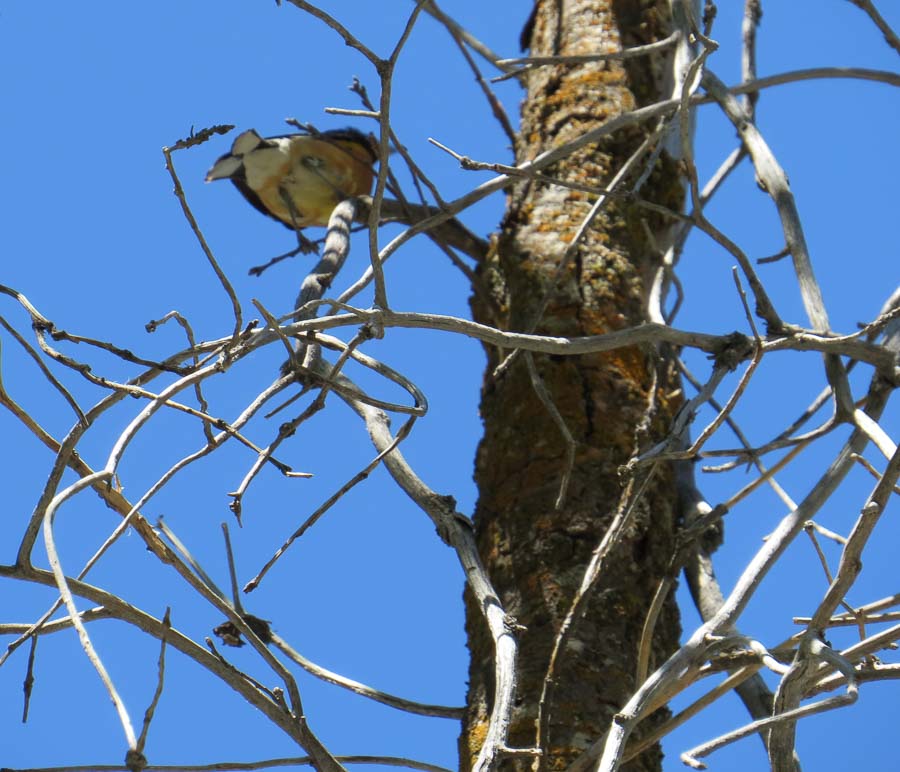

Black-headed grosbeak

By the time I was able to stop and take note, the bird was flitting from branch-to-branch and this (above) was the first photograph I was able to capture. Hmmmm – pretty hard to ID from that shot.

What was infuriating was that the bird would jump down closer to me, let’s say eight feet away, but would be among a mass of branches; drats!


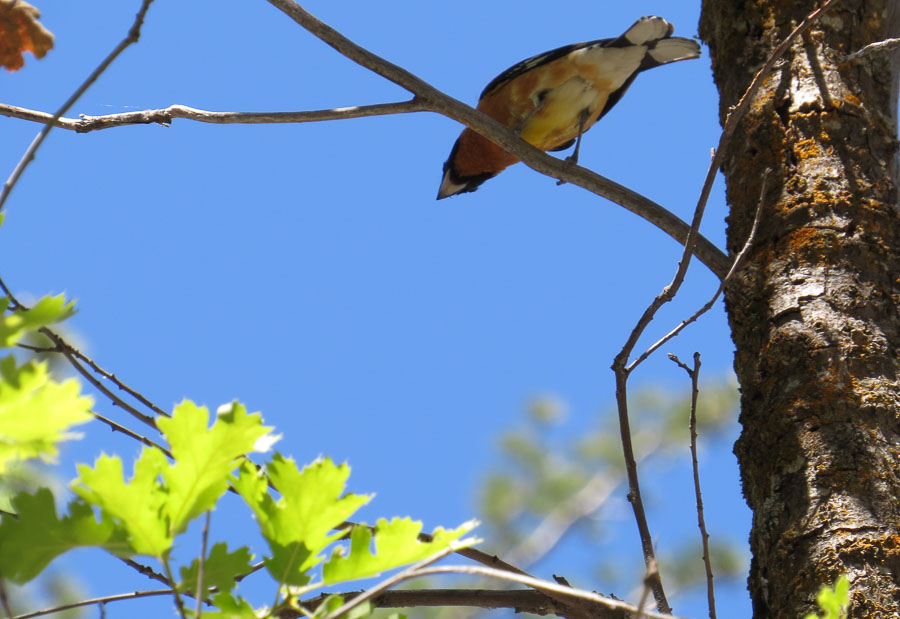
Black-headed grosbeak

There was one instance, when the bird was just above my head and I got a good luck at its rump and underparts.

Black-headed grosbeak

Although the bird was skittish, it appeared to have a certain curiosity as it lingered in the area for a long time; in bird minutes!
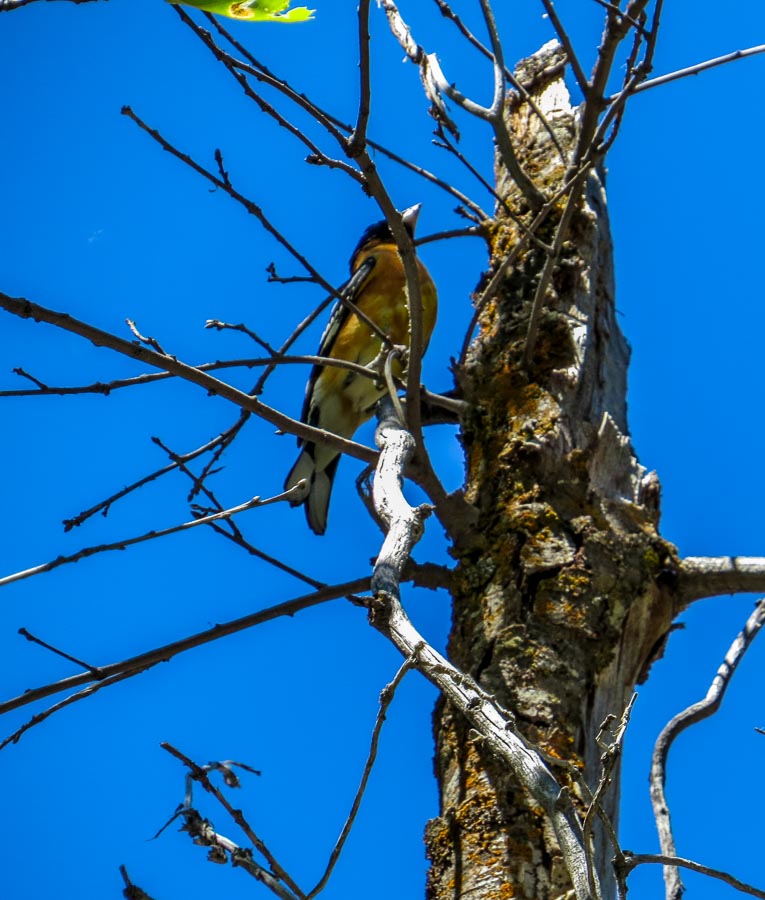

Black-headed grosbeak

In the field it is hard to tell exactly how good the photographs are and whether or not there would be enough information to piece an identification together, but using all of the photos, I believe I was able to correctly ID the bird.

Let’s take a look….

Using the Internet, I was able to find a few reference photographs. This was one of the better shots
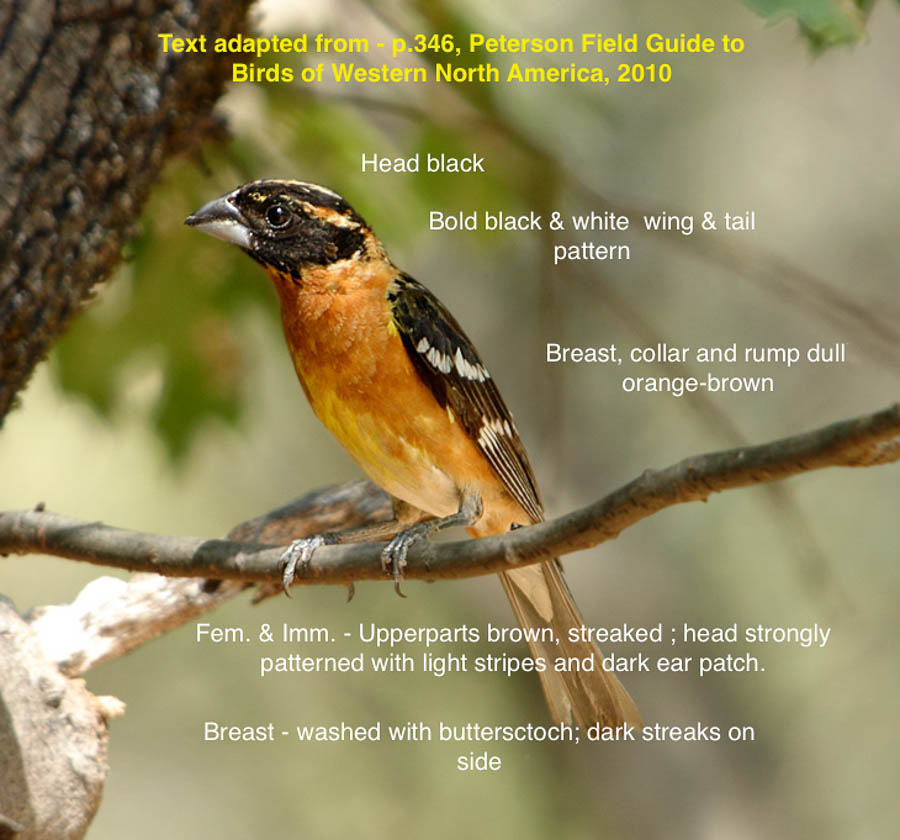

Black-headed grosbeak
Photograph By Alan Vernon – Male Black headed grosbeak (Pheucticus melanocephalus)Uploaded by Snowmanradio, CC BY 2.0, https://commons.wikimedia.org/w/index.php?curid=12140735

NOTE – Text added by JBRish


Looking at my less than stellar photos, I was able to locate most of the same markings. For those new to birding, keep in mind that males and females often have different markings and colorations. I knew this wasn’t an oriole as I originally suspected primarily because of the shape of the beak. An oriole would have a much more pointed beak.

NOTE – This is why I like to take multiple photographs and work the identification at my leisure.

What are your thoughts? Leave them in the comment section below.

To read more JBRish.com posts about birds or birding, click HERE.


**********


All original content on this blog is copyrighted by Jeffrey B. Ross with ALL Rights Reserved. While reference links back to JBRish.com are appreciated and encouraged, please acquire approval for any reproduction of original content from this website.

©Jeffrey B. Ross – 2017


Hiking the Peralta Trail, Gold Canyon, AZ – 20160701

The Finale of the Peralta Trail Photo Essay

NOTE – Keep in mind that we took this hike and these pictures represent the trail as we saw it in December, 2009. The trail may have changed a bit since them and some of the flora may no longer be exactly where we are reporting, but this is a good representation of things you may find along the way. Perhaps you will find even more intriguing highlights.

Of course the large rock formations and mountains will remain largely unchanged.


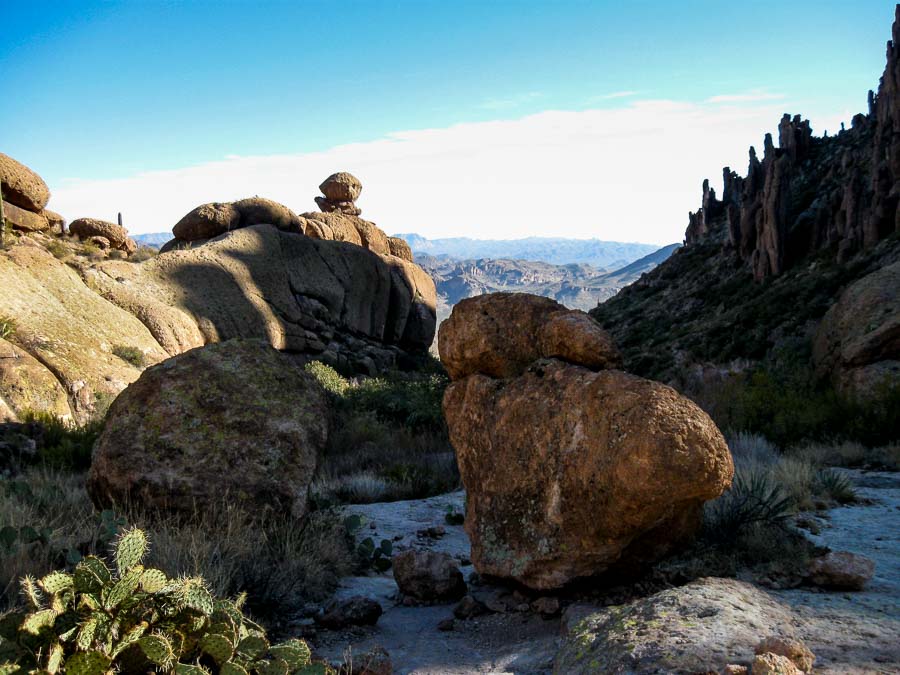
Long shadows, time to head backk
Toward Sunset

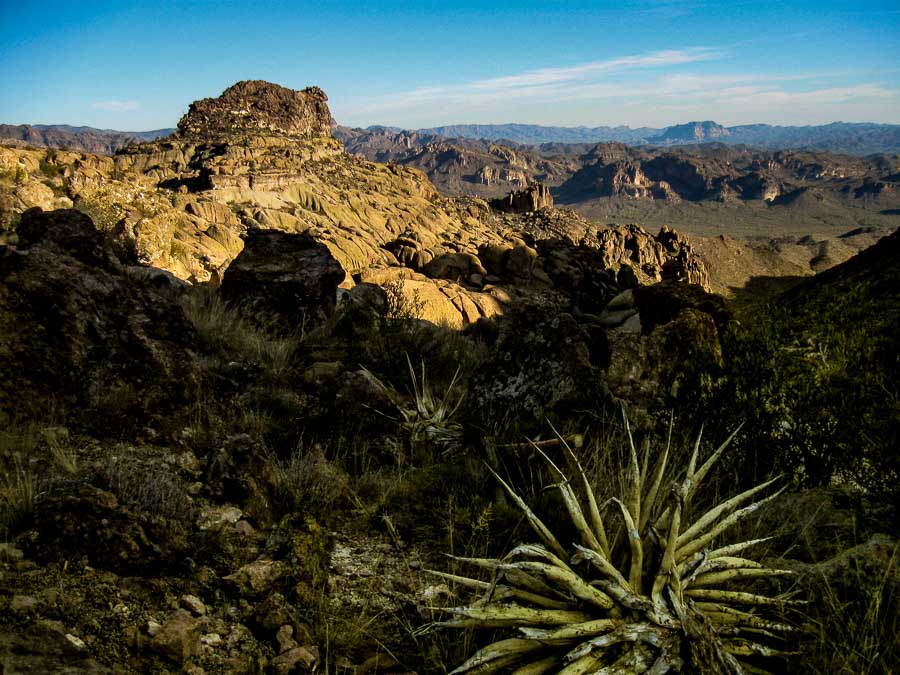
After spending some time at the Fremont Saddle and having a snack, we wanted to head back to the trailhead. As you can note from the picture, the shadows were getting longer and with that the cool, soon to be followed by cold, December chill would be setting in.

Even the decaying plants add a beauty to the desert if we take time to notice and appreciate them. Desert life is hard and any plant or animal that can survive gains my immediate and ever-lasting respect.

This is the final post about our experience along the Peralta Trail, Gold Canyon, Arizona. If you like moderate hiking and a walk in a very different and beautiful landscape, I recommend it. Just be prepared, heed all warning signs and read about the hike before you commit.

Read more about the Peralta Trail HERE.

Previous posts and photographs in the Peralta Trail series in chronological order:


**********


All content on this blog is copyrighted by Jeffrey B. Ross with ALL Rights Reserved. While reference links back to JBRish.com are appreciated and encouraged, please acquire approval for any reproduction of original content from this website.


©Jeffrey B. Ross


Hiking the Peralta Trail, Gold Canyon, AZ – 20160630

Hiking the Peralta Trail, Gold Canyon, AZ – 20160630

NOTE – Keep in mind that we took this hike and these pictures represent the trail as we saw it in December, 2009. The trail may have changed a bit since them and some of the flora may no longer be exactly where we are reporting, but this is a good representation of things you may find along the way. Perhaps you will find even more intriguing highlights.

Of course the large rock formations and mountains will remain largely unchanged.


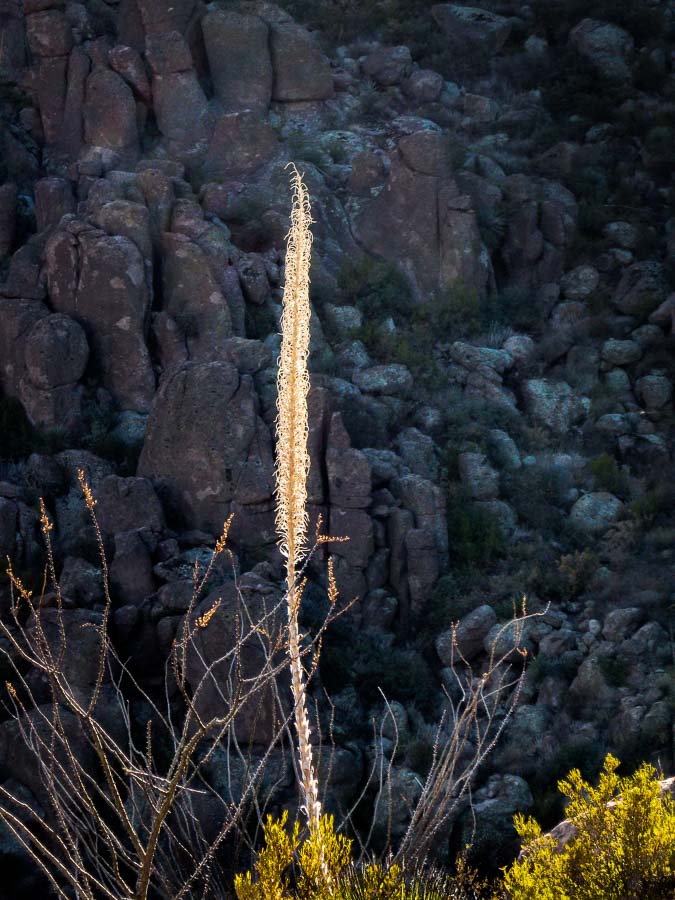
Spent desert flower stalk

As I pointed out in one of the first posts about the Peralata Trail, there is an abundance of desert flora along the trail as far as the eye can see. There is beauty all around during the spring as cacti and desert trees bloom freely.

Once the bloom is over, some of the plants continue to provide aesthetic interest with their dry stalks, etc. I so appreciated this willowy structure highlighted against the dark, shadowy background in the picture above. It was truly striking! The lower group of plants sporting their colors of yellow and orange were supporting cast members.

Read more about the Peralta Trail HERE.

Previous posts and photographs in the Peralta Trail series in chronological order:


**********


JBRish.com originally published this post
*All photographs Copyright by Jeffrey B. Ross with all rights reserved.

Hiking the Peralta Trail, Gold Canyon, AZ – 20160629

NOTE – Keep in mind that we took this hike and these pictures represent the trail as we saw it in December, 2009. The trail may have changed a bit since them and some of the flora may no longer be exactly where we are reporting, but this is a good representation of things you may find along the way. Perhaps you will find even more intriguing highlights.

Of course the large rock formations and mountains will remain largely unchanged.


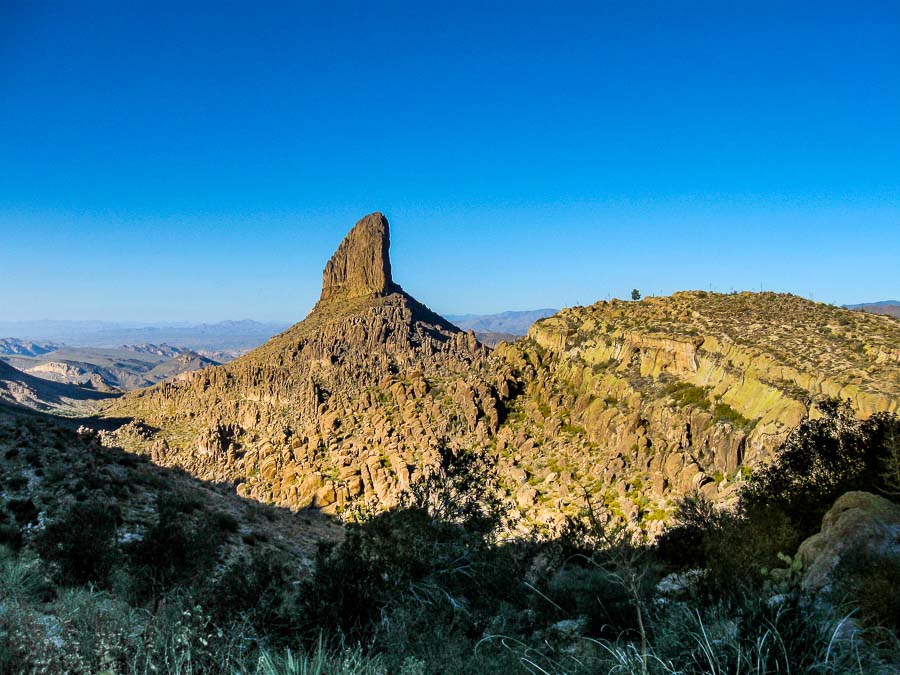
Weavers Needle from the Fremont Saddle - one last shot!
Weavers Needle – one last picture

Once we made it to the saddle and took in the view of Weavers Needle, we realized that it was time to head back down the trail. We started the hike later in the day and we were satisfied to have reached the saddle.

Before we started our journey back to the trailhead, I couldn’t resist taking one last picture of the needle and I am glad I did!

Read more about the Peralta Trail HERE.

Previous posts and photographs in the Peralta Trail series in chronological order:


**********


JBRish.com originally published this post
*All photographs Copyright by Jeffrey B. Ross with all rights reserved.

Hiking the Peralta Trail, Gold Canyon, AZ – 20160628

NOTE – Keep in mind that we took this hike and these pictures represent the trail as we saw it in December, 2009. The trail may have changed a bit since them and some of the flora may no longer be exactly where we are reporting, but this is a good representation of things you may find along the way. Perhaps you will find even more intriguing highlights.

Of course the large rock formations and mountains will remain largely unchanged.


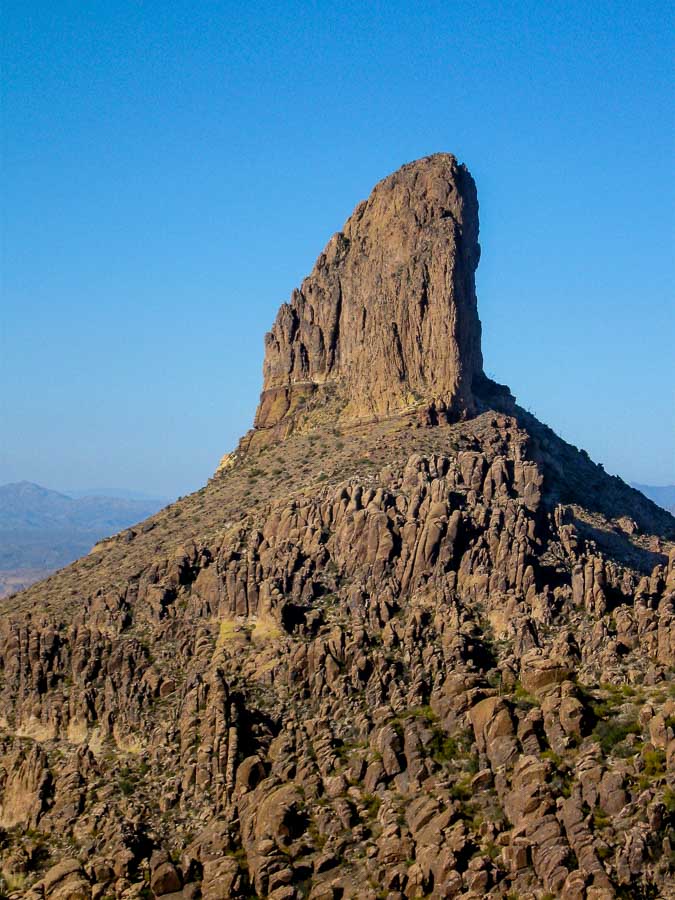
Weavers Needle close up

A closer view of Weavers Needle from the Fremont Saddle on the Peralta Trail. Read more about this particular formation in the post of June 27, 2017 linked at the bottom of this entry.

Read more about the Peralta Trail HERE.

Previous posts and photographs in the Peralta Trail series in chronological order:


**********


JBRish.com originally published this post
*All photographs Copyright by Jeffrey B. Ross with all rights reserved.

Hiking the Peralta Trail, Gold Canyon, AZ – 20160627

NOTE – Keep in mind that we took this hike and these pictures represent the trail as we saw it in December, 2009. The trail may have changed a bit since them and some of the flora may no longer be exactly where we are reporting, but this is a good representation of things you may find along the way. Perhaps you will find even more intriguing highlights.

Of course the large rock formations and mountains will remain largely unchanged.


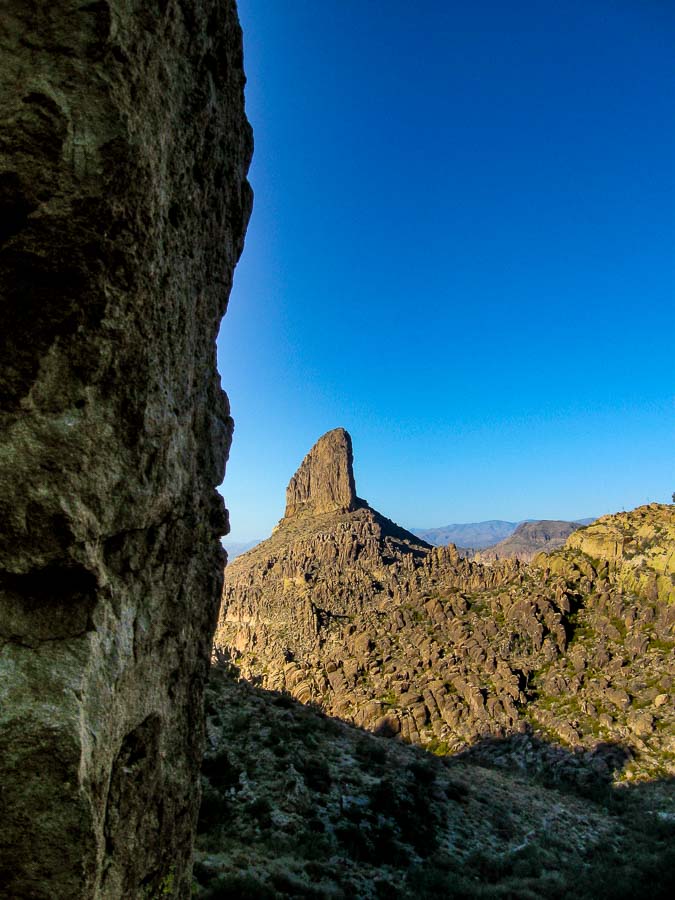
The Peralta Trail Payoff

This view is what I call the “payoff” for hiking uphill along the Peralta Trail. A bit more than two miles along the trail, hikers will come to the Fremont Saddle. For those who don’t know, a mountain’s saddle is generally a flatter piece of land between two mountains, or two rises of a single mountain, which often provides a wide area for sitting, resting, etc.

The vista from the saddle is a startling view of Weavers Needle. For those who don’t suspect what is coming, it can be awesome as it rises up just over the horizon and comes into view as you push upward onto the saddle.

You can read more specifically about Weaver’s SaddleHERE

Read more about the Peralta Trail HERE.

Previous posts and photographs in the Peralta Trail series in chronological order:


**********


JBRish.com originally published this post
*All photographs Copyright by Jeffrey B. Ross with all rights reserved.

Hiking the Peralta Trail, Gold Canyon, AZ – 20160626

NOTE – Keep in mind that we took this hike and these pictures represent the trail as we saw it in December, 2009. The trail may have changed a bit since them and some of the flora may no longer be exactly where we are reporting, but this is a good representation of things you may find along the way. Perhaps you will find even more intriguing highlights.

Of course the large rock formations and mountains will remain largely unchanged.


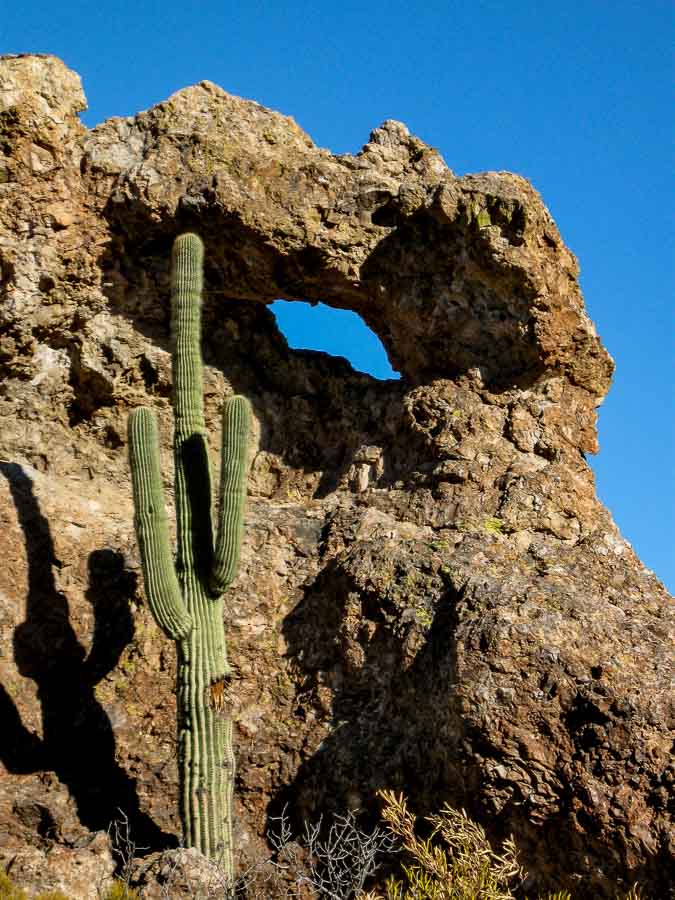
Another window in a rock formation

As we hiked further, we came across another window rock. This is what I enjoy about hiking; there are discoveries along the way most of the time.

Read more about the Peralta Trail HERE.

Previous posts and photographs in the Peralta Trail series in chronological order:


**********


JBRish.com originally published this post
*All photographs Copyright by Jeffrey B. Ross with all rights reserved.

Hiking the Peralta Trail, Gold Canyon, AZ – 20160625

NOTE – Keep in mind that we took this hike and these pictures represent the trail as we saw it in December, 2009. The trail may have changed a bit since them and some of the flora may no longer be exactly where we are reporting, but this is a good representation of things you may find along the way. Perhaps you will find even more intriguing highlights.

Of course the large rock formations and mountains will remain largely unchanged.


Approaching the saddle
A view from close to the saddle near the top of the Peralta Trail

As hikers continue to climb, it pays to look back “down” the trail. In some cases, hikers may find that the best views are behind them. This photo was taken as we began to approach the part of trail leading to the saddle, but looking back toward the trailhead.

Read more about the Peralta Trail HERE.

Previous posts and photographs in the Peralta Trail series in chronological order:


**********


JBRish.com originally published this post
*All photographs Copyright by Jeffrey B. Ross with all rights reserved.