Gardening – My Favorite Homemade Tool

Gardening can be a very personal endeavor. There are some who love the joy and satisfaction of growing vegetables in our desert environment. There are others who focus on ornamentals and the beauty of flowering cacti. Most gardeners not only focus on particular plants, but over the years, they collect a bevy of favorite gardening tools.

This is one of my favorite gardening tools and time savers.


Wherever I have gardened, one of the first things I have done was build a dirt sifter. I use it many times each season. Perhaps my workflow differs from yours so let me explain…

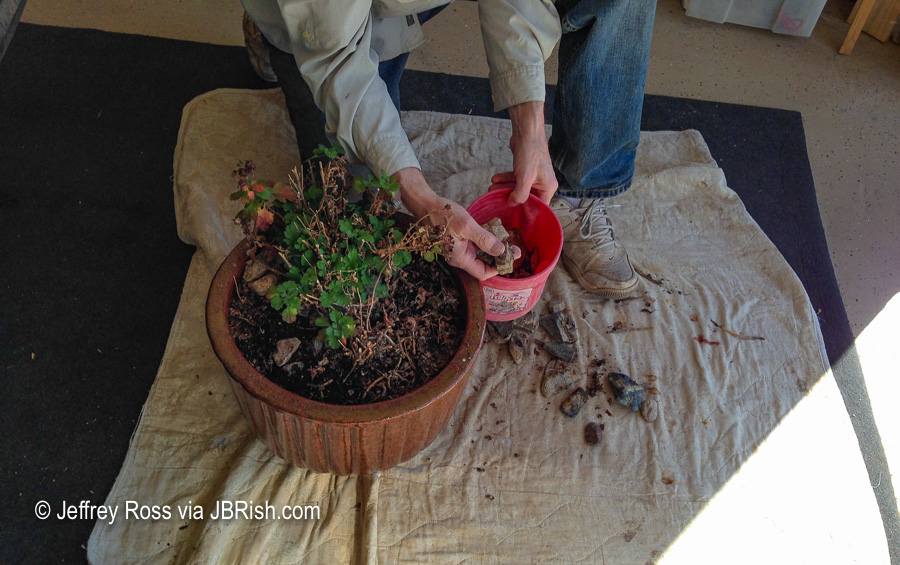
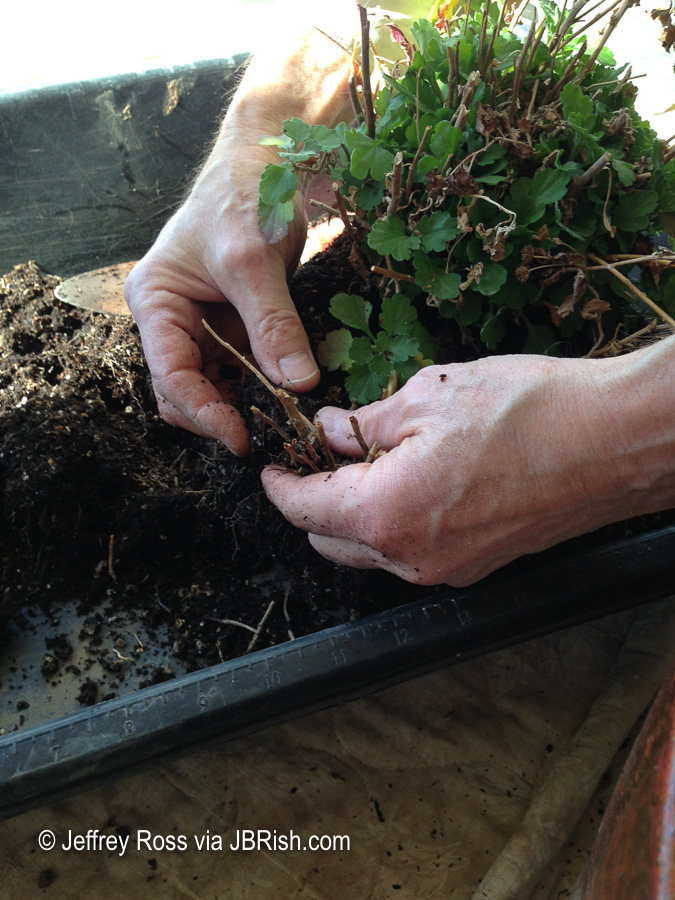
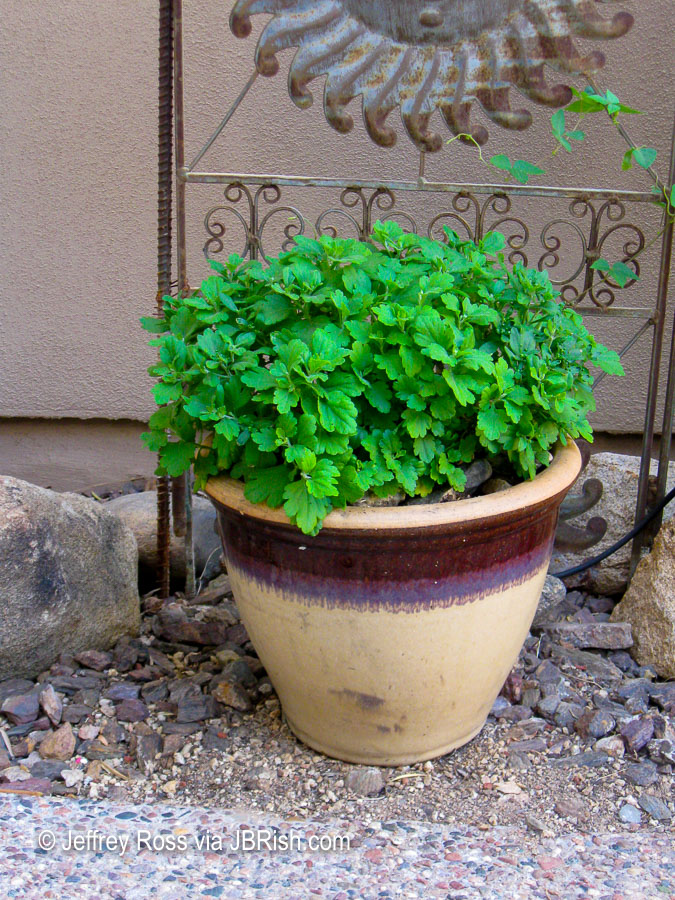
Our agave collection, for example, gifts us with pups and after they are potted up and cared for a while, they grow their own set of “offspring” and need to be separated and shared.


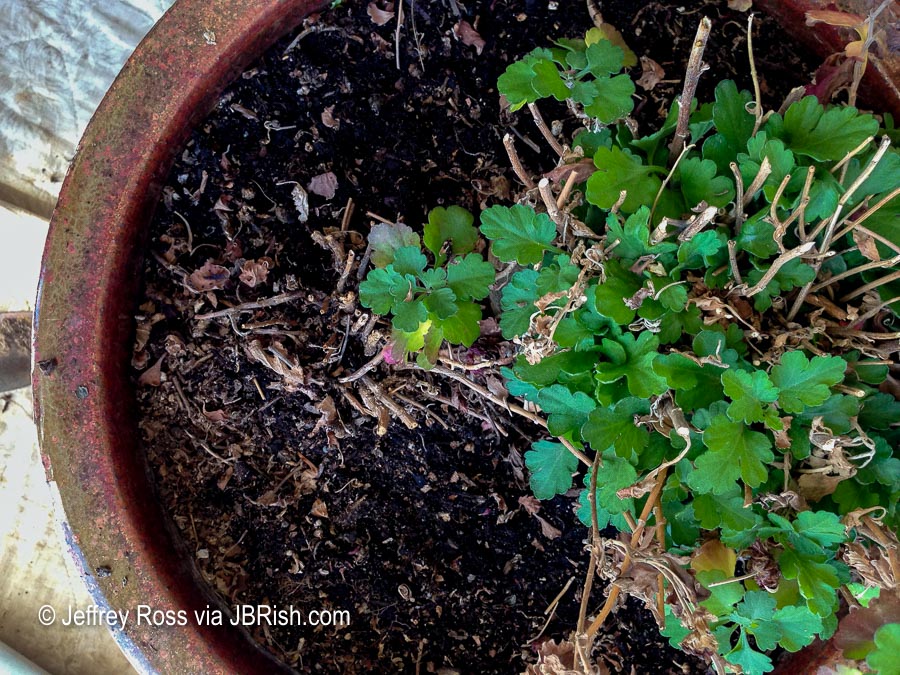
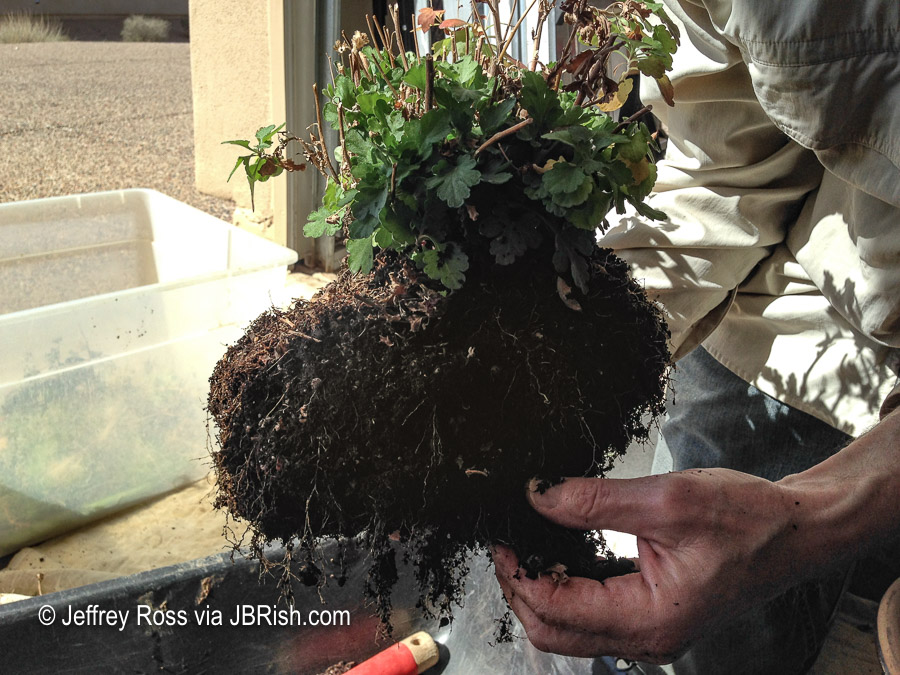
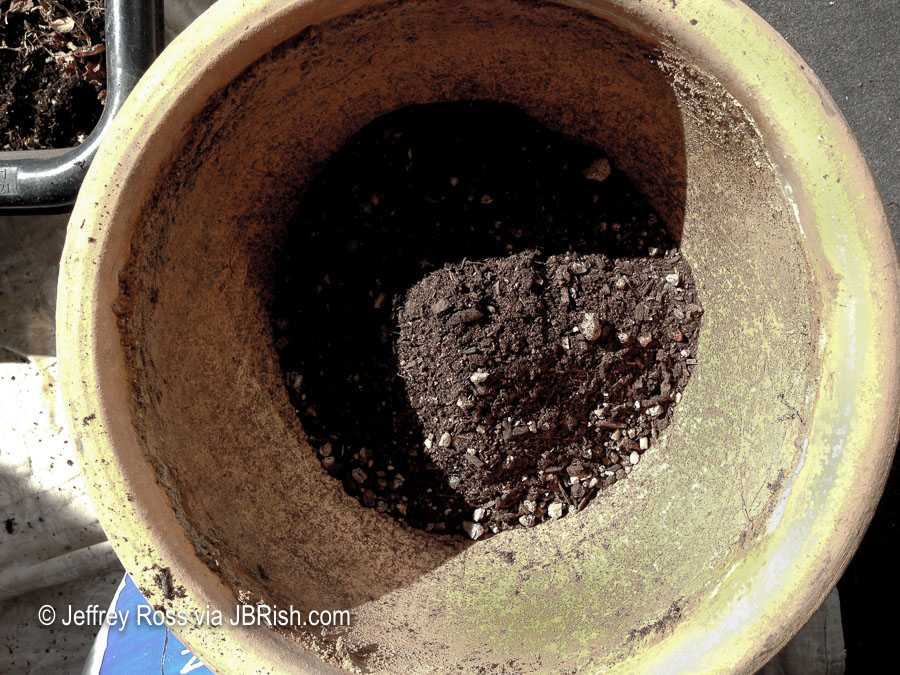
The rootball is often dense and needs to be dismantled.


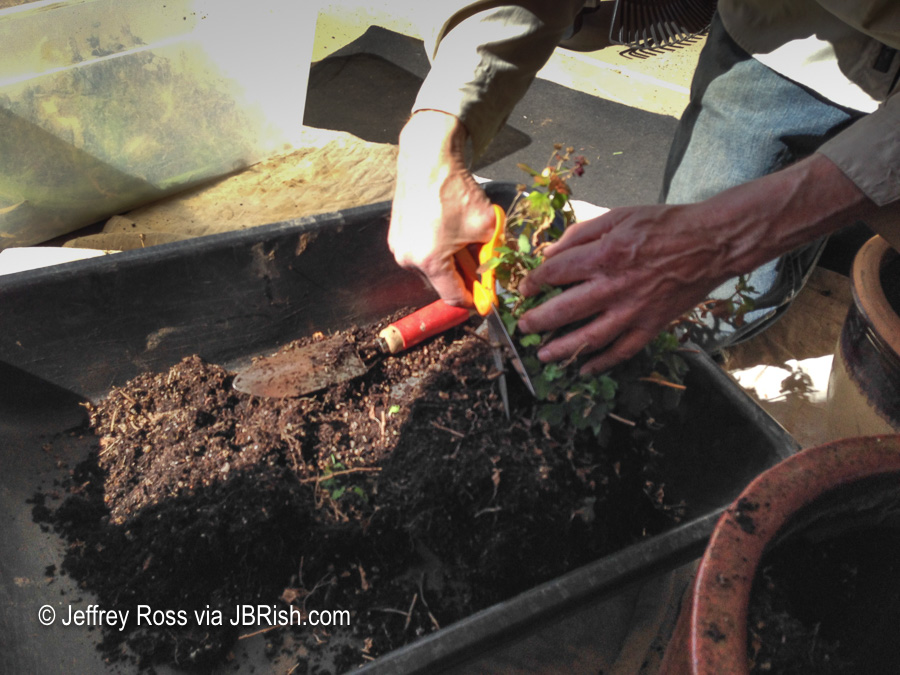
We first separate as many of the viable plants and roots as possible for replanting and/or sharing.


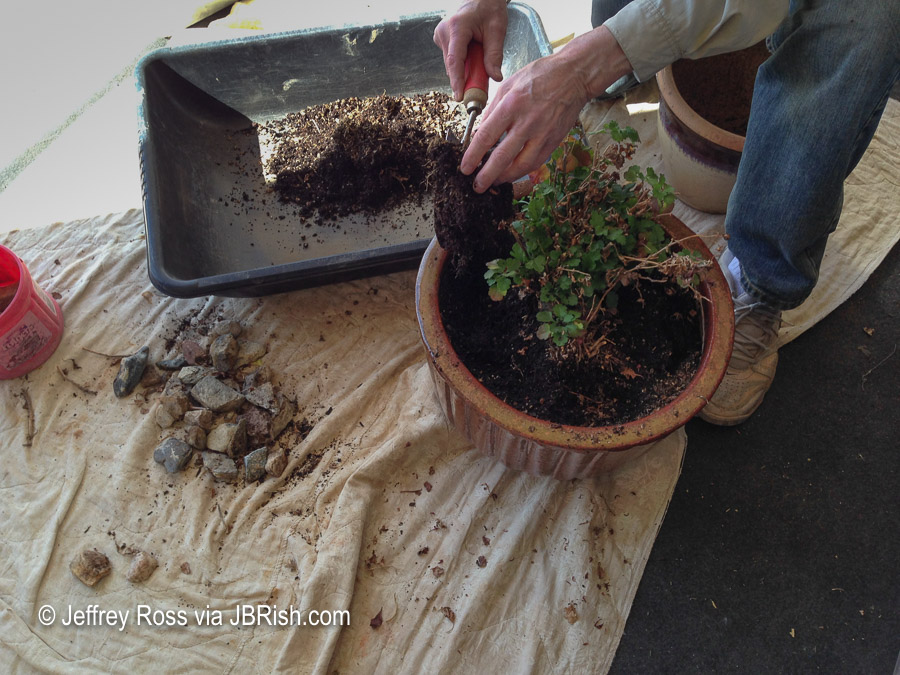
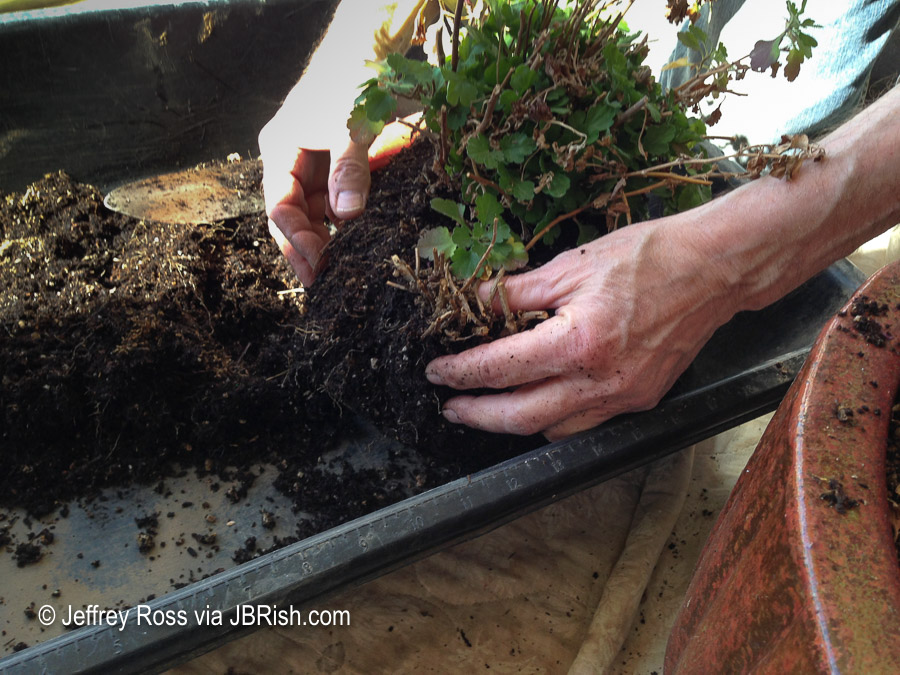
The next step is to place the densest part of the root ball on top of the sifter, break it up with a trowel and then rub it back and forth so the soil is released in to a garden cart or cement mixing bin (which we use to mix soil).


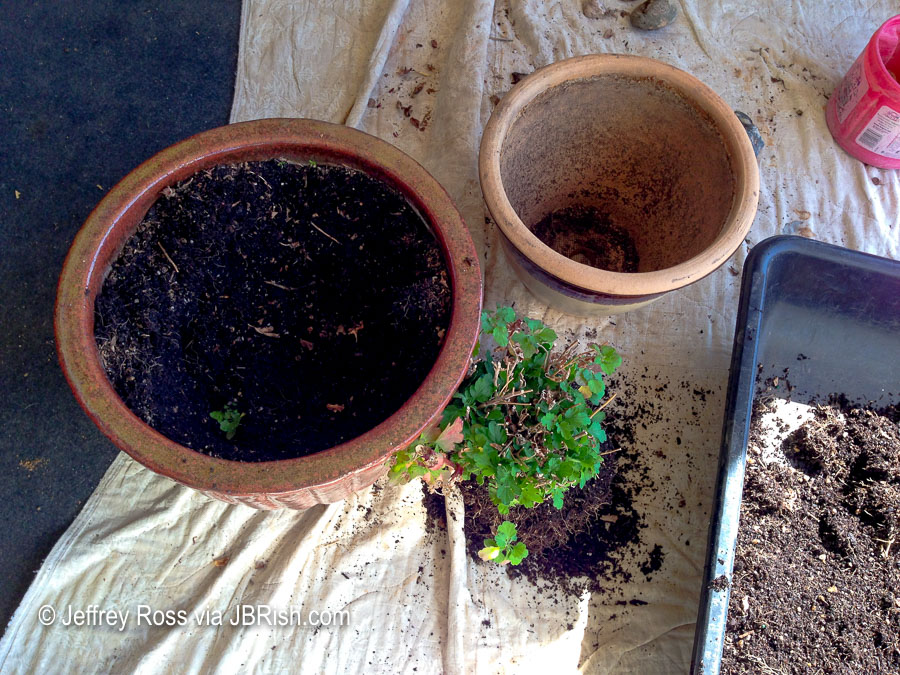
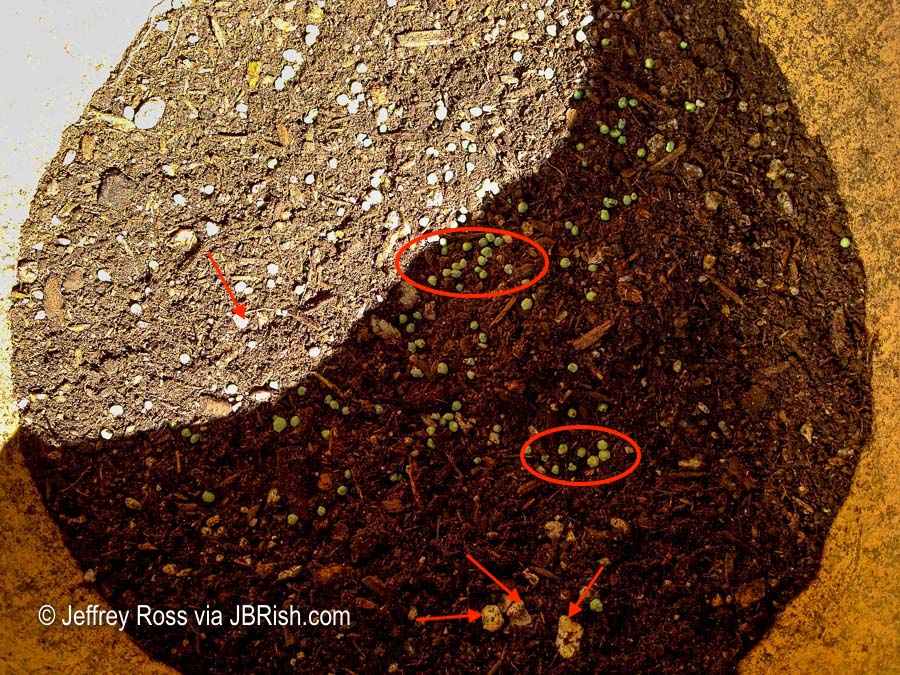
In the end we are left with a yield of reusable soil mix. The old roots and debris are discarded. More about the soil mix in a bit.


If the soil is wet or damp, it is placed on the side of our house where the afternoon sun warms and dries it.


Once the soil is dry, we place it in a large covered trash can to be used in our planting medium for new plants. Once again, if you speak to a dozen gardeners, you will probably get thirteen recipes for various plant mixes. This is a very individual preference, but since you ask, here is one I use for non-succulent plants.

Planting Mix
– A five gallon bucket is used as the basic unit –

  • 1/3 – old plant mix that has been sifted
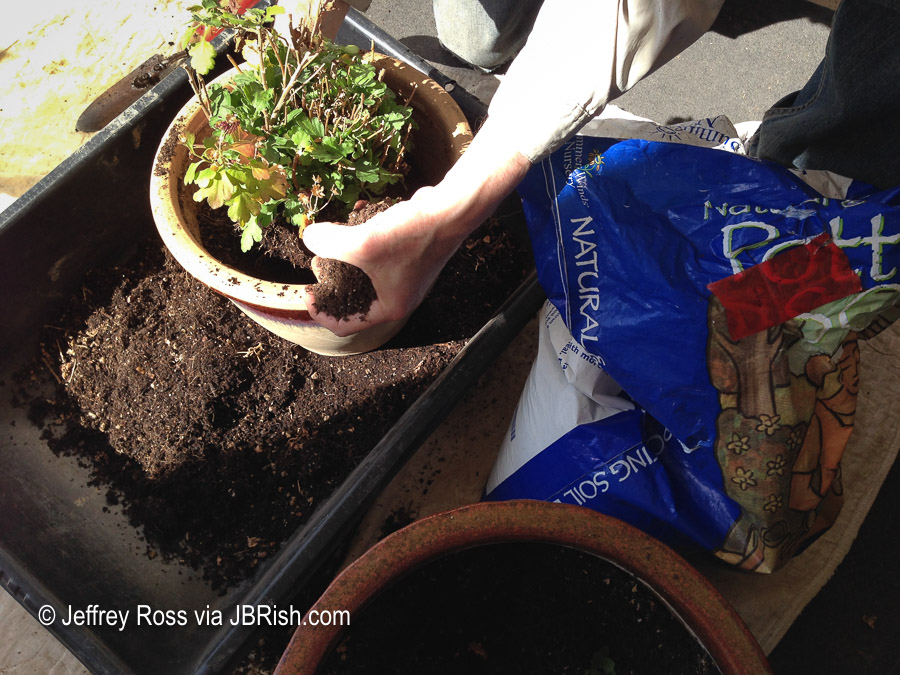
  • 2/3 – new plant mix – I use the Natural & Organic Potting Soil purchased from Summer Winds Nurseries.
  • 2/3 – of a large coffee can of gravel 1/4″ +/- which I purchase in bulk from MDI (2815 E. RoseGarden LN, Phoenix , AZ 85050). This increases drainage and provides a small buffer against over watering. *Adjust as necessary
  • 1 – Large coffee can of used coffee grounds (when available).
  • Mix all the ingredients very well until it appears even in texture and color. Don’t stint on this step. I use a large cement mixing bin and a standard shovel or in the large garden cart.
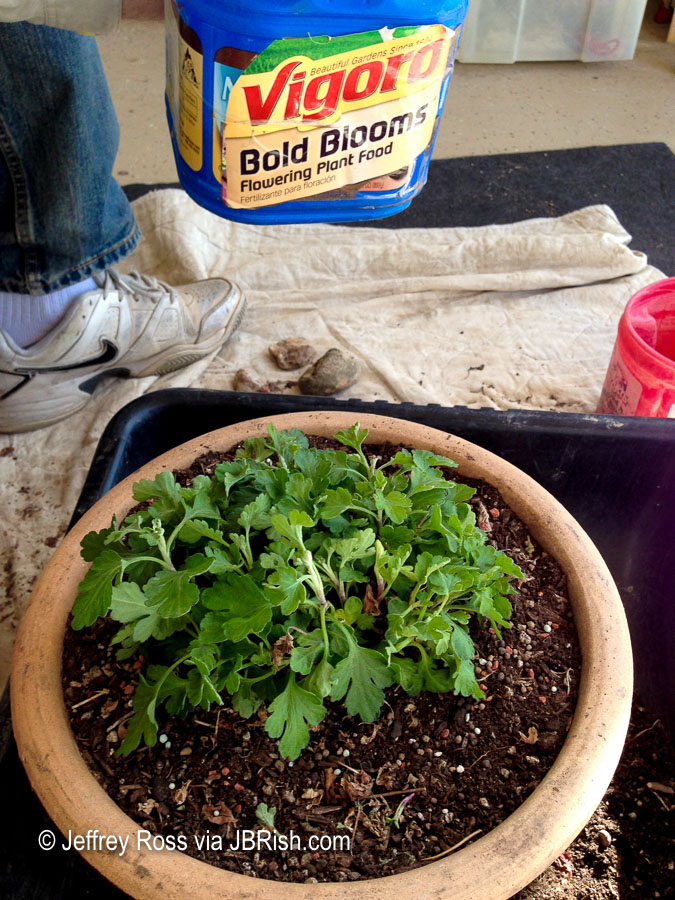
  • For flowering plants I use a dose of super bloom fertilizer following the recommended amount on the container UNLESS experience has dictated otherwise. This is added after the plant is potted and just before watering-in.


Let’s talk about the sifter. We are not building a piece of furniture here so it doesn’t have to be pretty or perfect. Good enough will be just fine for this project.

As you can see, the frame is made from simple 2 x 4’s. One will probably do, but decide how large you want it. Place the pieces of the frame on a flat surface and use L-brackets to fasten the sides.

NOTE – Our sifter is 35″ by 20″ after assembly and accounting for the width of the wood. The sifting surface is relatively smaller. Just decide how large you want it and purchase the appropriate amount of wood.


I then take one longer screw and screw it into each corner of the frame. Drill a pilot hole to assure alignment and to help keep the wood from splitting.


I purchased a roll of 1/2″ hardware cloth that we use for several different gardening tasks and cut it so there was an overlap around all of the sides of the frame. Be careful to trim off any pieces that stick out beyond the grid or you will be creating needles that will puncture gloves and fingers alike.


I then secured the hardware cloth using 3/4″ hot dipped, galvanized poultry net staples. Tap them in as far as they will go. It is OK if they stick out a bit as long as they don’t snag debris, gloves, etc. If you prefer, just hammer them flat so they don’t stick out as much.


Use a wire snip to cut the corners and fold them over similar to wrapping a present and secure the corners well with the staples mentioned above.


NOTE – In one iteration of building a sifter, I erroneously thought that if one layer of hardware cloth was good, two would be better so I assembled the frame using two layers of hardware cloth. That was a big mistake because debris was caught between the two layers. One layer is more than sufficient.


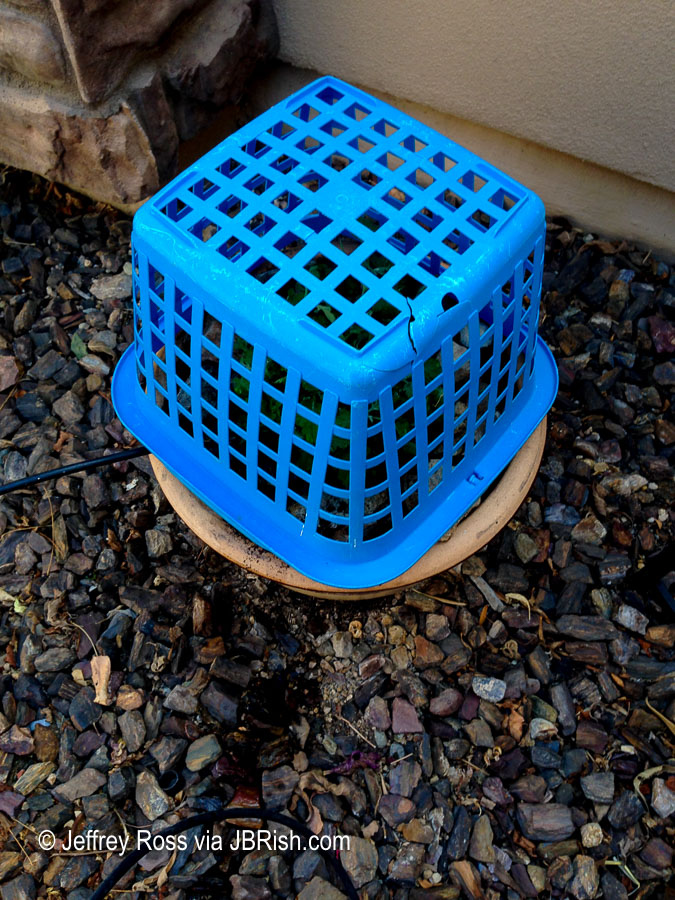
Of course, the sifter isn’t used only for breaking root balls, it is also great for sifting native soil and/or removing large rocks from a pile of dirt. It can even be turned upside down and used to protect seeds from birds or small rodents. Just be sure to place rocks on each corner so the rabbits and squirrels have less of a chance of moving the barrier.


NOTE – This procedure would be the same no matter where you garden. The only modification you would need to make would be in the planting mix and I am sure that you probably have your own favorite variation.

If you have any questions, leave them in the comment section and I will answer to the best of my ability.


Read more gardening posts HERE


**********


All original content on this blog is copyrighted by Jeffrey B. Ross with ALL Rights Reserved. While reference links back to JBRish.com are appreciated and encouraged, please acquire approval for any reproduction of original content from this website.

©Jeffrey B. Ross 2014 – 2019 – JBRish.com


The Queen Now Has A Crown!


Queens Wreath from 2015

Our Queen’s Wreath – 2015

Readers of JBRish who have been following along for a while might have read a bit about our Queen’s Wreath (Antigonon leptopus) vine (see links below). Up until recently, this plant has been a show stopper and then something happened…

The plant was just not filling out the way it did during the previous years. Instead of a full, swath of leaves and stems this what we saw.


Bare, sparse stems

A close up revealed how sparse the leaves where in relationship to the lush coat of heart-shaped leaves we anticipated.


closeup of sparse growth

It was only a vague shadow of its former glory and far from queen-like.


full side view - - sparse

Instead of the abundant bouquet of blooms in the first picture, this was the extent of the flowering.


single strand of paltry blooms

We examined the plant over time looking for insect damage, making sure the water was being amply applied and noting that we used the same fertilizing regimen of the past. At the base, the leaves were more lush so we looked more closely and then it hit us. Rabbits!


Rabbits were eating away at the base

Those pesky rabbits had decided that they now like the Queen’s Wreath and that it would become their salad bar. This was not an issue during the three or so seasons of beauty preceding this problem.

We knew what we had to do even though we didn’t relish the thought. Like other plants in our landscape, this would have to be rabbit-proofed. We erected a plastic barrier approximately thirty inches high.


a picture of the plastic fence

To completely thwart rabbits, some method needs to be used to keep them from digging under the barrier. Most of the time, having the “fencing” flat on the ground for several inches creating a lip and then topped with rocks will be discouraging enough. When done correctly, it forms a resistant border. (See yellow arrows below)


Fencing lip topped with rocks

We were sure to have the water supply located appropriately before fastening the barrier and now we had the fence around the entire plant. I wasn’t quite sure how to proceed. I knew I had to do something with the existing plant material. Some flowering vines (as well as other plants) will react negatively to a severe trim and the bloom may be lost for the current gardening year.

After all of this trouble, I didn’t want to risk that so I hedged my bet and severely trimmed one side while only moderately trimming the other side in hopes of preserving some of the flowers for this current season.

Luckily the plant began to flourish as in the past and now, at the end of the season, both sides have evened out and the plant is showing why it is called Queen’s Wreath.


Queen's Wreath glorious once again


Sprays of flowers cover the vine


Beautiful, blooming Queen's Wreath

You have to admit, although small, the plethora of blooms do put on a show.


Closeup of coral blooms

We are hopeful that this will be a long-lasting resolution to the Queen’s Wreath’s care and provide years of charming color!


Showy Queen’s Wreath – October, 2015

Reinforced Trellis Support – Reduce Metal Fatigue


Read more gardening posts HERE


**********


All original content on this blog is copyrighted by Jeffrey B. Ross with ALL Rights Reserved. While reference links back to JBRish.com are appreciated and encouraged, please acquire approval for any reproduction of original content from this website.

©Jeffrey B. Ross 2014 – 2018 – JBRish.com


Garden Video: Live Capture of Critters in a Bottle Mousetrap

If you have followed JBRish.com for a while, you may have read one of my posts where I describe the difficulty we have with a variety of rodents (and other critters) in our desert garden.

I try to appreciate and respect all of nature and I don’t like to kill any animals if it can be avoided. I was intrigued by the EL GATO live-capture Bottle Mousetrap which may help with some of our smaller vermin.

Watch the video below and let me know what you think.


Read more gardening posts HERE


**********


All original content on this blog is copyrighted by Jeffrey B. Ross with ALL Rights Reserved. While reference links back to JBRish.com are appreciated and encouraged, please acquire approval for any reproduction of original content from this website.

©Jeffrey B. Ross – 2018 – JBRish.com


Sunflowers in the Valley of the Sun – Part 1

There is no doubt about it, gardening in the Sonoran Desert during the summer is a challenge. It is similar to other areas of the country which have on season, mainly winter, that is not too hospitable to a wide assortment of plants that would be otherwise easy to grow in spring, summer and into the fall.

Unlike those areas where winter prevents almost all outside gardening, there are some plants and varieties that can tolerate our summers given the appropriate environment; and therein lies the rub!

As I travel the highways and byways of the desert regions of the southwest, I notice that there is one variety of wild sunflower that seems to survive the summer most years and even thrive when there are ample showers. Keeping that in mind, and not being able to nail down the exact variety (my bad), I decided to try a package of mixed sunflower seeds to see what it would yield in my desert garden. This was to be my gardening experiment for the summer of 2018.

Package of Sunflower Seeds

I always check the back of the package to see the “Packed for” date. Obviously the fresher the seeds, the better so I always make sure they are the current year’s seeds. I also like the fact that these seeds are organic and are not treated with chemicals. Our bees are struggling enough as it is.

Notice organic and sell-by date

An inexpensive turkey baster is used in this process to control the flow of water. It is good for delicate seedlings and at times when I need to wet a plant with a controlled, low flow of water.

Turkey baster for gentle watering

To keep everything corraled on the counter, I work inside a container lid. The lip of the lid keeps the water and other debris under control.

Coffee lid container for working

Of course we could plant the seeds directly in the ground, but I considered several factors:

  • We have numerous desert critters that would love to take a bite out of a luscious sprout.
  • There is no guarantee that every seed in a package will be viable.
  • I have limited time and space so I want to make sure any seed has the best start possible.

Considering the above, I decided to pre-sprout the seeds. Here are the three seeds I selected. [NOTE: One cannot tell from the seeds which sunflower will be “born” from any specific seed. This is a mix so it is a random choice.]

Three sunflower seeds-mixed varieties

My process for pre-sprouting the seeds is to wet a piece of paper towel to the point where it is uniformally wet, but not soaked.

Wet paper towel

Once the towel has been wet, the seeds are then placed at intervals on the sheet leaving ample space between, but not too much. I like to make a compact packet.

Seeds on wet towel

After the seeds have been carefully placed, the towel is folded over them so they are enveloped in the moist towel. This will be a good environment for sprouting.

Towel folded over seeds

The towel is folded into an envelope-type form to provide the best chance of staying moist.

Towel folded into envelope/packet

I always make a label just in case I want to keep track of sprouting times, time from sprout to flower, etc., but I didn’t use that information for tracking in this instance.

Sunflower seed label

Once this process is complete, probably less than thirty minutes, the seeds are placed inside a plastic bag, label and all and set aside. I check them every day to …

    – make sure the seeds remain uniformally damp, but not soaking

    – see if they have sprouted (because at that point further action is needed)

Packet in baggie with label

To be continued…


Read more gardening posts HERE


**********


All original content on this blog is copyrighted by Jeffrey B. Ross with ALL Rights Reserved. While reference links back to JBRish.com are appreciated and encouraged, please acquire approval for any reproduction of original content from this website.

©Jeffrey B. Ross – 2018 – JBRish.com


Desert Broom – New Cultivar Discovered**

There is a desert plant in the Sonoran Desert that has the distinction of being one of the few native plants that is considered invasive. It can become a problem during the very hot, dry summers when fires are a real possibility.

Here is a picture of the native Desert Broom.

Desert Broom Plant

Picture courtesy of Sierra Vista Growers

On the way to a shopping mall recently, I noticed what may potentially be a new cultivar or sport of the native desert broom. It was just off to the side of the road. Can you find it in the picture below?

Possible desert broom cultivar or sport closeup

If you are having difficulty, here is a closeup!

Possible desert broom cultivar or sport

What do you think?


**This post is a tongue and cheek bit of humor related to desert gardening! (wink, wink)


Read more gardening posts HERE


**********


All original content on this blog is copyrighted by Jeffrey B. Ross with ALL Rights Reserved. While reference links back to JBRish.com are appreciated and encouraged, please acquire approval for any reproduction of original content from this website.

©Jeffrey B. Ross – 2018 – JBRish.com


Sore Thumb, Green Thumb – Desert Bloom

Red blooming desert cactus at a distance

Can you see it?

Red blooming desert cactus at a distance

It stood out like a sore thumb; at least to me. The desert landscape doesn’t usually have a significant number of blooms this time of year with temperatures between 90-110 degrees. This particular cactus was given to me a couple of years ago as a broken piece from a much larger plant.

We hardened it off a bit and placed it in the landscape. Over the first year, I babied it a bit with extra water, but it only receives scant water now in its second full year.

Red blooming desert cactus portrait

Here is a close up

Closeup

The bees were taking advantage of the abundant pollen being made available.

Closeup with bees

I must say, they burrowed way down into the base of the flower and appeared to be “rolling around” in all their glory. We have to feel sorry for the bees nowadays.

I believe this is a torch cactus variety, but I do not have the exact botanical name. It might be a Trichocereus huascha (Echinopsis), but I will let you decide by checking the link.


Read more gardening posts HERE


**********


All original content on this blog is copyrighted by Jeffrey B. Ross with ALL Rights Reserved. While reference links back to JBRish.com are appreciated and encouraged, please acquire approval for any reproduction of original content from this website.

©Jeffrey B. Ross – 2018 – JBRish.com


Mum is the Word in the Desert Garden

Prior to moving to the Valley of the Sun, north of Phoenix, Arizona, we lived in northwestern New Jersey; Hunterdon County. We normally gardened from May through October and there were times when we started seeds indoor in early April. We could stretch our gardening into the fall and early winter by including Chrysanthemums.

Mums were part of the Halloween-Thanksgiving trimmings in our area. We usually had them placed on our front steps often with thin netting over them to keep the deer from nibbling. There were years when we were able to winter over a mum or two, but much of the time our efforts fell short or the variety we purchased was not as hardy as we thought.


We were surprised to find that mums are available for purchase in our area of Arizona during the same season as in the northeast. It was only natural then that we began to fold some of them into our Halloween-Thanksgiving floral displays.

Because our experience with Chrysanthemums was anchored in the northeast, we figured that once the real hot weather of sustained ninety to one-hundred and above came along, that these familiar plants would wither and die.

Imagine our surprise to find that they, given enough shade and water, fight off the heat to usher forth extended blooms during the late spring and summer and into the following fall. To give these plants the best chance possible for surviving in this less than hospitable climate, we have a routine we follow in the early spring.

This is the mum we selected for what we call revitalizing.


As readers can see, the green leaves make up only about one-half to two-thirds of the plant and there are a lot of brown, dead leaves and stems.


What we normally do if it is warm and the sun is in full flare is bring the plant into the shade of one of the garage bays and work there. We move the plant into the garage and remove the rock mulch that we use in almost every planter.


Once the rock mulch is removed, much of the dead parts of the plant are trimmed.


After the initial trimming, we begin to excavate the root ball.


NOTE – Notice that we work mostly on a drop cloth to catch errant dirt, stones and debris. The old dirt is offloaded to a cement mixing bin to dry and save for use in a future rejuvenated mix.

Once the root ball is excavated, it is examined to make sure the roots are white and in good condition and there are no grubs hiding. Then I gently remove more of the dead, hard stems and any dead roots.

NOTE – Be careful to leave most of the rootball intact as the plant will need to recover even from a mild root trimming and tickling.


Here is a closer look:


There are some stems so low to the base of the root ball that they have to be cut away with a scissors or garden shear which reduces the chance of disturbing too much of the root ball.


I make one final inspection of the root ball and very gently loosen some of the compacted roots so they are able to spread when they grow anew.


On the left is the old pot with the remaining old dirt. In the upper middle area of the picture is the new, smaller pot that is lighter in color. The new plant will spend much of the summer in this pot, but may need to be transplanted in to a larger pot later.


Enough new planting mix is placed in the pot to take up approximately one third. This is the bottom third of the planter.


To encourage downward root growth, I place a small amount of fertilizer in the bottom of the pot (notice the green dots in the ovals- BELOW) and then mix them into the top part of the bottom mix. The green dots are hard to discern in this photo and may be confused with gravel which is used in the planting mix. The arrows show the gravel which is much less uniform in shape.


The new planter is placed inside a bin to catch any stray dirt. Dirt is added to the correct depth to bring the crown of the plant to about three-quarters of an inch below the rim of the pot. I usually create a cone in the center and put the newly trimmed rootball in the center. The dirt is then filled in around the rootball as shown above.


Here is the plant with the dirt filled in and new, different fertilizer added (see the Vigoro in the background).


After the planting is complete, water is gently added. I use my hand to break the flow and spread the water around the rootball of the plant. Once the plant has been watered so that water runs freely through the bottom of the pot, I gently press the dirt down to remove any potential air pockets.

NOTE – Don’t press down too hard which may compact the roots; just gently.


Now it is time to move the plant to its place in the courtyard. We picked an area that will receive mostly shade with a bit of sun during the day. This will protect the mum from the blazing heat. Notice that a two gallon per-hour emitter (red) has been anchored to the side of the plant.


Another emitter is added to the other side of the plant to provide even coverage when watered.


We place the rock mulch on top of the plant, which also helps to hold the emitters in place and give one final watering. A protective cover is placed over the pot for a couple of days to provide bit of shade. The Dollar Store or Target sells laundry baskets, crates, etc. that serve this purpose. Sometimes we need to drill more holes depending on the configuration.

NOTE – We often put a weight on top of the “covers” to keep them from blowing off in the wind.


The plant is carefully checked over the next couple of days and after that, the basket or crate used to shield the sun is removed. The plant then needs time to grow and in a few months this is how it looks.


You can see it here (BELOW) on the left. As the summer progresses, the snail vine will grow to cover the sun trellis and offer enough shade to provide an appropriate environment for the plant during the hottest summer days.


You may also note two other mums on the right that we transplanted in the same fashion .


We have followed this procedure for a couple of years now and it has served us well. I wouldn’t have guessed that we would be able to winter-over or perhaps more appropriately, summer-over the mums in our Sonoran Desert environment.


Read more gardening posts HERE


**********


All original content on this blog is copyrighted by Jeffrey B. Ross with ALL Rights Reserved. While reference links back to JBRish.com are appreciated and encouraged, please acquire approval for any reproduction of original content from this website.

©Jeffrey B. Ross – 2018 – JBRish.com


Spring 2018 – What’s Growing in the Arizona Desert?

We have arrived at our spring planting season in the Phoenix, Arizona area even when other areas of the nation continue to be cold and perhaps stormy. I had an opportunity to visit the demonstration garden at the Maricopa County Extension Center which is maintained primarily by the Master Gardeners.

There were some interesting plants in full bloom and I wanted to share two of them with you. When I select a plant to grow, it is generally one that has impressive flowers. This can be small, numerous flowers or large, showy flower that are less in number.

I also like to have the flower-to-leaf ratio to be appropriate. I don’t want the leaves to overpower the flowers. The one exception to this would be a plant that has pretty or show leaves. One plant that comes to mind in this category is Milk Thistle. We have lots of critters in our neighborhood and they like many of the plants we enjoy so I need to be very selective.

Then there are some plants that people in our region select because they are unique.

One quite “different” plant at the demonstration garden is Lion’s Tail or Wild Dagga (Leonotis leonurus) – One look and it will be obvious how this flower received its name.

Lion's Tail or Wild Dagga

Here is a close up of the flower…

Lion's Tail or Wild Dagga - closeup

Lion’s Tail is reportedly a fast growing, drought tolerant plant!

You can read more about this unique plant in The San Francisco Gate article HERE. — scroll down.

Another unique and interesting plant is the Hyacinth Bean (Dolichos lablab or Lablab purpurea). This plant is grown as much for its purple seed pod as the plentiful light and dark pink flowers. If you have a place in your garden for a vine, this might be a very good choice.

Hyacinth Bean

Naturally if this is grown in our area, it must be heat tolerant, but the amazing thing is how well the vine tends to do even with the hight temperatures as long as it is given ample water.

Hyacinth Bean closeup

You can find more information about Hyacinth Bean HERE and HERE.


Read more gardening posts HERE


**********


All original content on this blog is copyrighted by Jeffrey B. Ross with ALL Rights Reserved. While reference links back to JBRish.com are appreciated and encouraged, please acquire approval for any reproduction of original content from this website.

©Jeffrey B. Ross – 2018 – JBRish.com


Bin There, Dug That

Although living in the Sonoran Desert does set some limits on what can and can not be grown at certain times of the year, it really isn’t much different than other areas of the United States such as New England. The nice thing about living in the North Phoenix, AZ area is that we have two planting seasons and by mid-to-late October, the second season is well under way.

What this generally means is that those plants that have worked hard all summer long, put up with exhausting heat and yet continued to put on a floral show are now very “tired” and ready to be replaced. The vinca below is one such candidate.

XXXXX

To help with this process, we use a cement mixing bin/tub or two to contain debris and corral the planting mix. As you will see, we also enlist a variety of pails and other containers.

XXXXX

A larger sized bin can be used to help merge the ingredients for the replenished soil mixture although on this day we used a wheelbarrow.

XXXXX

We use rocks as mulch because they are plentiful and help to keep the animals away from the roots. We have some pesky visitors that like to scale our walls and gates and dig in our garden and planters.

The pot below is shown after the plant and rocks were removed.

XXXXX

As you can see, there was a substantial root ball.

XXXXX

We use a shovel and/or trowel to break up the dirt and remove as much plant debris (roots, leaves, etc.) as possible. We then place the dirt in a sunny spot to dry out for a few days making sure to turn it several times during the process.

Notice the crack near the bottom handle of the bin. After several years in the heat and sun the hard plastic does have a tendency to develop cracks here and there. Our experience is that even with heavy use, they last quite a few seasons if care is exercised.

XXXXX

XXXXX

The older, dried planting mix will later be incorporated into a new planting blend using fresh “dirt” and fertilizer.

With the vinca removed, we replanted an ivy geranium in the same pot.

XXXXX

Before placing the rest of the dirt and mulch in the planter, we position it on its elevated platform. We have several raised pot holders because our courtyard did not always have a gate and the Javelinas were fond of marauding among our posies! BTW the pail is set up to catch water should the irrigation system engage while we are in the transplanting process.

XXXXX

Once the dirt is filled to the desire level, the emitters for the irrigation system are secured in place. I like to have one emitter on either side to the root ball to distribute the water as evenly as possible without getting carried away.

XXXXX

With the emitters secured, the plant is watered in, the rock mulch applied and a bit more water added to make sure the mix is moist throughout.

XXXXX

Since this plant is in a location that receives reflected heat which is still intense in the October afternoon, we cover it with a lattice plastic bin which reduces some of the negative effects of the hot sun. After two or three days this will be removed during an evening and the plant will be better acclimated. The large rock is to keep the cover from blowing in the wind.

XXXXX

Having the bins and other accessories really helps to make the job of transplanting without too much of a mess relatively easy.

For your reference, Home Depot has a large mixing tub for under $15:

  • 20.9-Gal capacity for large or small jobs
  • Strong enough for mixing materials like concrete, grout or mortar
  • Heavy-duty PVC construction


Read more gardening posts HERE


**********


All original content on this blog is copyrighted by Jeffrey B. Ross with ALL Rights Reserved. While reference links back to JBRish.com are appreciated and encouraged, please acquire approval for any reproduction of original content from this website.

©Jeffrey B. Ross – 2017 – JBRish.com


Argentine Giant Cactus Flower – Photograph

Photograph of the Argentine Giant Cactus in Bloom
at the Desert Botanical Garden, Phoenix

Argentine Giant Cactus, Echinopsis candicans

I am a member/volunteer at the Desert Botanical Garden in Phoenix, AZ. It is the second most visited attraction in the state after the Grand Canyon. On my way to the Seed Room where I work as a volunteer, I passed an Argentine Giant cactus that was still in bloom. It has been my experience that they generally bloom earlier in the season, but this particular specimen was in a location that enabled it to be in flower now.

The flower is not the most attractive cactus bloom I have seen, but it is very pretty and the size is huge. The flower can be as large as a person’s face. Unfortunately, these blooms only last a day, but what a day it is!


JBRish.com originally published this post
*All photographs Copyright by Jeffrey B. Ross with all rights reserved.

 
See previous posts about life in the desert HERE or gardening HERE.

*******