Identification for the Birds

Here is a problem every novice or occasional birder is bound to face…

We were enjoying a beautiful hike through Zumwalt Meadow in Kings Canyon, CA observing all of the plants, scenery and wildlife we encountered.

Keep in mind that much of this trail has tree roots, rocks, boulders, fallen branches, etc. so keeping eyes ahead or up is not an option for those hiking along. We would stop when a sudden motion or noise caught our attention or we just wanted to gaze at the scenery. We are avid gazers and thus would probably be considered somewhat pokey when it comes to the more speedy hikers.

But I digress… We were climbing upward through a somewhat narrow corridor formed by boulders on either side and ahead, no more than twenty feet away, an attractive multi-colored bird landed in a tree. I was almost sure this was one that I hadn’t identified yet so of course I was very interested in photographing the bird for future identification.

NOTE – For those who want to know why I didn’t or more truthfully, couldn’t, identify the bird right there and then, read my earlier post – Photography and Birding: Good Photo, Bad Photo

The bird was mostly black, with orange-brown sides, a buff bottom and rump with white markings on black wings. The face also had some blotches of other colors as well. Immediately I thought this was an oriole of one type or another.
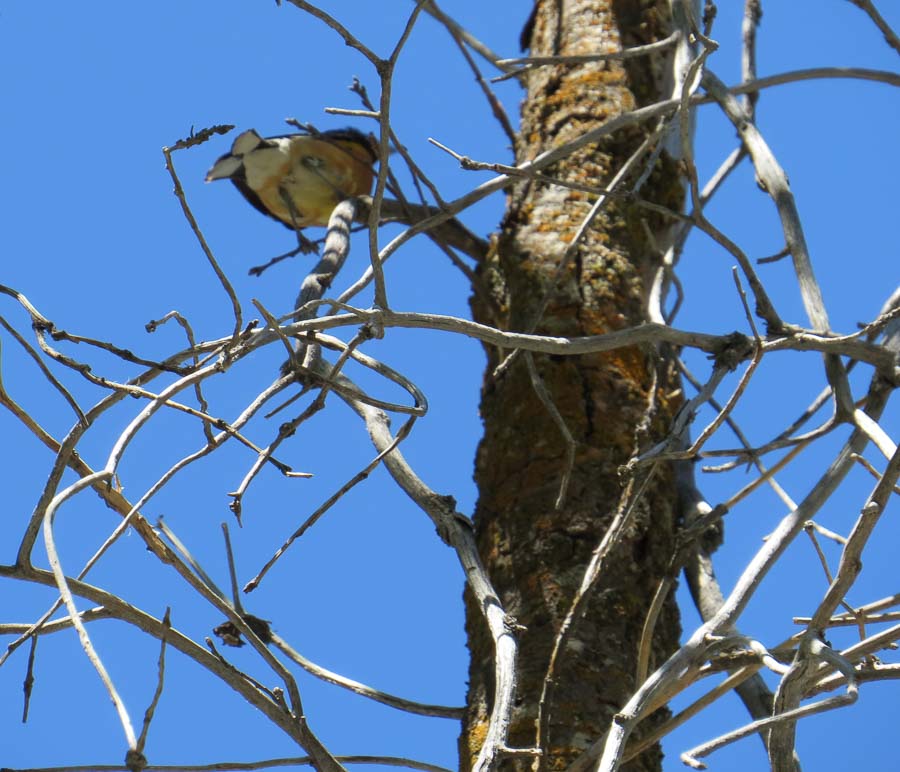

Black-headed grosbeak

By the time I was able to stop and take note, the bird was flitting from branch-to-branch and this (above) was the first photograph I was able to capture. Hmmmm – pretty hard to ID from that shot.

What was infuriating was that the bird would jump down closer to me, let’s say eight feet away, but would be among a mass of branches; drats!


Black-headed grosbeak

There was one instance, when the bird was just above my head and I got a good luck at its rump and underparts.
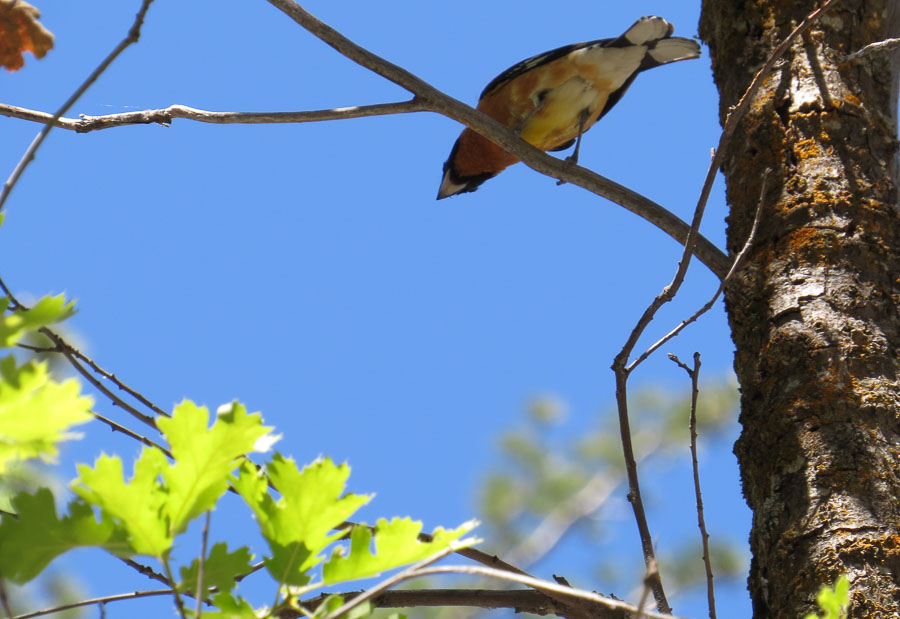

Black-headed grosbeak

Although the bird was skittish, it appeared to have a certain curiosity as it lingered in the area for a long time; in bird minutes!
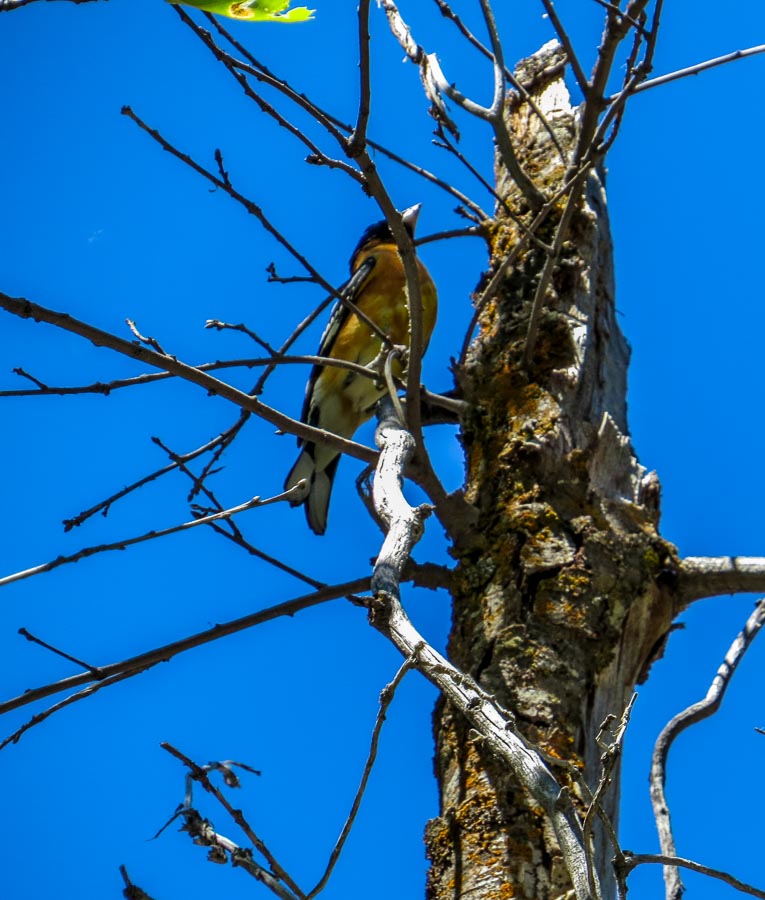

Black-headed grosbeak

In the field it is hard to tell exactly how good the photographs are and whether or not there would be enough information to piece an identification together, but using all of the photos, I believe I was able to correctly ID the bird.

Let’s take a look….

Using the Internet, I was able to find a few reference photographs. This was one of the better shots
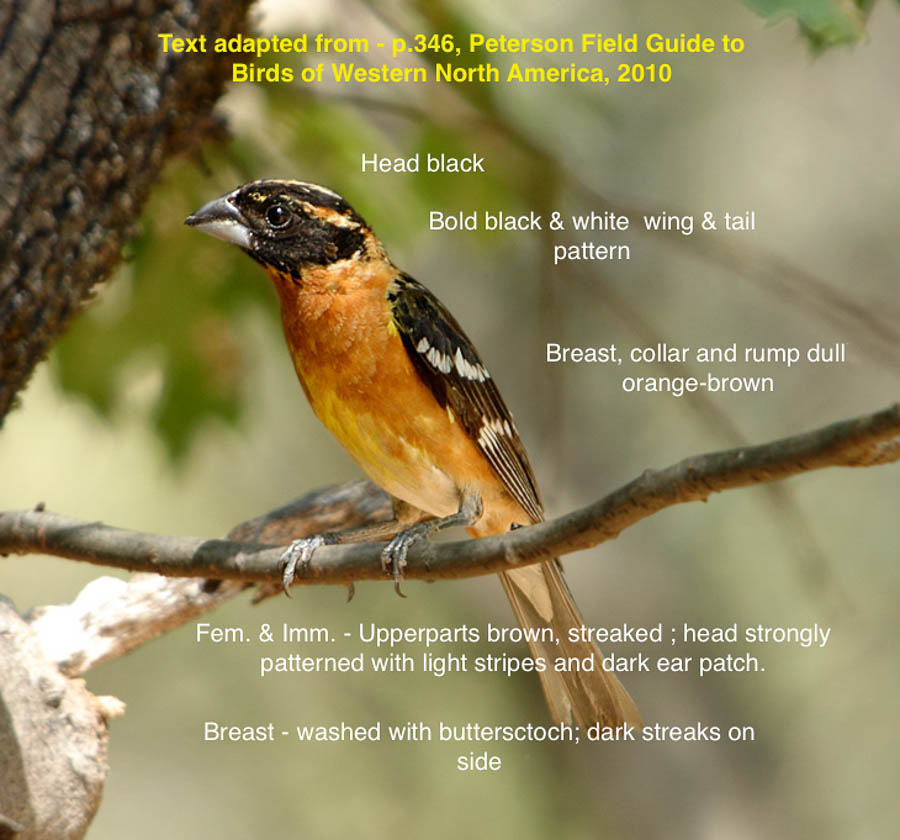

Black-headed grosbeak
Photograph By Alan Vernon – Male Black headed grosbeak (Pheucticus melanocephalus)Uploaded by Snowmanradio, CC BY 2.0, https://commons.wikimedia.org/w/index.php?curid=12140735

NOTE – Text added by JBRish


Looking at my less than stellar photos, I was able to locate most of the same markings. For those new to birding, keep in mind that males and females often have different markings and colorations. I knew this wasn’t an oriole as I originally suspected primarily because of the shape of the beak. An oriole would have a much more pointed beak.

NOTE – This is why I like to take multiple photographs and work the identification at my leisure.

What are your thoughts? Leave them in the comment section below.

To read more JBRish.com posts about birds or birding, click HERE.


**********


All original content on this blog is copyrighted by Jeffrey B. Ross with ALL Rights Reserved. While reference links back to JBRish.com are appreciated and encouraged, please acquire approval for any reproduction of original content from this website.

©Jeffrey B. Ross – 2017


JPEGs from Drab to Fab – Maybe

Full Disclosure: I am not a professional photographer. I like photography and it is a hobby. I am not an expert in either photography or post processing. Putting that aside, I do enjoy trying to capture the best photographs I can and to make them look as nice as possible using Adobe’s Lightroom and Google’s Nik Collection.

I didn’t have anything approaching a “real” DSLR until last year when I purchased a Nikon D3300. I was going to rent some Fuji gear, but it was less expensive at that time to make an outright purchase of the D3300. We were planning our trip to Yosemite National Park and the Sierra Nevada Mountains in California. I wasn’t ready to spend a couple of thousand dollars on camera equipment; at least not yet.

I currently own three cameras:

  • Canon PowerShot AS590 IS – This Camera is many years old, but keeps on ticking. It has been my companion whenever I go on a photographic expedition. It has an 8.0 megapixel CCD with 4x optical image-stabilized zoom.
  • Canon PowerShot SX50 HS – I purchased this camera for two reasons: 1) I wanted to see if I would enjoy shooting in the RAW format and doing post processing and 2) I wanted a camera with a lot of reach. This has a 50x optical zoom lens which, as Canon claims, goes from 24mm to 1200mm (35 mm equivalent). This is a step up from the AS590 above with 12.1 megapixels and it has helped with my bird identification hobby.
  • Nikon D3300 – This is my newest camera and comes closer to the full DSLR experience. I do enjoy this camera and I am still learning how to harness the full potential. It has a 24.2 Megapixel DX-format sensor and it came with the 18-55mm kit lens. It did as well as I expected during our trip to Bishop, CA and Yosemite National Park.

With the above out of the way, let me just say that I have a lot of fun turning images from “drab to fab” using Lightroom with Googles’s Nik Collection and doing some intermediate post processing. Let’s just look at one example from my least advanced camera, the Canon AS590.

We were hiking in Utah and on the way home, we stopped at the Grand Staircase–Escalante National Monument. It was a very gray day with rain threatening. The only camera I owned was my little Canon that was three years old at the time.

Assessing the weather we were having, we knew we had little time to explore so we parked the car on the side of one of the named trails, the Toadstool Trail, and began to walk toward several beautiful rock formations.

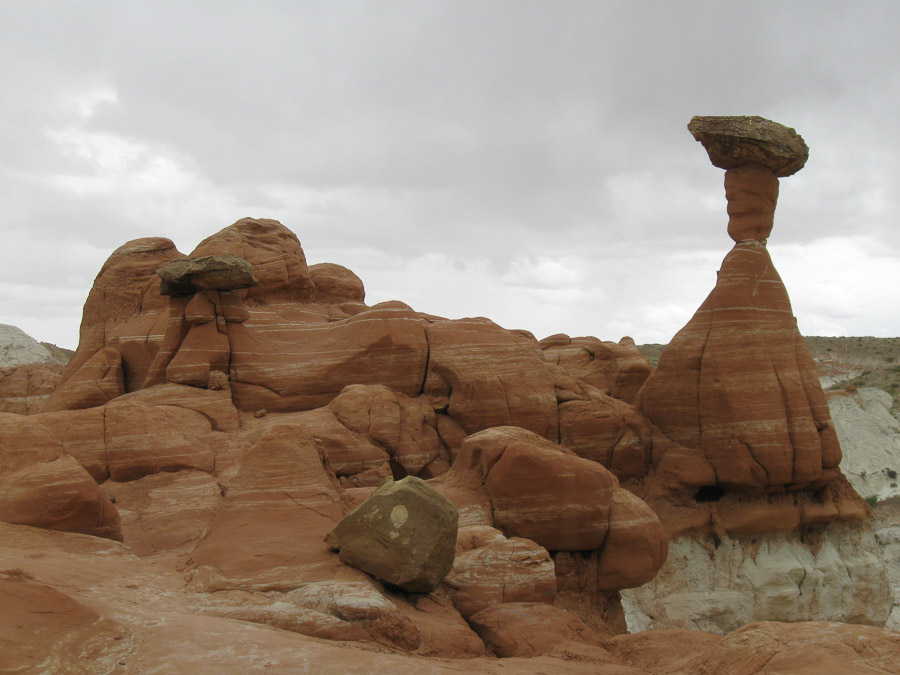
The toadstools are rock pillars with larger flatish rocks on top of them. Thus they look like (abstractly) toadstools. Below is one of the photographs that I took that day.

Unprocessed photo of the toadstoolsThis JPEG photograph was taken with an AS590 IS and is unprocessed
Understand that this is a JPG only image. It is straight out of camera (SOOC). If you read many of the punditori, they will tell you that there is not much that can be done with post processing and a JPG image and that may be true, but “not much” doesn’t mean that nothing can be done.

I upload all my images to Lightroom (LR) because it is a good cataloguing tool. When done correctly, it is easy to organize and then find any given photograph you have taken. I follow blogs of photographers who have hundreds of thousands of images indexed in LR. I have less than 10,000 photos in my LR catalog, but I am working on it.

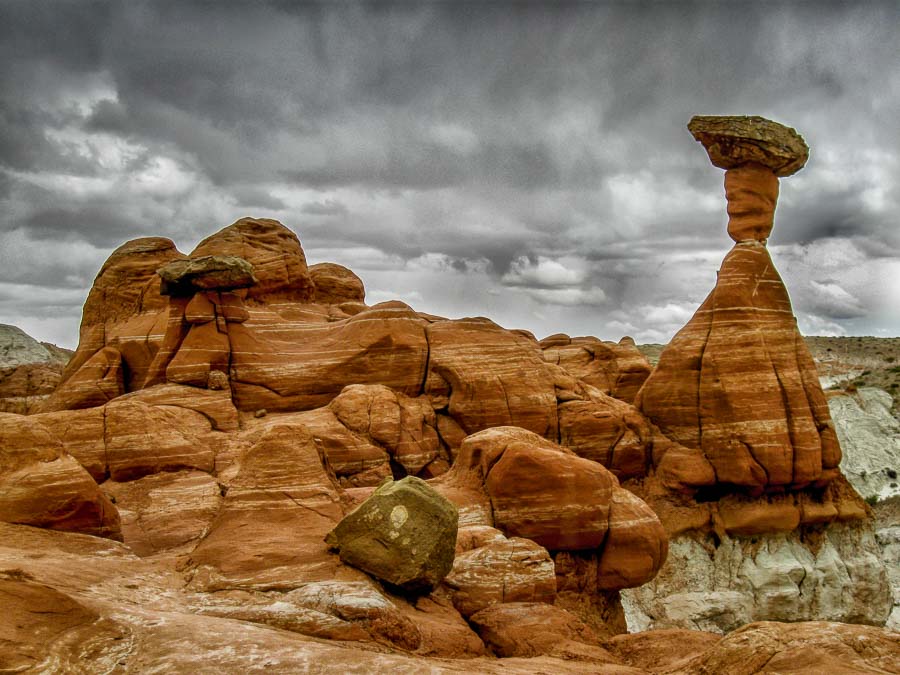
When I took the photo above, the rocks appeared to have more red tones in them and there was much more contrast in the clouds. Unfortunately, my camera could not render all the nuances my eye was seeing. Although this is a JPEG image, I decided to process it as I would my RAW images.

This is the final image after doing some work in LR. This is closer to what I remember seeing. I have enhanced the colors and contrast, but that’s what I want…a more beautiful photograph.

Processed photograph of the toadstoolsThis is the same photograph as the one above with post processing done in Lightroom
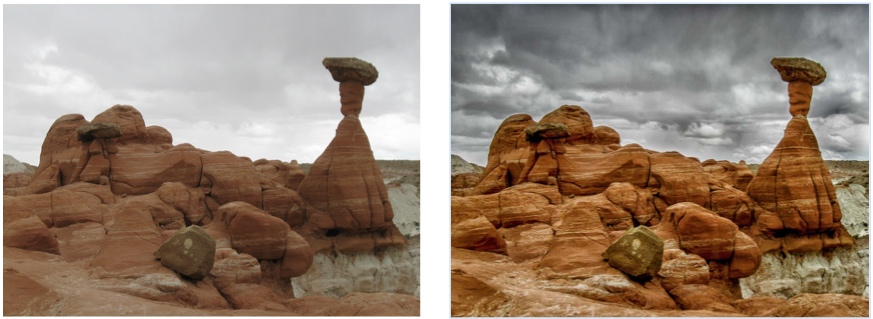
It is hard to compare the two photographs above when they are separated by the narrative. Although this will not provide much detail, the set of smaller images below should impart the basic idea.


Side by side Comparison of the two images aboveThis is a side-by-side comparison of the two images above

So…what do you think? Don’t you feel the photograph on the right is a more beautiful landscape than the shot on the left? Leave a comment or ask a question in the comment section.


JBRish.com originally published this post
All photographs are Copyright by Jeffrey B. Ross with ALL Rights Reserved

See previous Photography posts HERE